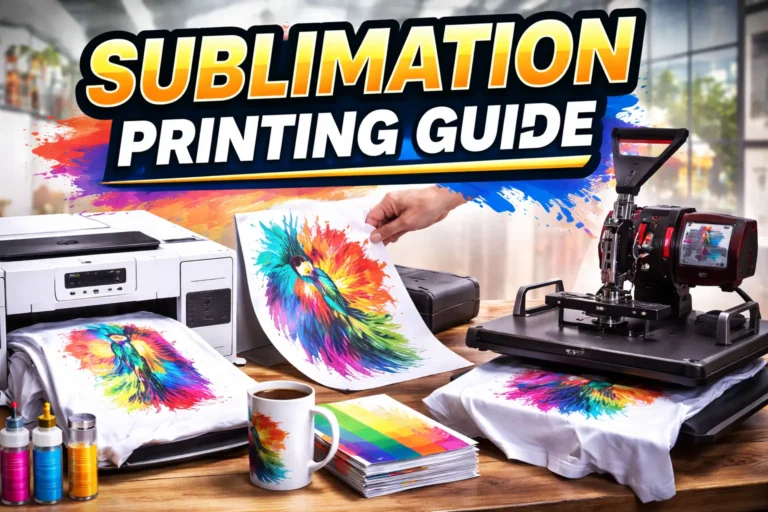
Sublimation Paper Settings: Fix Poor Color, Brightness Issues
The best sublimation paper settings depend on your printer model, paper type, and heat press method. For Epson sublimation printers, set the paper type to “Premium Presentation Matte,” turn off high-speed printing, choose “Photo” or “Best Photo” quality, and use ICC profiles for accurate color.
Proper temperature and time (usually 380–400°F for 45–60 seconds) also help prevent dull prints.
In this guide, we’ll walk you through the exact printer settings you need for Epson models like the 2800, 2850, and more.
Sublimation Paper Settings: Fix Poor Color, Brightness Issues
If your sublimation prints look dull, washed out, or just “off,” it’s usually not your design, it’s your printer and paper settings. Getting these settings right can be the difference between a faded shirt and a vibrant, sellable product.
Why Sublimation Paper Settings Matter
Sublimation relies on heat and pressure to transfer ink into a coated surface. If your printer uses the wrong paper type, resolution, or color profile, you’ll end up with:
- Dull or muted colors
- Overly bright or washed-out prints
- Ink bleeding or ghosting
- Uneven transfers
The right settings keep your prints sharp, color-accurate, and consistent across different jobs.
To get the best results, adjust your printer and software settings properly:
- Choose the Right Sublimation Paper
- Match the paper to your printer type (inkjet vs. laser).
- Select paper suited for your substrate (fabric, mugs, tiles, etc.).
- Use High-Quality Sublimation Ink
- Sublimation ink turns into gas when heated; regular ink won’t work.
- Use ink compatible with your printer and paper to avoid clogging.
- Refillable cartridges or a CIS (Continuous Ink System) can save money.
- Adjust Print Settings
- Print Mode: Use high-quality or photo mode for vibrant colors.
- Paper Type: Match the setting (plain, glossy, matte) for proper ink absorption.
- Color Management: Choose the right RGB or CMYK profile for accuracy.
- Mirror Image: Enable for fabrics and materials that require flipping.
- Test Print First
- Print on regular paper to check clarity, sharpness, and color accuracy.
- Compare with a substrate sample before using sublimation paper.
1. Best Printer Settings for Sublimation (Epson Models)
Getting the printer settings dialed in is step one. Here’s what typically works best for most Epson EcoTank models (e.g., Epson 2800, 2803, ET-15000, etc.) when using sublimation ink and paper.
🔧 Recommended Epson Sublimation Settings
| Setting | Recommended Option | Why It Matters |
|---|---|---|
| Paper Type | Premium Presentation Paper Matte | Gives even ink coverage and prevents bleeding |
| Print Quality | High / Best Photo | Maximizes ink density for vibrant colors |
| High Speed | Off | Avoids banding and ensures smooth gradients |
| Color Management | ICC Profile (via Photoshop, Sawgrass, etc.) | Accurate color matching to your monitor |
| Mirror Image | On | Required for proper transfer orientation |
📌 For Epson 2800 and 2803 series, these settings are accessed through Printer Properties → More Options or Advanced Settings.
2. Sublimation Times and Temperatures Chart
Even with perfect printer settings, the transfer can fail if your heat press settings are off. Here’s a quick reference table:
| Item Type | Temperature | Time | Pressure | Notes |
|---|---|---|---|---|
| Polyester T-shirts | 385–400°F | 45–60 sec | Medium | Pre-press 5 sec to remove moisture |
| Ceramic Mugs | 400°F | 180–210 s | Medium | Use mug press, wrap evenly |
| Mouse-pads | 385°F | 45–60 sec | Medium | Firm, even pressure |
| Metal Panels | 400°F | 60 s | Medium | Use protective sheet to avoid scorching |
| Cotton (with HTV) | 385°F | 45–60 sec | Medium | Use sublimation HTV as a base layer |
👉 Save this chart or grab a sublimation temperature chart PDF for quick access in your workspace.
3. Choosing the Right Paper Type
Not all sublimation paper is created equal. Picking the right paper type ensures proper ink absorption and release.
| Paper Type | Best For | Pros | Cons |
|---|---|---|---|
| Fast Dry Paper | High-volume printing | Quick handling, less smudging | Sometimes lower color depth |
| Tacky Sublimation Paper | Stretchy or slippery fabrics | Prevents ghosting | Slightly longer dry time |
| Standard Premium Paper | Most projects | Balanced color and transfer | Needs proper drying before pressing |
For Epson printers, the paper type setting in the driver should still be Premium Presentation Matte regardless of the actual sublimation paper brand.
Sublimation Paper Settings for Beginners
If you’re new, don’t over complicate it. Start with this beginner setup:
- Select Premium Presentation Matte as paper type.
- Print quality = High or Best Photo.
- Turn off high-speed mode.
- Mirror your design.
- Use the correct ICC profile for your ink brand.
- Press at 385–400°F for 45–60 seconds depending on the item.
Once you’ve mastered the basics, you can tweak for specific substrates or advanced workflows.
Paper Settings Chart for Beginners
| Setting | Recommended Value | Tips |
|---|---|---|
| Paper Type | Sublimation Paper | Always use high-quality sublimation paper. |
| Print Quality | High or Best (depending on printer) | Higher print quality = sharper, more vibrant prints. |
| Color Mode | RGB or CMYK (check printer’s profile) | Use RGB for digital designs; CMYK for standard prints. |
| Print Resolution | 300 DPI | Ensures sharpness and detail. |
| Ink Settings | Use ICC profile for your ink | Match the ink profile to avoid color inaccuracies. |
| Paper Feed | Standard (unless paper is thick) | Ensure paper is loaded straight to avoid jams. |
| Brightness/Contrast | Adjust in software to preference | Do this before printing for optimal results. |
| Temperature for Transfer | 380–400°F (193–204°C) | Preheat your press, and adjust according to material. |
| Pressure for Transfer | Medium to Heavy | Too much pressure can distort the design; too little won’t transfer properly. |
Key Tips for Beginners:
- Monitor Calibration: Calibrate your screen for accurate color representation.
- Test Prints: Always do a test print before committing to a large batch.
- Proper Heat Press Settings: Make sure to test different temperatures and pressure to see what works best with your material.
Common Sublimation Issues
| Problem | Possible Cause | Fix |
|---|---|---|
| Colors look faded | Low print quality or wrong paper type | Switch to “Best Photo” and Premium Presentation Matte |
| Bright but inaccurate colors | No ICC profile or incorrect color management | Install correct ICC profile for your ink and paper brand |
| Patchy or banded prints | High-speed mode or clogged nozzles | Turn off high-speed, run nozzle check, clean printhead |
| Ink bleeding | Wrong paper type or too much heat | Use proper sublimation paper, lower press temp/time slightly |
| Dull transfer on cotton | Sublimation doesn’t bond with cotton fibers | Use sublimation HTV or cotton spray coating before pressing |
How to Fix Common Sublimation Issues
1. Color Issues: Dealing with Faded or Inaccurate Colors
- Solution: Make sure your printer’s color settings are correct. Use the right color profile for your sublimation ink and ensure your monitor is calibrated. For faded colors, check ink levels, clean the printhead, and use high-quality paper for better ink absorption.
2. Brightness Problems: Brightening Prints Without Losing Detail
- Solution: Adjust the brightness and contrast in your design software before printing. Use a high-quality sublimation paper with good coating to enhance vibrancy. Avoid over-saturating the design, as this can cause loss of detail.
3. Print Alignment and Paper Feeding Issues
- Solution: Regularly clean the printer’s rollers and ensure proper paper alignment. If misalignment happens, adjust the paper guides and check if the paper is loaded correctly. For paper jams, carefully remove the jam and inspect the rollers for any debris or damage.
Why Correct Sublimation Paper Settings Matter for Epson Printers
If your sublimation prints are coming out dull, with inaccurate colors or poor quality, chances are your printer settings aren’t optimized. The right settings are crucial for vibrant, sharp prints. Here’s why:
How Settings Affect Print Quality
- Print Quality: Incorrect paper settings can cause ink bleeding or blurry prints.
- Color Saturation: Wrong settings can result in washed-out or muted colors.
- Overall Quality: Proper settings help your printer transfer ink smoothly, leading to crisp, vibrant results.
Model-Specific Tips for Epson Printers
- Epson 2800: Set the paper type to “sublimation” or “matte” and adjust print resolution for sharpness.
- Epson 2803: Focus on color profiles and resolution to avoid color shifts.
- Epson 2850: Fine-tune ink density and print speed to maintain vibrant, accurate prints.
Benefits of Optimizing Settings
- Vibrant Colors: Achieve deep, accurate hues with correct settings.
- Longer-Lasting Prints: Proper settings ensure your prints stay bright and durable.
- Efficiency: Fine-tuning your printer means fewer mistakes and better results.
Best Printer Settings for Sublimation on Epson Printers
Adjusting these settings can result in sublimation prints that are vibrant and consistent on your Epson 2800, 2803, or 2850.
With the necessary adjustments, you can eliminate color issues, achieve better brightness, and produce professional-quality results every time.
Epson 2800 Sublimation Settings
For the Epson 2800, these settings will help you achieve sharp, vivid prints:
- Paper Type: Set your paper type to “Matte” or “Sublimation Paper” to ensure the best ink transfer.
- Color Mode: Choose “Photo” or “Vivid” mode for rich, bright colors.
- Resolution: Use a high resolution (1440 x 720 dpi) for detailed prints with no blurring.
- Print Speed: Use the default setting to avoid sacrificing print quality for speed.
Epson 2803 & 2850 Sublimation Settings
For these models, the key is fine-tuning your paper and color settings:
- Paper Type: Choose “Matte” or “Premium Glossy” for optimal results with sublimation paper.
- Color Correction: Set your printer to use “Custom Color Correction” or “Vivid” mode. This helps in adjusting saturation and tone for accurate color reproduction.
- Resolution: Set to 1440 x 720 dpi for high-quality, clear prints.
- Ink Density: Increase ink density slightly if colors appear faint or washed out.
How to Adjust Printer Quality for Brighter Sublimation Prints
- Increase ink density
- Open your printer driver or print settings and raise ink density/ink limit slightly. This boosts saturation so colors pop on paper.
- Adjust brightness & contrast
- In the printer software, tweak brightness and contrast to lift midtones while keeping detail. Make small changes and test print.
- Use proper color management
- Install and apply the ICC profile for your sublimation ink + paper. Make sure color management is handled either by your design app (Photoshop) or the printer, not both.
- Test and iterate
- Print small test patches after each change, then press and check the transfer. Note that transfers can look different than the paper print.
Software for Sublimation Paper Settings
When selecting sublimation printing software, take into account your specific requirements, budget, and the complexity of your designs. Each of these programs has its own unique features that cater to the needs of different skill levels and project requirements.
1. Adobe Photoshop
- Features: Advanced photo editing tools, layers, filters, and effects.
- Pros: Industry-standard with extensive resources and tutorials.
- Cons: Subscription-based pricing.
- Pricing: Starts at $20.99 per month.
2. GIMP (GNU Image Manipulation Program)
- Features: Comprehensive image editing capabilities similar to Photoshop.
- Pros: Free and open-source; supports various file formats.
- Cons: Steeper learning curve; lacks some advanced features.
- Pricing: Free.
3. CorelDRAW
- Features: Vector illustration, layout, and typography tools.
- Pros: Robust design suite suitable for various projects.
- Cons: Subscription required for full features.
- Pricing: Starts at $249 per year.
4. Canva
- Features: Drag-and-drop interface with a vast library of templates and assets.
- Pros: User-friendly; ideal for beginners.
- Cons: Limited advanced design capabilities.
- Pricing: Free with optional premium subscriptions.
5. Inkscape
- Features: Vector graphics editor with tools for object manipulation and styling.
- Pros: Free and open-source; suitable for creating scalable designs.
- Cons: Interface can be less intuitive for new users.
- Pricing: Free.
6. Lightburn
- Features: Designed primarily for laser cutters but adaptable for sublimation design.
- Pros: User-friendly interface; supports various file formats.
- Cons: Primarily intended for laser cutting, so some features may not be relevant.
- Pricing: $40 for a GCode license key.
What Paper Type is Best for Sublimation on Epson Printers?
When it comes to sublimation printing, choosing the right paper is just as crucial as selecting the right ink or substrate. The paper plays a significant role in how well your design transfers onto the final product. With Epson printers, sublimation paper needs to be designed specifically for the process to achieve the best results.
Understanding Sublimation Paper Compatibility
Not all paper types are suitable for this kind of print process. Sublimation paper is specifically coated to hold the ink and allow it to transfer effectively when exposed to heat.
For your Epson printer, you want to look for sublimation paper that is designed for high ink retention and fast drying to prevent smearing.
Popular options include brands such as A-Sub, Koala, and TexPrint. These papers are well-known for producing vibrant, sharp colors and minimal bleeding, which are crucial for a professional finish.
Common Paper Types and How to Choose the Right One for Your Epson Printer
Always double-check the recommended paper weight and thickness in your printer’s manual. This ensures smooth feeding and minimizes the chance of paper jams.
- High-Quality Sublimation Paper – This is the go-to paper for most sublimation projects. It’s coated to hold the ink well and prevent excessive bleeding or fading. These papers are great for larger prints or projects that need fine detail.
- Fast-Dry Sublimation Paper – If you’re printing a lot of pieces and need them to dry quickly, fast-drying sublimation paper is your best bet. It’s ideal for high-speed printers or large-volume printing jobs where time is of the essence.
- Heavyweight Sublimation Paper – For projects like large signs, banners, or high-end fabric applications, heavyweight paper can be a good choice. It helps reduce any chance of paper curl and ensures that the print doesn’t warp during the heat transfer process.
What Happens if You Use the Wrong Paper Type?
Can result in poor-quality transfers and potential issues down the road. Here’s what could go wrong:
- Ink Absorption: The wrong paper may not absorb the ink correctly, causing colors to look faded or washed out. This means your prints won’t pop with the vibrancy you’d expect.
- Poor Transfer Quality: Some papers don’t hold the ink properly, leading to smudging or ghosting on the final product. This is especially true if the paper isn’t designed for high-heat applications like sublimation.
- Paper Jams and Printer Damage: Using paper that’s too thick or not compatible with your Epson printer could lead to paper jams or even damage the print head over time.
In short, sticking to sublimation paper that’s compatible with your printer is essential for getting clean, high-quality prints every time.
Best Sublimation Paper for Tumblers & Other Substrates
When sublimating onto tumblers, mugs, or other curved or cylindrical objects, you need to choose paper that can conform to the surface of these substrates without causing distortion or uneven transfers.
- A-Sub Sublimation Paper: Known for its excellent color reproduction and minimal bleeding, A-Sub is one of the best papers for curved surfaces like tumblers.
- Koala Sublimation Paper: This paper offers great ink absorption and drying speed, which makes it an excellent choice for projects that require a quick turnaround, like custom mugs or water bottles.
For these types of substrates, the key to success is also adjusting your print settings. Here’s what to do:
- Use the Correct Heat Settings: Tumblers and mugs require different temperature settings compared to flat surfaces. The heat press should be set around 400°F for 60–70 seconds, depending on the material.
- Pressure is Important: For tumblers, using a heat press with a silicone pad or a specialized tumbler press is a great way to maintain even pressure across the entire surface. Too much or too little pressure can cause uneven transfers.
- Trim Your Paper: For products like mugs and tumblers, it’s important to trim the sublimation paper to fit the surface area perfectly. Any excess paper can cause smudging or reduce the print quality.
- Mirror Your Design: Always mirror your image before printing, as sublimation transfers the image in reverse. This is crucial for achieving the correct orientation on your final product.
Advanced Tips:
To achieve the best results from your Epson printer when sublimating, fine-tuning advanced settings can make all the difference. Here’s how to take your prints to the next level.
1. Experiment with Advanced Printer Settings:
- Ink Density Adjustments: Adjusting the ink density in the printer settings helps achieve deeper, more vibrant colors. Use Epson’s Advanced Settings menu to increase ink density or fine-tune individual colors.
- Paper Feed Calibration: Fine-tune the paper feed settings to avoid banding or misalignment. This is particularly helpful for printers with a roll feed or when using thicker sublimation papers.
- Print Mode Selection: Use Best Photo or High Quality print modes for higher resolution. While it takes longer, the print quality will be far superior, especially for fine details.
2. Using Software Tools and Color Profiles:
- ICC Profiles: Always install the correct ICC profile for your sublimation ink and paper. These profiles ensure that colors are accurately represented and adjusted for the specific material you’re using.
- Pro Tip: Software like Adobe Photoshop or CorelDRAW allows you to select or load custom ICC profiles for precise color matching.
- Software Color Adjustments: If you notice certain colors are still off, try adjusting the color balance (RGB or CMYK) in your software before printing. You can tweak individual color channels to make reds pop or deepen blues, for example.
- Soft Proofing: Use soft proofing in your design software to preview how colors will appear when printed, especially if you’re using non-white or textured materials.
3. Troubleshooting Advanced Issues:
- Inconsistent Color Output: If colors still appear inconsistent:
- Check that the right ICC profile is active.
- Verify that your monitor is calibrated for accurate color representation.
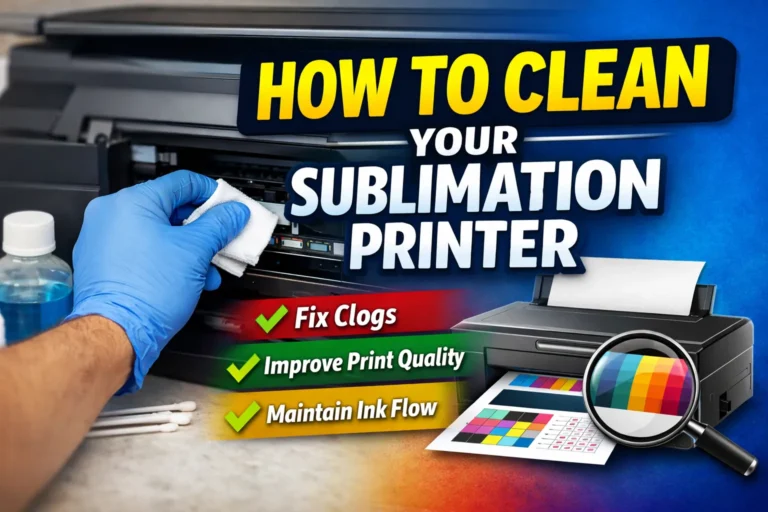
- Clean the printhead or perform a nozzle check to make sure ink isn’t drying or clogging.
- Banding or Stripes on Prints: This usually points to clogged nozzles or incorrect printhead alignment. Run the printhead cleaning utility from your printer’s software. You might also need to manually align the printheads.
- Faded Prints or Low Vibrancy: This can happen due to using low-quality paper or incorrect heat settings. Ensure the temperature is consistent (around 380-400°F for most fabrics) and the pressure is sufficient.
- Paper Jams or Misfeeds: If this happens frequently, check the paper guides and make sure the paper is loaded straight. You can also try a lower paper feed setting or use a different type of paper.
Maximizing Color Accuracy and Image Clarity:
- Print Resolution: Always use the highest print resolution your printer offers (usually 1440 x 1440 DPI). This ensures that your images come out crisp and clean, especially for high-detail designs.
- Image Optimization: Before printing, make sure your images are optimized for sublimation—adjust the sharpness, brightness, and contrast in your editing software.
Fine-tuning these settings will take some trial and error, but once you get it right, you’ll enjoy crisp, vibrant, and consistent sublimation prints that are tailored perfectly to your projects. Happy printing!
Professional Sublimation Printing & Wholesale Custom Products
Looking for high-quality sublimation printing for apparel, drinkware, and promotional items? Subli Genius Print delivers vibrant color, sharp detail, and long-lasting results for businesses, brands, and resellers across the U.S.

6 Comments