Unlock Your Creative Potential: 8 Unique Sublimation Project Ideas
Feeling uninspired with your sublimation projects? Looking to break away from the usual t-shirts and mugs? This guide, packed with eight unique sublimation project ideas, is just the thing to get your creative juices flowing.
From vibrant custom tumblers to playful personalized sippy cups, we’ve got you covered with essential tips and techniques for achieving perfect results.
Whether grappling with design ideas or tackling technical challenges, these projects will help you overcome obstacles and explore new possibilities in sublimation printing.
Ready to turn your creativity up a notch? Let’s jump into these innovative ideas and make your sublimation experience one for the books.
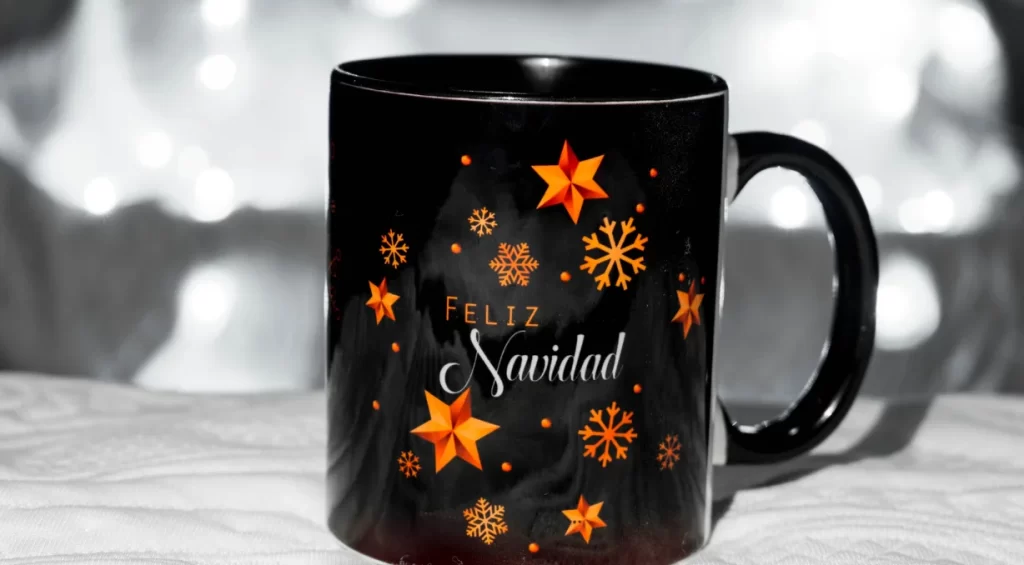
1. Sublimated Tumblers
Customizing tumblers with unique designs using sublimation is a straightforward process that yields durable and versatile products. The process and the benefits of sublimated tumblers:
- Design Selection: Choose or create a design you want to transfer onto the tumbler. This could be a graphic, logo, or even a photograph.
- Printing: Print the design onto sublimation transfer paper using sublimation ink. Ensure that the print is the mirror image of the final design.
- Preparation: Clean the tumbler thoroughly to ensure proper adhesion of the design.
- Transfer Process: Wrap the printed transfer paper around the tumbler, ensuring the design is correctly positioned. Use heat-resistant tape to secure the paper in place.
- Heat Press: Place the tumbler in a heat press machine and apply heat and pressure according to the manufacturer’s instructions. The heat will cause the sublimation ink to turn into a gas, which will then bond with the surface of the tumbler.
- Cooling and Finishing: Allow the tumbler to cool before removing the transfer paper. Once cooled, the design will be permanently embedded into the surface of the tumbler.
Sublimated tumblers offer several advantages:
- Durability: The sublimated design is highly durable and resistant to fading, scratching, and peeling.
- Versatility: Tumblers can be customized with almost any design, allowing for personalization and creativity.
- Variety: Tumblers come in various sizes, shapes, and materials, providing options for different preferences and needs.
Sublimated tumblers are functional and serve as unique and personalized items or gifts for friends, family, or customers.
2. Personalized Sippy Cups for Children
Personalized sippy cups make drinking fun for kids and serve as unique and thoughtful gifts for birthdays, holidays, or special occasions.
- Selecting the Sippy Cup: Choose a high-quality sippy cup suitable for sublimation, such as polypropylene or aluminum. Ensure that the cup is BPA-free and food-safe.
- Designing the Artwork: Create or select a design appealing to children. This could include cartoons, animals, or colorful patterns. Remember the size and shape of the cup when designing the artwork.
- Printing the Design: Print the design onto sublimation transfer paper using sublimation ink. Make sure the design mirrors the image of the final product.
- Preparing the Cup: Clean the sippy cup thoroughly with soap and water to remove dirt or residue. Ensure the cup is completely dry before proceeding.
- Applying the Design: Wrap the printed transfer paper around the sippy cup, making sure the design is centered and aligned properly. Secure the paper in place with heat-resistant tape.
- Heat Pressing: Place the sippy cup in a heat press machine and apply heat and pressure according to the manufacturer’s instructions. The heat will cause the sublimation ink to transfer onto the cup, creating a vibrant and permanent design.
- Cooling and Finishing: Allow the sippy cup to cool before removing the transfer paper. Wash the cup again with mild soap to remove any residual ink and ensure it is safe.
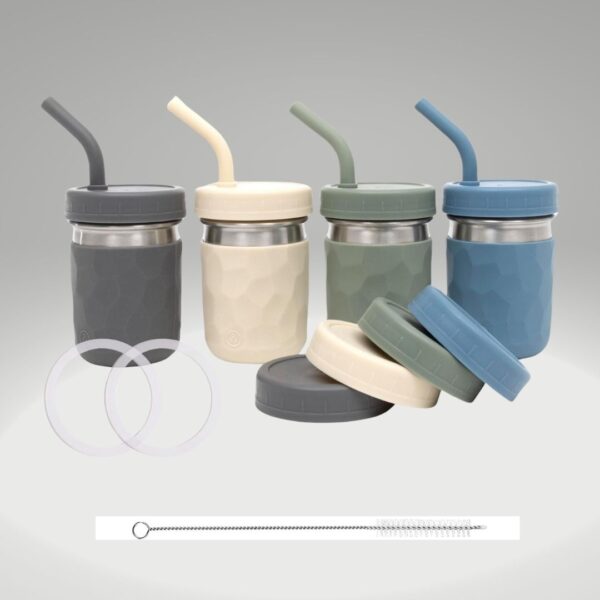
2-in-1 Stainless Steel Kid Personalized Sippy Cups Set of 4 Dishwasher
2-in-1 cups are designed for kids, featuring soft silicone straws for gentle oral development. They come with drinking lids and storage lids, perfect for transitioning to big kid cups.
Safety Considerations:
- Materials: Use only BPA-free and food-safe sippy cups to ensure the safety of children.
- Inks: Use sublimation inks that are non-toxic and safe for children.
- Heat Pressing: Follow the manufacturer’s instructions for the heat press machine to avoid overheating the cup or causing any safety hazards.
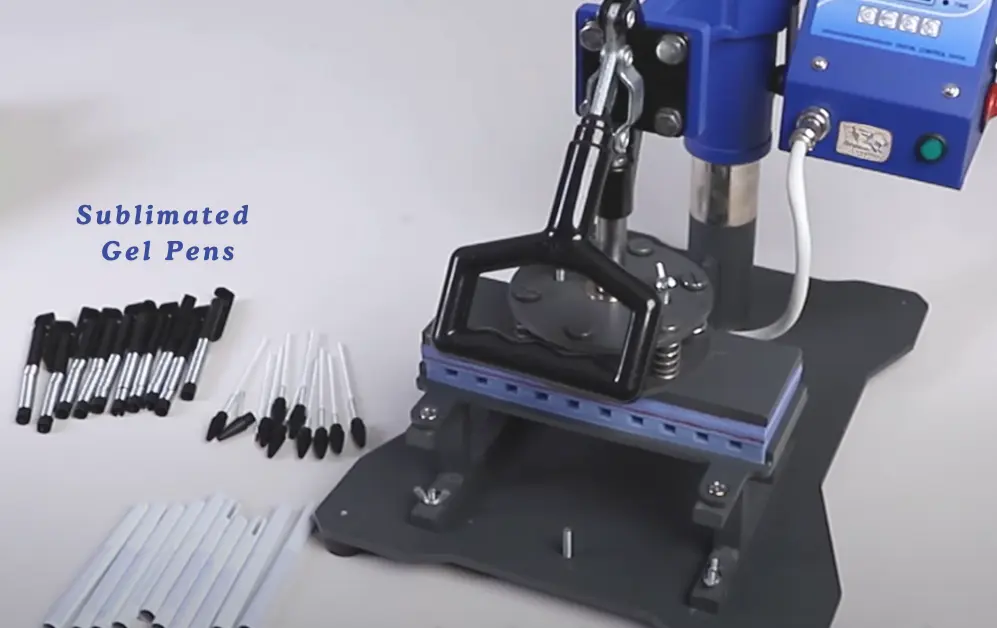
3. Brighten Up Your Workday with Sublimated Gel Pens
A creative way to add a personal touch to your workspace or make thoughtful gifts. Here’s how they can brighten up your workday:
- Customization: Using sublimation, gel pens can be customized with unique designs, patterns, or even personal photographs. This customization lets you express your personality and style through your writing instruments.
- Vibrant Colors: Sublimation allows the creation of full-color, vibrant designs on gel pens. This can make your workspace more lively and colorful, enhancing your mood and productivity.
- Professionalism: Despite their colorful designs, sublimated gel pens can still maintain a professional appearance, making them suitable for office settings. You can choose designs that reflect your professional identity or company branding.
- Gifts: Sublimated gel pens are great for colleagues, employees, or clients. You can personalize them with names, motivational quotes, or company logos, making them thoughtful and memorable gifts.
- Variety: Gel pens come in various styles, sizes, and colors, providing options for different preferences and needs. Whether you prefer a sleek and professional look or a fun and colorful design, there’s a sublimated gel pen for you.
4. Adding with Sublimated Glass Cutting Boards
By customizing a glass cutting board with a unique design, you can add a personal touch to your kitchen while benefiting from its heat resistance and easy cleaning features.
- Design Selection: Choose a design you want to transfer onto the cutting board. This could be a pattern, artwork, or even a personal photograph.
- Printing Process: Print the design onto sublimation transfer paper using sublimation ink. Ensure that the print is the mirror image of the final design.
- Preparing the Glass: Clean the glass cutting board thoroughly to remove dust or residue. Ensure the surface is dry and free from contaminants that could interfere with the sublimation process.
- Transferring the Design: Place the printed transfer paper onto the glass cutting board, ensuring the design is correctly positioned. Use heat-resistant tape to secure the paper in place.
- Heat Pressing: Place the glass cutting board in a heat press machine and apply heat and pressure according to the manufacturer’s instructions. The heat will cause the sublimation ink to turn into a gas, which will then bond with the surface of the glass.
- Cooling and Finishing: Allow the glass cutting board to cool before removing the transfer paper. Once cooled, the design will be permanently embedded into the surface of the glass.
Benefits of Sublimated Glass Cutting Boards
- Heat Resistance: Glass cutting boards are heat resistant, allowing you to place hot pots and pans directly onto them without causing damage.
- Easy Cleaning: The smooth surface of glass cutting boards makes them easy to clean. Simply wipe them down with soap and water, and they’re ready to use again.
5. Creating Unique Frosted Mugs Using Sublimation
A step-by-step guide:
- Design Preparation: Create or select a design you want to transfer onto the frosted mug. Ensure the design is sized correctly for the mug and is mirrored (flipped horizontally) for sublimation printing.
- Printing: Print the design onto sublimation paper using sublimation ink. Make sure to use a printer compatible with sublimation ink.
- Preparation of the Mug: Clean the frosted mug thoroughly to remove any dust or residue. Place the mug in a heat-resistant wrap or use heat-resistant tape to secure the sublimation paper with the design onto it, ensuring it is positioned correctly.
- Heat Press Transfer: Heat the mug in a heat press at the recommended temperature for sublimation (typically around 400°F) for the specified time (usually around 3-5 minutes). The heat press will transfer the design from the paper onto the mug, creating a permanent, vibrant image.
- Cooling and Finishing: After the transfer, remove the mug from the heat press and allow it to cool. Once cool, carefully remove the sublimation paper to reveal the design. The frosted mug is now ready to use or display.
6. Personalized Frosted Mugs for Various Occasions
It’s perfect for various occasions, including weddings, parties, or corporate events. Some ideas for using personalized frosted mugs:
- Weddings: Create custom frosted mugs with the bride and groom’s names and wedding dates for guests to take home as favors.
- Parties: Design frosted mugs with a theme or motif that matches the party’s theme, such as a birthday or holiday celebration.
- Corporate Events: Customize frosted mugs with a company logo or message for employees or clients as promotional items or gifts.
7. Designing Bandanas with Sublimation
Bandanas are versatile accessories personalized with specific patterns or photographs using sublimation. How you can create custom bandanas:
- Pattern Selection: Choose a pattern or design you want to transfer onto the bandana. Consider using vibrant colors and high-contrast images for the best results.
- Printing and Transfer: Print the design onto sublimation paper and use a heat press to transfer the design onto the bandana. Follow the manufacturer’s instructions for temperature and time settings.
- Versatility: Bandanas can be used as fashion, headbands, or pet accessories. Personalized bandanas are great for adding a unique touch to your outfit or creating a matching look with your pet.
8. Personalizing Beverage Coasters with Sublimation
To create unique sets or themed designs, beverage coasters can be personalized using sublimation. How to customize beverage coasters:
- Design Selection: Choose a design or theme for your coaster set. To create a cohesive look, consider creating matching designs for coasters, mugs, and other items.
- Printing and Transfer: Print the design onto sublimation paper and use a heat press to transfer the design onto the coaster. Follow the manufacturer’s instructions for temperature and time settings.
- Themed Sets: Create themed coaster sets for different occasions or seasons. For example, you could create a set of coasters with holiday-themed designs for Christmas or Halloween.
Introduction to Sublimation Printing
This is a way to put designs on things using heat. It’s different from other types of printing because the ink turns into a gas when it gets hot. This gas then goes into the surface of the item you’re printing on, becoming part of it.
Here’s how it works:
- You make a design on a computer.
- You print the design on special paper with special ink.
- You put the paper on the item you want to print on.
- You use a machine that gets very hot to press the paper and item together.
- The heat makes the ink turn into gas, which then goes into the item.
- When it cools down, your design is now part of the item.
Good for many reasons:
- The designs last a long time and don’t fade easily.
- You can print on many different things like shirts, mugs, and phone cases.
- The colors can be very bright and clear.
- You can make small amounts of custom items easily.
This method is popular for making custom gifts, team uniforms, and items to sell. It’s a good way for people who like making things to start a small business or hobby.
Getting Started with Sublimation
To begin with sublimation, you’ll need some key equipment and materials.
A. Essential equipment
- Sublimation printer: This is a special printer that uses sublimation ink. Some popular brands are Epson and Sawgrass.
- Sublimation ink: This ink turns into gas when heated. Make sure to get ink that works with your printer.
- Sublimation paper: This special paper holds the ink until it’s time to transfer the design.
- Heat press or sublimation oven: This applies heat to transfer the design. A heat press is more common for beginners.
B. Choosing sublimation blanks
Sublimation blanks are the items you print on. They need to have a special coating that accepts the sublimation ink. Some popular blanks include:
- White or light-colored polyester shirts
- Ceramic mugs
- Metal water bottles
- Polymer-coated phone cases
C. Tips for beginners
- Start with easy projects: Begin with flat items like coasters before trying curved surfaces.
- Test your designs: Always do a test print on paper before using a blank.
- Check your temperature: Different blanks need different heat settings. Follow the maker’s instructions.
- Use heat-resistant tape: This keeps your design in place during transfer.
- Wear heat-resistant gloves: The equipment gets very hot.
- Clean your workspace: Dust or lint can ruin your design.
- Store materials properly: Keep your ink and paper in a cool, dry place.
Remember, practice makes perfect. Don’t get upset if your first tries aren’t perfect. Keep trying, and you’ll get better with time.
In Conclusion
Sublimation printing offers endless possibilities for creating unique, personalized items such as frosted mugs, bandanas, and beverage coasters. Experiment with different materials, designs, and techniques to create one-of-a-kind items that reflect your style and personality.
Whether planning a wedding, hosting a party, or just looking to add a personal touch to your home decor, sublimation printing is a fun and creative way to express yourself.
Whether planning a wedding, hosting a party, or just looking to add a personal touch to your home decor, sublimation printing is a fun and creative way to express yourself. Try Subli Genius Print for your next project!



2 Comments