
Sublimation Tumbler Blanks: Sizes, Coatings & Buying Guide

Sublimation tumbler blanks are drinkware blanks made with a surface coating intended to accept sublimation dye. For a small business, the important buying questions are not just color or finish. You need the right body shape, printable area, equipment fit, coating consistency, packaging, and usable cost per blank.
A straight 20 oz skinny tumbler is usually simpler to size for a rectangular full wrap than a tapered or handled blank. Larger 30 oz and 40 oz styles can expand your product range, but they require more attention to taper, handle clearance, equipment fit, shipping size, and the supplier’s exact template.
20 oz vs 30 oz vs 40 oz Sublimation Tumbler Blanks
| Blank type | Best fit | Production advantage | What to verify before buying |
|---|---|---|---|
| 20 oz skinny, straight | General custom orders, gifts, small-batch selling | Usually the simplest style for a rectangular full wrap | Exact circumference, printable height, coating, lid style, and whether it fits your press |
| 30 oz | Customers who want more capacity | Larger printable area | Whether the body is straight or tapered, exact template, press clearance, packaging size |
| 40 oz handled | Large-capacity drinkware and panel-style designs | Large visible decoration area | Handle gap, taper, printable panels, equipment compatibility, shipping box size |
| Tapered tumbler | Styles where shape matters more than easiest production | Distinct profile | Use the supplier template or measure top and bottom circumference instead of assuming a rectangular wrap |
The ounce label alone is not enough to size artwork. Two blanks sold as the same capacity can have different printable dimensions. Measure the actual blank or use the supplier’s current template, then use our sublimation tumbler wrap size calculator for production planning.
How to Compare Bulk Tumbler Blank Cost
Compare the usable unit cost, not just the case price. A practical planning formula is:
Usable unit cost = total landed order cost ÷ usable tumblers
Calculate usable tumblers as the quantity received minus damaged, defective, or otherwise unusable units. Total landed order cost can include the purchase price, inbound shipping, nonrecoverable taxes or import fees, insurance, and other acquisition costs that apply to that order.
Check case quantity, sample-order availability, replacement policy, packaging, lid and straw inclusion, inbound shipping, and damaged or rejected units before moving from a test order to a larger case. Use the sublimation blank cost calculator when you want the landed and usable cost from your own supplier numbers. For the selling side, use the tumbler pricing guide. If you are comparing vendors, see the sublimation blank supplier guide.
Straight vs Tapered vs Handled Tumblers
Body shape affects artwork setup, equipment fit, and how easily a shop can repeat the same result. A straight tumbler is usually simpler to wrap, while tapered and handled styles need more blank-specific measurements and clearance checks.
| Body style | Artwork setup | Equipment check | Bulk-order risk |
|---|---|---|---|
| Straight | Usually works with a rectangular wrap based on the actual printable circumference and height | Verify diameter, height, and heating-area coverage | Low when dimensions stay consistent between shipments |
| Tapered | Use the supplier template or measure top and bottom circumference before building the wrap | Confirm even contact or an approved oven workflow | Higher if artwork is built from a generic size instead of the exact blank |
| Handled | Plan printable panels around the handle area rather than assuming a full uninterrupted wrap | Check handle clearance and the press or attachment limits | Higher if the handle or shape changes packaging, pressing, or shipping space |
Do not use the ounce label as a production template. Two tumblers with the same listed capacity can still have different printable dimensions, taper, handle spacing, and lid construction.
Coating and Finish: What Matters for Sublimation
Buy the exact SKU as a sublimation-ready blank. A stainless steel, glass, plastic, colored, or glitter tumbler that looks suitable for decoration is not automatically coated for sublimation.
- Confirm the decoration method: the product listing or supplier documentation should identify the blank as suitable for sublimation.
- Check the visible base color: white and light surfaces give artwork a different starting background than colored, translucent, metallic, or glitter finishes.
- Verify care claims: dishwasher, scratch, outdoor, and durability claims should come from the exact blank manufacturer or supplier rather than a general tumbler rule.
- Sample the finish: inspect coating appearance, seams, rims, and surface consistency before committing customer work to a case.
Check Your Press or Oven Fit Before Ordering
A blank is not a good bulk buy if it does not fit the equipment you already use. Check the exact tumbler dimensions against your press, heating attachment, shrink-wrap workflow, or oven method before ordering a large quantity.
- Compare the blank diameter and height with the usable heating area of your equipment.
- For handled or shaped blanks, confirm clearance around the handle, base, lid area, and heating element.
- Use the supplier’s current instructions for time, temperature, pressure, rotation, cooling, and any parts that must be removed before heating.
- Run one sample before assigning a full customer order to a new SKU or shipment.
If you need help separating press and oven variables, use the sublimation tumbler temperature guide as a workflow reference, then follow the instructions for the exact blank you purchased.
Sublimation Batch Tracker
Use the tracker below to record the exact blank, supplier, equipment, settings, and outcome for each test or production batch. Treat saved settings as records for that specific blank and equipment combination, not as universal settings.
- Start a batch: Click New Batch in the tracker below.
- Record the setup: Add the tumbler size, brand or SKU reference, coating, press model, temperature, time, pressure, rotation, paper, and ink used for that job.
- Save the result: Rate the outcome and add notes about defects, alignment, color, coating, or other details worth checking on the next shipment.
- Duplicate repeat jobs: Duplicate a saved batch when you are producing the same blank again, then update only the details that changed.
- Create templates: Save a repeatable setup as a template for the exact product and equipment combination you use regularly.
- Export or review: Export CSV records, print a job sheet, or use the Reports tab to review the batches stored in your browser.
How to Vet a Tumbler Supplier Before Buying a Case
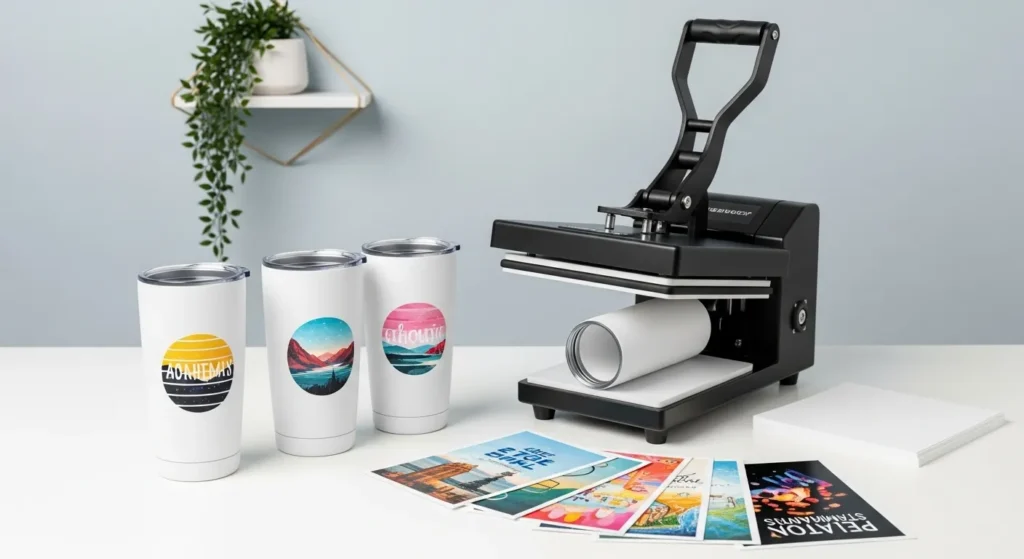
Order a small sample from the exact SKU you plan to stock before committing to a larger case. Supplier quality can vary by product line, shipment, warehouse, and fulfillment method, so the useful comparison is the blank you will actually reorder.
- Confirm the exact SKU is listed as suitable for sublimation.
- Record the current case quantity, minimum order, inbound shipping, and replacement policy.
- Check whether lids, straws, silicone parts, and individual boxes are included with the SKU.
- Measure several pieces for dimensional consistency before building production artwork around one sample.
- Inspect the coating, rim, seam area, packaging, and visible damage before pressing.
- Keep one approved sample and its SKU reference so the next shipment can be compared with the same standard.
Test the Exact SKU and Keep a Production Record
Press one sample from the exact shipment before committing customer work to a full batch. Follow the current supplier or manufacturer instructions for that blank because time, temperature, pressure, rotation, cooling, and removable parts can differ by coating and construction.
- Record the exact SKU, supplier, and shipment or order reference.
- Measure printable height, circumference, taper, and handle clearance as applicable.
- Confirm the blank fits the press, attachment, or approved oven workflow you plan to use.
- Record the supplier or manufacturer settings used for that specific blank.
- Save the artwork or template version used for the sample.
- Log the result, visible defects, damaged pieces, and usable-unit cost before approving a larger order.
The Batch Tracker above is designed for these job-specific records. Saved settings should stay tied to the blank and equipment combination that produced them.
Compare Two Tumbler Blanks With the Same Test
When comparing two blanks, keep the artwork, printer profile, paper, and evaluation criteria consistent where practical. Use the correct pressing instructions for each blank instead of forcing identical heat settings across different products.
| Compare | What to record |
|---|---|
| Dimensions | Printable height, circumference, taper, handle clearance, and variation between pieces |
| Artwork setup | Template source, wrap fit, seam position, and whether a straight or tapered file is required |
| Equipment fit | Press or oven compatibility, heating coverage, and any clearance problem |
| Blank condition | Coating consistency, rim or seam defects, dents, scratches, and packaging damage |
| Included parts | Lid, straw, silicone pieces, gift box, or other accessories included with the SKU |
| Cost | Case price, shipping, unusable units, replacements, and resulting usable-unit cost |
| Reorder fit | Case quantity, availability, replacement policy, and whether the supplier can support your normal order size |
Choose the Blank You Can Produce Consistently
For a new tumbler line, start with a small sample of the exact SKU, confirm the printable dimensions and equipment fit, and record the approved production setup. Move to larger case quantities only after the blank is consistent enough for repeat orders.
When two blanks look equally good on paper, compare usable unit cost, supplier availability, packaging damage, and how easily your team can reproduce the same result. Those factors usually matter more to a small print business than an extra finish or accessory.
Professional Sublimation Printing & Wholesale Custom Products
Looking for high-quality sublimation printing for apparel, drinkware, and promotional items? Subli Genius Print delivers vibrant color, sharp detail, and long-lasting results for businesses, brands, and resellers across the U.S.



3 Comments