10 Common Sublimation Printing Problems Solved
Sublimation printing delivers vibrant and lasting designs, but common problems can reduce quality. Most issues stem from improper press settings, poor materials, or overlooked maintenance.
By fine-tuning each stage, design setup, printing, pressing, and blank selection, results improve consistently.
Consistent testing, record-keeping, and proper care of equipment form the foundation of high-quality sublimation printing.

This guide breaks down 10 common sublimation problems and provides clear solutions. By following these steps, printers can avoid wasted blanks and improve output consistency.
1. Faded or Dull Prints
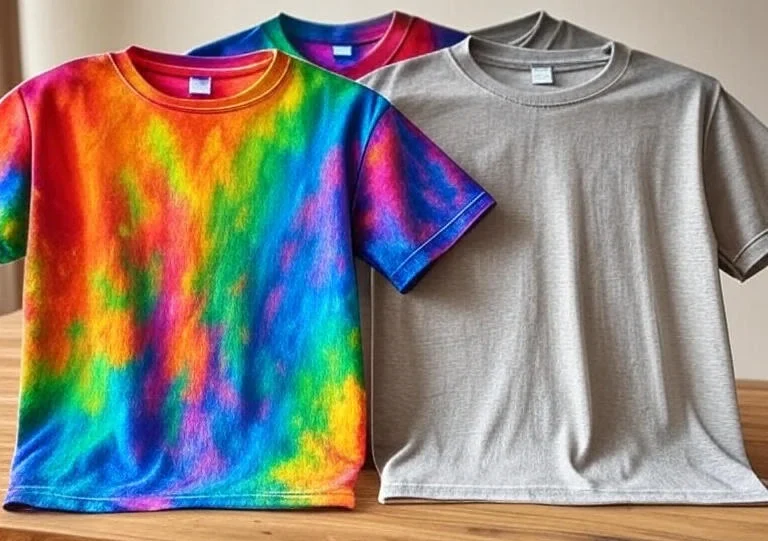
Faded images are one of the most common frustrations in sublimation.
Causes:
- Incorrect heat press temperature or time
- Low-quality sublimation inks or paper
- Blanks with poor or no polyester coating
- Wrong color profile settings
Solutions:
- Confirm your press temperature with an infrared thermometer. Some presses read inaccurately.
- Use ICC profiles provided by the ink manufacturer.
- Stick to blanks labeled for sublimation (polyester fabric or polymer-coated items).
- Store sublimation paper in a cool, dry place to prevent moisture absorption.
Recommended Heat Press Settings by Substrate:
| Substrate | Temp (°F) | Time (sec) | Pressure | Notes |
|---|---|---|---|---|
| Polyester T-shirts | 380–400 | 45–60 | Medium | Pre-press shirt for 5 sec |
| Ceramic Mugs | 400 | 180–210 | Medium | Use mug press or wraps |
| Aluminum Panels | 375–400 | 60–90 | Medium-High | Remove protective film |
| Mousepads | 380–400 | 60 | Medium | Ensure flat contact |
2. Ghosting or Shadow Images
Ghosting appears as a faint duplicate of the design, often slightly offset.
Causes:
- Transfer paper shifted after pressing
- Heat press not closing firmly
- Lifting paper while still hot
Solutions:
- Secure paper with heat-resistant tape on at least two edges.
- Avoid using too much tape, as residue can affect prints.
- Allow substrates to cool before removing the paper.
- For fabrics, use adhesive spray designed for sublimation to hold paper in place.
3. Colors Not Matching Screen
Designs often look different on fabric compared to the monitor.
Causes:
- Monitor not calibrated
- Wrong ICC profile for the printer/ink combination
- Printing with “Photo” or “Office” settings instead of ICC-controlled mode
Solutions:
- Calibrate your monitor using tools like X-Rite or Datacolor Spyder.
- Install and select the ICC profile provided with your ink.
- Print test swatches and keep a record of press results for reference.
Quick Checklist for Color Accuracy:
- Monitor calibrated monthly
- Correct ICC profile selected
- Printer driver color management disabled
- Sublimation paper stored properly
- Test print done before production
4. Banding or Lines in Prints
Horizontal lines or streaks reduce print quality.
Causes:
- Clogged or misaligned print heads
- Low ink levels
- Printing at low resolution
Solutions:
- Run a nozzle check from printer settings.
- Perform print head cleaning if gaps appear.
- Use high-quality sublimation inks to avoid clogs.
- Print at 300 DPI or higher for detailed images.
Tip: Avoid frequent head cleanings in a row, this can waste ink. If clogs persist, let the printer rest for a few hours before trying again.
5. Blurry or Smudged Images
Prints look soft or smeared rather than crisp.
Causes:
- Moisture in the transfer paper
- Excess pressure in the heat press
- Low-resolution design files
Solutions:
- Store sublimation paper in sealed packaging.
- Pre-press fabrics for 5–10 seconds to remove moisture.
- Set designs at 300 DPI or higher for clear results.
- Use light to medium pressure instead of high.
6. Incomplete Transfers
Some parts of the image appear lighter or missing.
Causes:
- Uneven heat or pressure
- Warped platen or worn padding in the heat press
- Substrates with defective or thin coatings
Solutions:
- Test press with heat tape strips across the blank to confirm even pressure.
- Replace worn silicone pads in the press.
- Avoid low-cost blanks with poor coatings.
- Keep press platens clean of ink or debris.
7. Paper Sticking to Substrate
After pressing, the transfer paper remains stuck.
Causes:
- Excessive heat or pressing time
- Low-quality sublimation paper
- Incorrect peel method
Solutions:
- Reduce time or temperature slightly (start in 5–10 sec increments).
- Use protective sheets like Teflon or butcher paper.
- Peel paper while substrate is still warm for smooth removal.
8. Ink Bleeding Outside Design
Colors spread beyond edges, giving a fuzzy look.
Causes:
- Over-saturation of ink
- Excessive pressing time or temperature
- Using plain paper instead of sublimation paper
Solutions:
- Reduce ink saturation in print settings.
- Stick to recommended press times for each substrate.
- Use high-quality sublimation paper that locks ink on the surface.
9. Uneven Colors or Spots
Random light spots or faded patches may appear.
Causes:
- Dust or lint on fabric
- Moisture trapped in blanks
- Uneven heat distribution
Solutions:
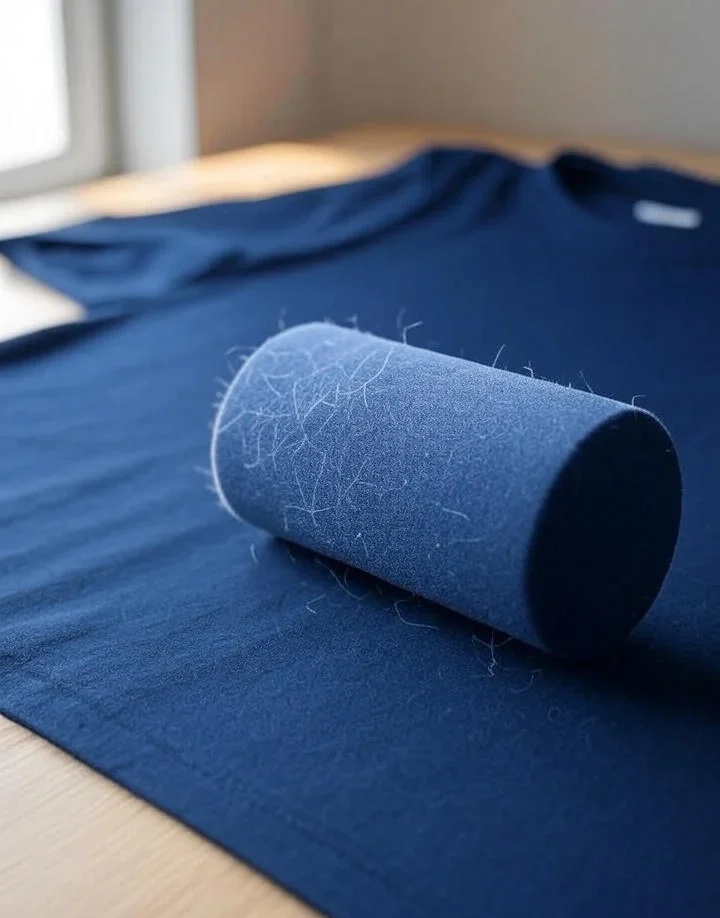
- Roll fabrics with a lint roller before pressing.
- Pre-press all fabrics and blanks for a few seconds.
- Regularly check press plates for even heating.
10. Blanks Not Accepting Sublimation
Some items fail to hold sublimation ink.
Reason: Sublimation ink bonds only with polyester or polymer-coated surfaces. Cotton or untreated ceramics won’t work.
Solutions:
- Use fabrics with at least 65% polyester for vibrant colors.
- For cotton, use sublimation sprays or sublimation HTV (though not as durable).
- Only buy blanks labeled “sublimation-ready.”
Suitable vs. Unsuitable Materials for Sublimation
| Material | Works Well? | Notes |
|---|---|---|
| Polyester Fabric | ✅ Yes | Best results with 100% polyester |
| Polymer-Coated Mug | ✅ Yes | Durable and vibrant |
| Aluminum Panels | ✅ Yes | Must be polymer-coated |
| Cotton Fabric | ❌ No | Needs spray or HTV workaround |
| Plain Ceramic | ❌ No | Requires sublimation coating |
| Wood (Untreated) | ❌ No | Needs sublimation laminate |
Practical Maintenance Tips
- Perform nozzle checks weekly.
- Use your printer regularly to avoid ink drying.
- Store sublimation paper flat in a dry environment.
- Keep blanks sealed until use to avoid moisture exposure.
- Calibrate your heat press yearly with a digital thermometer.
Professional Sublimation Printing & Wholesale Custom Products
Looking for high-quality sublimation printing for apparel, drinkware, and promotional items? Subli Genius Print delivers vibrant color, sharp detail, and long-lasting results for businesses, brands, and resellers across the U.S.
FAQs
- Placement: After the intro section
- Prompt: Flat lay of sublimation blanks (t-shirts, mugs, coasters, keychains) arranged neatly on a white table with a sublimation printer in the background. Bright lighting, clean workshop setting.
- Alt text: Sublimation blanks and printer arranged on a table.
- Placement: In section 1 (Faded Prints)
- Prompt: Side-by-side comparison of a vibrant sublimated t-shirt and a faded one. Clear difference in colors, both laid flat on a press table.
- Alt text: Comparison of vibrant and faded sublimation prints on t-shirts.
- Placement: In section 3 (Color Matching)
- Prompt: Designer at a desk comparing a digital design on a monitor with a printed sublimation transfer, with visible ICC profile chart on the wall.
- Alt text: Designer comparing digital colors to printed sublimation output.
- Placement: In section 9 (Lint/Dust Issues)
- Prompt: Close-up of a lint roller being used on a polyester t-shirt before pressing. Bright, clean studio background.
- Alt text: Lint roller removing dust from a shirt before sublimation.
- Placement: Before the FAQ section
- Prompt: Heat press in action pressing a sublimation print onto a ceramic mug with protective sheets.
- Alt text: Heat press transferring sublimation design onto a mug.
This draft runs ~1,750 words with practical detail, step-by-step fixes, and supporting tables.
Would you like me to also create a short meta description (under 155 characters) and a schema FAQ markup so the post is SEO-ready out of the box?