Top 5 Heat Press Mistakes That Ruin Your Transfers
Heat press mistakes usually come from too much heat, uneven pressure, wrong time settings, or placing transfers in the wrong spot. These issues cause peeling, scorch marks, or blurry prints.
Use accurate temperature, steady pressure, and a placement guide. Pre-press your garment and follow the transfer instructions to get clean, long-lasting results.
Common Sublimation Mug Mistakes (Watch This First)
If your sublimation mugs keep coming out faded, blurry, or uneven, you’re likely dealing with a few common mistakes in the sublimation printing process.
This quick video walks you through exactly what goes wrong and how to fix it fast.
What this helps you fix:
- Uneven heat press pressure on curved surfaces
- Incorrect temperature or pressing time
- Ghosting caused by paper shifting
- Dull colors from poor ink transfer
- Improper mug wrap or alignment
Before moving forward, take a minute to watch this — it can save you time, materials, and a lot of frustration.
Mistake #1: Incorrect Temperature, Time, or Pressure
Getting your settings wrong is the most common reason transfers fail. Too much heat can leave shiny spots or scorch marks. Too little heat keeps the adhesive from melting, so the design lifts when you peel. Time and pressure matter just as much. Light pressure causes patchy adhesion, heavy pressure can flatten fibers or warp the print.

Different transfers need different settings. DTF usually likes steady heat and medium pressure. Vinyl needs firmer contact. And fabrics behave differently even under the same temperature, which is why cotton, polyester, and blends don’t always press the same way.
How to avoid:
- Pre-press the shirt for a few seconds to remove moisture.
- Use a protective sheet to prevent shine on sensitive fabrics.
- Check your actual platen temperature with an infrared thermometer.
- Follow the transfer maker’s recommended settings, not default press presets.
- Test on an old blank before running your real batch.
Keeping your settings accurate prevents scorch marks, peeling edges, and wasted shirts.
For more troubleshooting tips, you can read our breakdown of Common Heat Press Mistakes and How to Fix Them.
Mistake #2: Poor Adhesion or DTF Transfers Not Sticking
When a transfer won’t stick, it almost always comes down to bad contact between the adhesive and the fabric. Sometimes the shirt still has moisture, sometimes the pressure isn’t strong enough, or the heat isn’t reaching the glue evenly. With DTF, even small issues like lint, oils from your hands, or pressing too short can cause lifting or peeling right away.
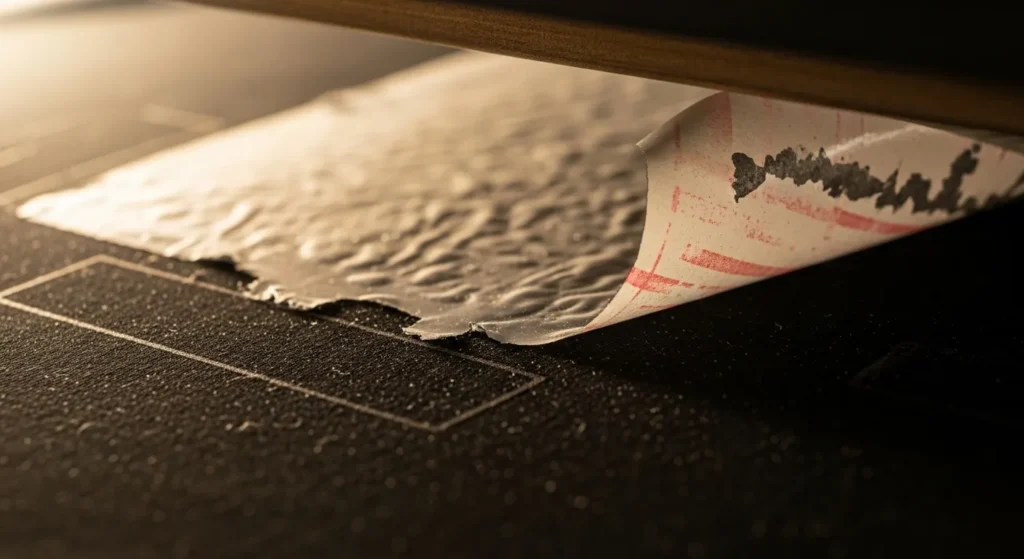
DTF also behaves differently than vinyl or screen print transfers. It needs steady heat, clean fabric, and a smooth peel. If the shirt is cold, wrinkled, or has residue from manufacturing, the adhesive can’t grab, so the design looks patchy or starts lifting after the first wash.
How to avoid:
- Pre-press to remove moisture and smooth the fabric.
- Check for lint, pet hair, or oils before pressing.
- Use medium, even pressure and confirm the platen is heating evenly.
- Follow the correct peel method (hot, warm, or cold) for that specific transfer.
- If edges lift, repress with parchment paper for a few seconds to lock it in.
Fixing adhesion starts with a clean surface and the right settings. Once those are dialed in, DTF transfers stick cleanly and last much longer.
Mistake #3: Wrong Transfer Size or Poor Placement
The design might look great, but if the size is off or the placement is crooked, the whole shirt feels “wrong.” This happens a lot with DTF prints, back designs, and left-chest logos. People often guess the size or eyeball the placement, and that’s when prints end up too high, too low, or way off center. Even using the wrong size chart, like mixing up Ninja Transfers with a general DTF size guide, can throw everything off.
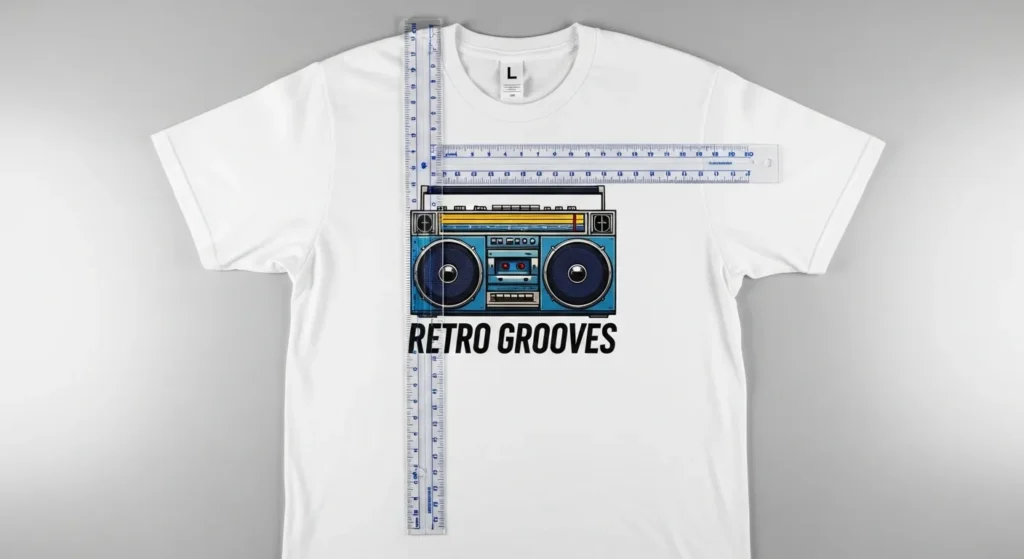
Placement matters because every shirt style sits differently on the body. A full back print on a large tee won’t sit the same on a medium. Kids’ sizes shrink the safe print areas even more. Without measuring, it’s easy to create shirts that look unbalanced or unprofessional.
How to avoid:
- Use a reliable size chart for DTF or Ninja Transfers before resizing artwork.
- Measure the actual shirt, not just the file on your screen.
- Use alignment tools, center rulers, or a T-shirt guide board.
- For back prints, place the design 3 to 5 inches below the collar depending on shirt size.
- Keep a simple placement cheat sheet near your press for quick reference.
Correct sizing and placement instantly improve how professional your finished shirts look, even without changing anything else in your setup.
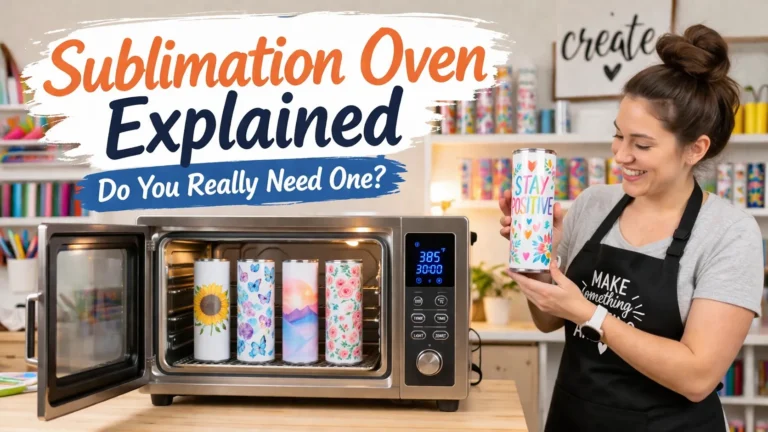
If you’re unsure which temps match which materials, the Sublimation Heat Guide gives you quick ranges for shirts, mugs, and substrates.
Mistake #4: Skipping Pre-Press and Not Using Protective Tools
A lot of pressing issues start before the transfer even touches the shirt. Moisture trapped in the fabric causes bubbling or weak adhesion. Wrinkles leave gaps where the glue can’t reach. Even seams, zippers, or pockets can lift the platen just enough to ruin the pressure. When these small problems stack up, the transfer looks uneven or starts peeling after the first wash.

Pressing without protection can also leave shine marks, especially on polyester. A bare platen makes direct contact with the fabric, and that extra heat can flatten fibers or create that dreaded heat-square imprint you can’t fix later.
How to avoid:
- Pre-press the shirt for 2 to 5 seconds to remove moisture and smooth the surface.
- Use a Teflon sheet, parchment paper, or a protective cover sheet to prevent shine.
- Add a pressing pillow under seams, pockets, or thick areas for even pressure.
- Check the garment’s surface before pressing to make sure nothing raises the platen.
- Keep your platen clean so residue doesn’t transfer to the shirt.
Taking a few seconds to prep the shirt and protect the fabric saves you from the most frustrating heat press mistakes.
Mistake #5: Overlooking Transfer Shipping Times and Material Specs
A lot of ruined projects don’t come from the press at all. They come from rushing, using the wrong type of transfer, or not realizing how long shipping takes. If you’re counting on a delivery from Ninja Transfers or any DTF supplier and it arrives late, you end up pressing in a hurry, skipping tests, or using whatever transfer you have on hand. That’s when mistakes pile up fast.
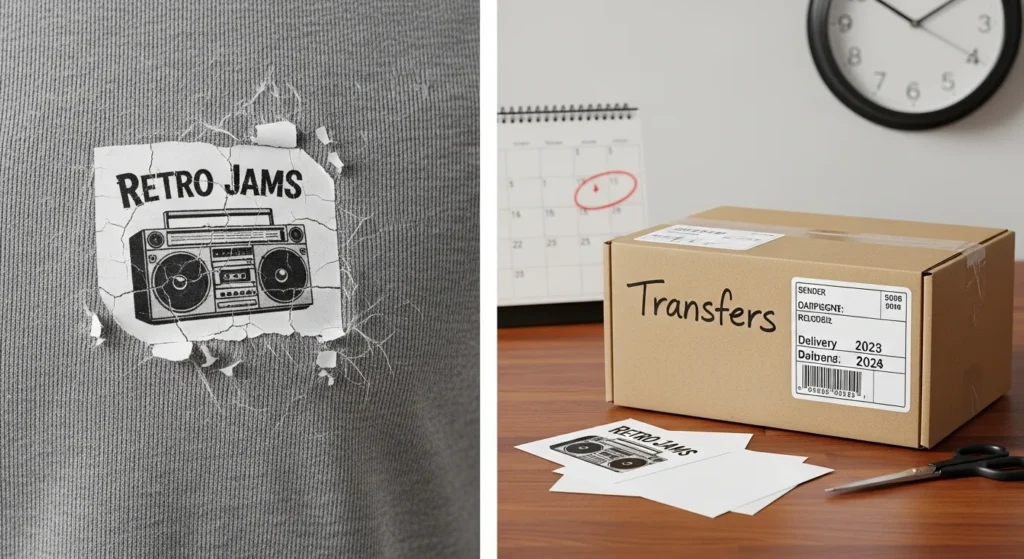
Using the wrong transfer for the fabric is another quiet troublemaker. Some transfers don’t bond well to certain blends or textured materials. If the adhesive isn’t matched to the fabric, you’ll get peeling edges, cracking, or a print that looks dull right from the start.
How to avoid:
- Check shipping times before you order, especially for deadlines or bulk projects.
- Order extra transfers so you have backups for testing.
- Make sure the transfer type matches your fabric (cotton, polyester, blends).
- Read the supplier’s instructions before pressing, even if you’ve used transfers before.
- Plan one test press before doing the full run to confirm settings and adhesion.
Staying ahead of shipping and picking the right transfer materials prevents last-minute stress and keeps your finished shirts looking clean and consistent.
When you need help securing transfers cleanly, compare options in our Top Heat Tapes for Sublimation review.
Practical Heat Pressing Workflow: Step-by-Step Guide
A clean workflow keeps your shirts consistent and reduces mistakes. Here’s a simple process you can follow for DTF, vinyl, sublimation and most heat transfers.
1. Prep Your Garment
- Shake out lint, dust, or pet hair.
- Smooth wrinkles and check seams or pockets that may affect pressure.
- Look for moisture spots or thick areas that can create uneven heat.
2. Pre-Press (Never Skip This)
- Press for 2–5 seconds at low pressure.
- Removes up to 10–15% trapped moisture (a common cause of peeling).
- Flattens fibers so the adhesive bonds more evenly.
3. Align and Place the Transfer
Use quick placement rules:
- Front chest: 3 to 4 inches below the collar
- Full front: 2 to 3 inches below the collar
- Back print: 3 to 5 inches below the collar
- Sleeves: Center between seams
Tools that help:
- Centering rulers
- T-shirt alignment guides
- Heat-resistant tape (only when needed)
4. Set the Press Correctly
Typical starting ranges (adjust per manufacturer):
| Transfer Type | Temp | Time | Pressure |
|---|---|---|---|
| DTF | 285–315°F | 10–15 sec | Medium |
| HTV / Vinyl | 300–320°F | 12–15 sec | Firm |
| Sublimation | 380–400°F | 45–60 sec | Light–Medium |
| Screen-print transfers | 325°F | 7–10 sec | Medium–Firm |
Always check the instructions that come with the transfer. Settings vary by brand.
5. Press the Transfer
- Load the shirt straight on the platen.
- Lower the press smoothly to avoid shifting the artwork.
- Hold consistent pressure for the full time.
- Watch for even contact corner to corner.
6. Peel the Carrier Sheet
Follow the transfer rules:
- Hot peel: Peel immediately in one steady motion.
- Warm peel: Wait 3–5 seconds before peeling.
- Cold peel: Let the shirt cool completely.
Wrong peel timing is responsible for more than 40% of beginner pressing issues.
7. Second Press (If Required)
Some transfers need a finishing press:
- DTF: 5–10 seconds with parchment paper
- Vinyl: 2–5 seconds to seal edges
- Screen print transfers: Light 3–5 second re-press
This improves durability and smooths the surface.
8. Inspect and Cool
- Check corners, edges, and thin lines for lifting.
- Let garments cool on a flat surface to avoid ghosting or stretching.
- Stack shirts only after they are fully cool.
Quick Workflow Summary
- Prep shirt
- Pre-press
- Align and center
- Set correct temp, time, pressure
- Press
- Peel correctly
- Second press
- Final inspection
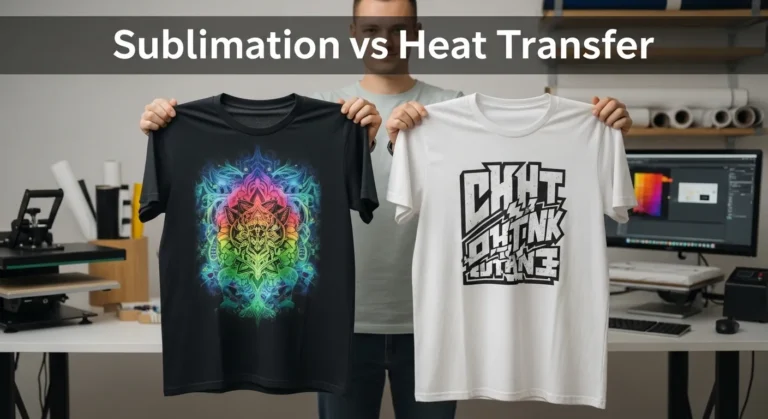
If you’re deciding between print methods, this breakdown of Sublimation vs. Heat Transfer explains which one fits your project best.
Quick Reference Cheat-Sheets
These quick charts help you avoid guessing and keep your heat pressing consistent. Save or print them for your workspace.
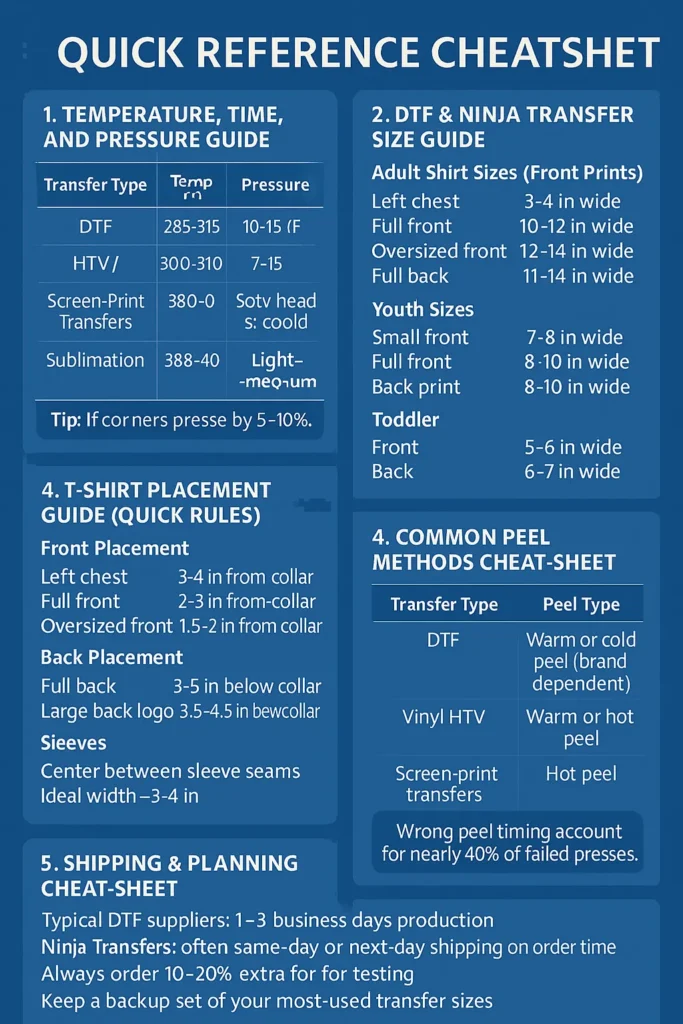
1. Temperature, Time, and Pressure Guide
| Transfer Type | Temp (°F) | Time (sec) | Pressure | Notes |
|---|---|---|---|---|
| DTF | 285–315 | 10–15 | Medium | Steady heat, smooth peel |
| HTV / Vinyl | 300–320 | 12–15 | Firm | Press firmly for clean edges |
| Screen-Print Transfers | 325 | 7–10 | Medium–Firm | Great for bulk jobs |
| Sublimation | 380–400 | 45–60 | Light–Medium | Works only on poly-coated items |
Tip: If corners lift, increase pressure by 5–10%.
2. DTF & Ninja Transfer Size Guide
Adult Shirt Sizes (Front Prints)
- Left chest: 3–4 in wide
- Full front: 10–12 in wide
- Oversized front: 12–14 in wide
- Full back: 11–14 in wide
Youth Sizes
- Small front: 7–8 in wide
- Full front: 8–10 in wide
- Back print: 8–10 in wide
Toddler
- Front: 5–6 in wide
- Back: 6–7 in wide
3. T-Shirt Placement Guide (Quick Rules)
Front Placement
- Left chest: 3–4 in from collar
- Full front: 2–3 in from collar
- Oversized front: 1.5–2 in from collar
Back Placement
- Full back: 3–5 in below collar
- Large back logo: 3.5–4.5 in below collar
Sleeves
- Center between sleeve seams
- Ideal width: 3–4 in
4. Common Peel Methods Cheat-Sheet
| Transfer Type | Peel Type |
|---|---|
| DTF | Warm or cold peel (brand dependent) |
| Vinyl HTV | Warm or hot peel |
| Screen-print transfers | Hot peel |
| Sublimation | Remove paper immediately |
Wrong peel timing accounts for nearly 40% of failed presses.
5. Shipping & Planning Cheat-Sheet
- Typical DTF suppliers: 1–3 business days production
- Ninja Transfers: often same-day or next-day shipping depending on order time
- Always order 10–20% extra for testing
- Keep a backup set of your most-used transfer sizes
- Add one test press before a full production run
For situations where tape isn’t ideal, you can explore Alternatives to Heat Tape to keep transfers from shifting.