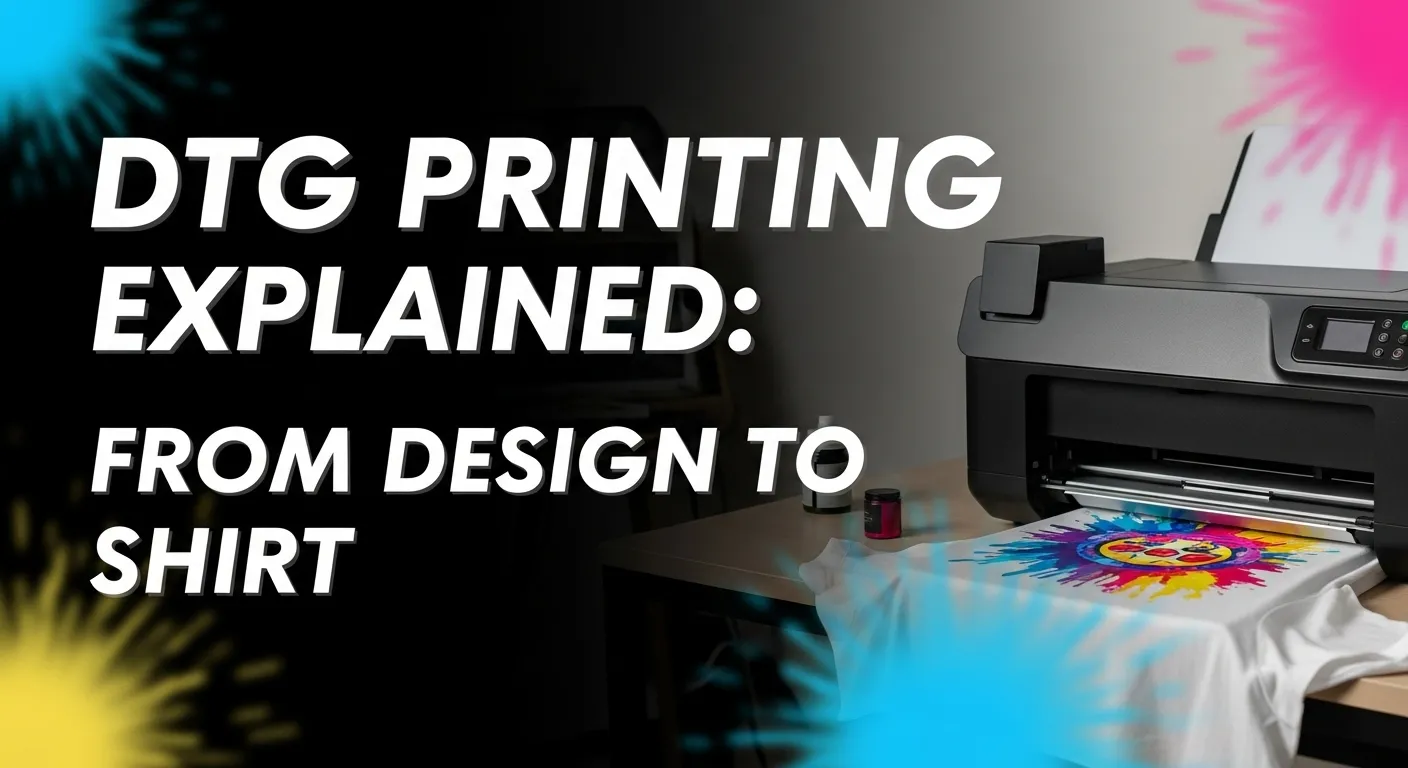
DTG Printing Explained: From Design to Shirt
DTG printing, or direct-to-garment printing, uses inkjet technology to print full-color designs straight onto fabric. It’s perfect for custom t-shirts and small batches.
The process involves pre-treating the shirt, loading it into a DTG printer, and curing the ink with heat for a soft, durable, high-quality finish.
What Is DTG Printing?
Think of DTG printing (Direct-to-Garment printing) like using an inkjet printer, but instead of paper, it prints straight onto fabric. It sprays special water-based textile inks directly into the fibers of a shirt, creating smooth, full-color designs that feel soft to the touch.
DTG printing bridges creativity and convenience. You can turn a digital design into a retail-quality shirt in minutes, without expensive prep or bulk orders. It’s the go-to choice for anyone who values flexibility, color accuracy, and fast customization.
How DTG Printing Works in Simple Terms
The process is pretty straightforward. You create your design on a computer, load a cotton shirt into a DTG printer, and hit print. The printer then sprays the ink layer by layer to match your digital artwork. Afterward, the shirt is heat-cured so the colors lock into the fabric permanently.

It’s great for:
- Detailed artwork (like photos, gradients, or colorful logos)
- Small batches or one-offs (since there’s no need to make screens)
- Print-on-demand stores (custom designs can be printed instantly)
How DTG Differs From Other Printing Methods
| Method | How It Works | Best For | Main Drawback |
|---|---|---|---|
| DTG Printing | Prints ink directly into fabric using digital nozzles | Complex, multi-color designs and small runs | Slower for large orders |
| Screen Printing | Pushes ink through mesh screens layer by layer | Bulk printing, simple logos | Costly setup for small batches |
| Heat Transfer | Uses transfer paper and heat to press designs onto fabric | Quick one-offs on light fabrics | Can feel stiff or peel over time |
| DTF (Direct-to-Film) | Prints on film, then transfers to fabric with heat | Works on many fabric types | Slightly thicker print texture |
As Kornit Digital notes, DTG delivers “photorealistic quality with zero setup waste,” while FlashShip points out it’s ideal for today’s e-commerce demand for personalized apparel.
Why DTG Printing Is So Popular Now
DTG’s rise isn’t random. It’s powered by how people shop and create today:
- Small runs, big creativity: Perfect for artists, brands, and Etsy sellers who print one shirt at a time.
- Eco-friendlier production: Water-based inks mean less waste and fewer chemicals.
- E-commerce ready: Integrates easily with print-on-demand platforms like Shopify or Etsy.
- No setup cost: Start printing as soon as your design is ready, no screens, no mess.
How DTG Printing Works: Step-by-Step Workflow
Nail the file, pretreat the garment when needed, use correct RIP and white-ink steps, cure properly, then inspect and test. Do those and DTG gives vibrant, soft prints fast, especially for small batches and custom orders.

1. Design preparation: get the file right
Keep designs high quality and print-ready. Use PNG for transparency, or high-res JPEG/TIFF. Aim for at least 150–300 DPI depending on the size, convert to RGB (or follow your RIP’s profile), and create a separate white-ink layer when printing on dark garments. Simple checks: crop to size, remove stray pixels, and save a flattened export for the RIP.
Quick tips
- Use PNG with transparent background for non-rectangular artwork.
- Save a copy at the exact output dimensions (in pixels) you’ll print.
2. Garment preparation: fabric and pretreating
DTG works best on mostly cotton fabrics. For dark shirts, a pretreatment solution is sprayed onto the print area to create a white underbase that makes colors pop. Light shirts often skip pretreating unless the design needs it. After spraying, the pretreat is typically flash-cured slightly to create a flat surface for printing.
Common fabric notes
- Best: 100% cotton, high-cotton blends.
- Avoid or test heavily textured or very stretchy knits.
3. Printing process: setup and inking
Load the garment on the platen and align it precisely. The DTG printer reads your RIP file, lays down white ink base if needed, then prints CMYK (and any spot colors) in very fine droplets. Modern DTG printers handle multiple passes and drop sizes to render gradients and photo detail. Do a nozzle check and a quick test print when changing media or colors.
Checklist before print
- Correct platen and garment placement.
- Proper RIP settings and ICC profile.
- White ink settings checked for dark garments.
4. Curing and finishing: lock the ink in
After printing, cure the ink with a heat press or conveyor dryer. Proper heat and dwell time bind the ink to fibers, improving wash durability and hand feel. Over- or under-curing causes problems: too cold and ink washes out, too hot and fabric or ink can scorch. Post-cure, inspect prints under good light.
Practical note
- Use manufacturer-recommended temperature and time as a starting point, then run wash tests.
5. Post-print inspection and tips: quality control matters
Check for these common issues: color shift, white ink banding, misalignment, or pretreat residue. Fixes are usually straightforward: calibrate color profiles, clean or agitate white ink cartridges, adjust pretreat levels, or re-align the platen. Always run a sample wash test, and include care instructions with finished garments.
Quick QC steps
- Visual inspection under neutral light.
- One wash test on sample garment.
- Log settings that worked for repeatability.
Materials & Equipment Essentials
Before you jump into printing, it’s worth getting familiar with what gear and materials actually matter for great DTG results. The right setup can make or break your print quality, color accuracy, and durability.

Garments & Fabrics
Your fabric is your foundation. DTG (Direct-to-Garment) printers work best on 100% cotton or high-cotton blends because the fibers naturally absorb water-based inks.
Best choices:
- Ringspun cotton T-shirts (smooth surface = sharper details)
- Cotton-rich blends (80/20 cotton-poly works fine for casual wear)
- Light-colored fabrics if you’re just starting — easier to manage color accuracy
Avoid or prep carefully:
- 100% polyester (ink won’t bond properly)
- Dark synthetics — unless you use a solid white ink base
- Coarse or textured shirts — they can cause uneven prints
💡 Pro tip: If you’re using blends or slightly textured shirts, apply a pretreatment spray and heat press before printing. It smooths the surface and helps ink sit better on the fibers.
🎨 Inks & Consumables
DTG inks are water-based, meaning they’re eco-friendlier and give that soft, breathable feel on shirts.
But they need care, especially white ink, which tends to settle or clog if you skip maintenance.
Essentials you’ll need:
- CMYK + White Ink: For vivid, full-color prints on any base color.
- Pretreatment Solution: Used for dark garments to help white ink stick and pop.
- Cleaning Solution & Capping Station Fluid: Keeps your printer heads healthy and prevents clogs.
🧴 Brand example: Procolored-EU makes reliable DTG inks and pretreatments for budget and small-shop setups.
Printers & Software
Not all DTG printers are created equal. Your choice depends on volume, budget, and quality goals.
Entry-Level Printers:
- Great for startups and small batches
- Slower print speeds
- Smaller platens (10×12 or 13×19 inches typical)
- Example: Epson F2100, Procolored A4 series
Professional Printers:
- Built for speed and bulk runs
- Offer RIP software integration, bigger platens, and faster curing
- Example: Brother GTX Pro, Kornit Atlas
RIP Software (Raster Image Processor):
This is the “brain” that controls color layers, white ink base, and print order.
If you’re serious about output control, make sure your printer includes a solid RIP system.
💡 Quick advice: Budget printers might skip RIP software, so you’ll rely more on manual tweaks in Photoshop or similar tools.
Workspace & Setup
DTG printing isn’t messy like screen printing, but setup still matters.
Must-haves for a good workspace:
- Ventilation: Especially if you’re pretreating and curing.
- Curing Station or Heat Press: To dry ink and lock it into fibers.
- Maintenance Zone: Keep lint rollers, nozzles, and cleaning tools handy.
- Humidity Control: Ideal range is 40–60% to keep inks from drying in the heads.
Routine tip: Run nozzle checks and head cleanings weekly if printing often, or every few days if your shop’s cooler or drier than usual.
Design Considerations & Best Practices
Here’s the truth: even the best printer can’t fix a bad file. A great DTG print starts long before you hit “Print.” These design details will help you get crisp, vibrant results every time.

Artwork File Specs
Your design file is the foundation of print quality. If it’s low-res or set up wrong, you’ll see it on the shirt.
Keep these specs in mind:
- Resolution: 300 DPI (dots per inch) minimum. Anything lower looks blurry when printed.
- Color Mode: Use RGB, not CMYK — DTG printers convert color data better from RGB.
- Background: Always use a transparent background (PNG format). This keeps your print edges clean.
- File Size: At least 12×12 inches at 300 DPI for full-front prints. Scale down from there if needed.
💡 Example: Platforms like Gelato and Printify both recommend 300 DPI PNGs with transparency for optimal results.
Print Placement & Sizing
Placement can make or break how your design looks on the final shirt. It’s not just about size, it’s about visual balance.
Common placement zones:
| Area | Recommended Size | Tips |
|---|---|---|
| Front Chest | 8–10 inches wide | Align with collar center |
| Full Front | 12–14 inches wide | Ideal for statement designs |
| Back Print | 12–14 inches wide | Keep text high between shoulders |
| Sleeves | 3–4 inches wide | Great for logos or icons |
🧭 Anchor tip: Use a printed T-shirt template or placement ruler to make sure your design isn’t too high or off-center.
Fabric Color vs. Print Color
DTG inks are semi-transparent, so your fabric color always affects the final tone.
On light fabrics:
- You can print directly without a white base.
- Colors look slightly softer but feel smoother.
On dark fabrics:
- You’ll need a white ink underbase to make colors pop.
- This adds curing time but gives a more vibrant finish.
💡 Pro tip: Always preview your design against the exact fabric color you’ll print on. It avoids dull results or color shifts.
Avoiding Common Design Pitfalls
A few small design mistakes can cost you time, ink, and good shirts.
Watch out for:
- Overuse of gradients: They can look patchy or banded on cotton.
- Tiny text or fine lines: May blur or fade when printed.
- Over-saturated colors: DTG printers have limits, pure neon or metallic shades won’t translate.
- Alignment issues: Always double-check center points in your RIP software before printing.
Tip: Run a quick test print on a spare shirt before doing your full batch. It’s the best way to catch errors early.
Benefits & Limitations of DTG Printing
If you’ve ever wanted to print full-color designs without the mess of screens or transfers, DTG (Direct-to-Garment) printing is probably what caught your eye. But like any method, it has its strengths and trade-offs. Here’s what to know before jumping in.

Benefits of DTG Printing
The main reason people love DTG is how easy and flexible it is. It’s basically digital printing for T-shirts.
Top perks:
- Full-color, photorealistic prints: Perfect for detailed graphics, portraits, or gradients that screen printing can’t handle well.
- No setup costs: You can print one shirt or a hundred — there’s no need for screens, stencils, or plates.
- Low minimums: Ideal for small batches, personalized gifts, or print-on-demand stores.
- On-demand flexibility: Change designs anytime without wasted inventory.
- Soft feel: Since the ink absorbs into the fibers, the print feels smooth, not rubbery like vinyl or transfers.
💡 Example: Flashship.net notes that many small brands use DTG for testing new designs before scaling production.
Limitations of DTG Printing
DTG is awesome for creativity and customization, but it’s not built for every situation.
Potential downsides:
- Slower for bulk orders: Printing each shirt individually takes time.
- Higher cost per unit: Not as cost-effective for hundreds of pieces compared to screen printing.
- Fabric restrictions: Works best on 100% cotton or cotton-rich blends — polyester and dark synthetics can cause poor adhesion.
- Maintenance: DTG printers need regular cleaning and white ink circulation to prevent clogging.
💡 Tip: Gelato and Brother both suggest running weekly maintenance cycles if the printer isn’t used daily to keep ink heads clear.
When DTG Is the Right Choice
Go for DTG if you:
- Run a print-on-demand shop or want to offer custom designs on Etsy, Shopify, or your website.
- Need high-detail artwork like photos, gradients, or shaded graphics.
- Want small runs or one-offs without setup costs.
- Prefer a soft, breathable print over heavy transfer layers.
🛍️ Example: A local artist printing 20 custom tees for an art event or a small brand testing designs before bulk ordering.
When Another Method Might Be Better
DTG isn’t always the hero. Sometimes, another technique makes more sense.
You’re better off with:
| Goal | Better Option | Why |
|---|---|---|
| Large production runs | Screen Printing | Faster and cheaper per unit at scale |
| Polyester or activewear | Dye Sublimation / DTF | Bonds better with synthetics |
| Heavy-duty workwear | Plastisol or Vinyl Heat Transfer | More durable for frequent washing |
| Simple designs in bulk | Screen Printing | Fewer colors, higher efficiency |
💡 Pro tip: If you’re starting a small shop, consider using DTG for custom orders and outsourcing big runs to a screen printer for balance.
Cost, Turnaround & Profit Considerations
Let’s talk numbers. DTG printing can be a great business move, but understanding costs upfront helps you avoid surprises. Here’s how the money side of DTG really works.

Setup Cost vs. Screen Printing
Getting started with DTG isn’t cheap, but it’s way more flexible than traditional setups.
| Expense Type | DTG Printing | Screen Printing |
|---|---|---|
| Machine Cost | $3,000–$25,000+ depending on model | $2,000–$10,000 for full setup |
| Inks & Pretreatment | $200–$400 per liter (white ink costs more) | $50–$100 per gallon of plastisol ink |
| Maintenance | Regular cleaning & nozzle checks | Minimal maintenance |
| Setup Time | Almost instant (no screens or films) | Long prep for each color |
💡 Takeaway: DTG is ideal for startups or e-commerce shops that need flexibility without bulk inventory.
Per-Shirt Cost Breakdown
A big advantage of DTG is skipping setup fees, but your per-shirt cost can vary depending on design size, shirt color, and ink coverage.
| Item | Light Garment | Dark Garment |
|---|---|---|
| Blank Shirt | $3–$5 | $4–$6 |
| Pretreatment | $0 (light shirts often skip) | $0.50–$1.00 |
| Ink Cost | $0.75–$1.50 | $1.50–$3.00 |
| Labor/Time | $1–$2 | $1–$2 |
| Curing (Electric/Press) | $0.25 | $0.25 |
| Total Cost (Estimate) | $5–$8 | $7–$12 |
🧾 Example: A full-front print on a black cotton tee might cost $9 total and sell for $25–$30 retail — leaving a healthy margin.
Turnaround Time
One of DTG’s biggest perks is speed from file to finished product. You can literally print a shirt minutes after uploading the design.
Average workflow:
- Design prep: 5–10 minutes (file setup, color check)
- Pretreat & dry (dark shirts): 2–3 minutes
- Print time: 2–5 minutes per shirt
- Curing: 1–2 minutes using a heat press or conveyor dryer
Total: Around 10–15 minutes per shirt, start to finish.
⚡ Optimization Tip: Batch pretreatments and use RIP software presets to save up to 30% of total production time.
Profit Modeling & Pricing Strategy
DTG gives you flexibility with pricing, especially for custom, one-off, or niche orders.
Example pricing model:
- Light shirt: $6 cost → sell for $22–$25
- Dark shirt: $9 cost → sell for $28–$35
- Bulk order discount: 10–15% off for 10+ units
💡 Formula to estimate profit:Selling Price - Total Production Cost = Gross Profit
Pro Tip: Always factor in shipping, packaging, and platform fees (if selling online) to calculate real profit margins.
Case Example: Small Business Use
Example:
A small custom apparel brand in Spokane prints 25 shirts for a local music event.
- Each shirt costs ~$8 to produce (including ink and labor).
- Sold for $25 each.
- Total revenue: $625, profit around $425.
- Turnaround time: 1 day (design + print + cure).
📈 Why it works: No bulk setup, quick turnaround, personalized designs that fans love, the perfect combo for local events or e-commerce.
Want a complete look at all print technologies? Don’t miss our expert guide comparing DTG, DTF, Sublimation, and Embroidery — it’s perfect for scaling or upgrading your setup.
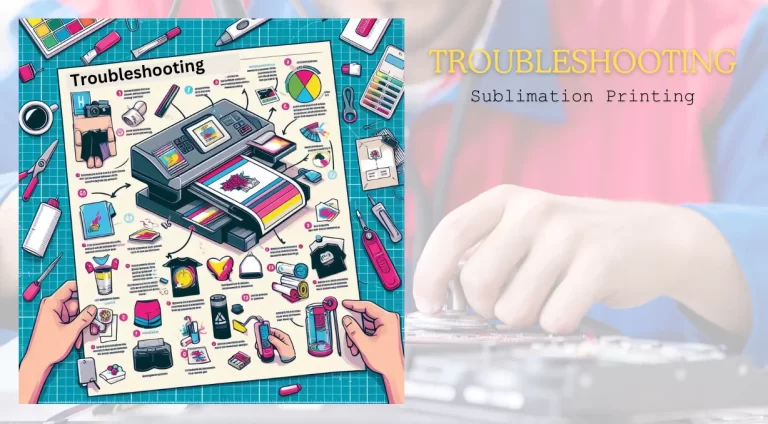
Quality Control & Troubleshooting
Even the best DTG printer can’t save a job if the prep or maintenance is off. Quality control is what separates a professional print shop from a hobby setup. Here’s how to spot issues early, fix them fast, and keep your prints looking sharp.

Common Print Problems
Most DTG issues fall into a few repeat offenders. If you’ve noticed one of these, you’re not alone:
| Problem | What It Looks Like | Typical Cause |
|---|---|---|
| Fading or dull colors | Print looks washed out after curing or washing | Low pretreatment, under-curing, or wrong fabric blend |
| Peeling or cracking | Design lifts after washing | Too much pretreat or under-curing |
| Color shift | Colors print differently than on-screen | RGB-to-CMYK mismatch or old ink |
| Ink bleeding | Edges look fuzzy or blurred | Over-saturation or low-quality cotton |
| Misalignment | Design off-center or crooked | Incorrect platen setup or garment wrinkling |
💡 Quick tip: Always inspect the first print of every batch before continuing. A 30-second check can save an entire run.
Root Causes & Fixes
1. Fabric selection matters:
Stick with 100% cotton or high-cotton blends. Avoid cheap polyester tees — they resist water-based DTG inks.
2. Pretreatment consistency:
Use a pretreat machine or spray evenly. Too little = faded colors. Too much = peeling. Let it dry fully before printing.
3. Proper curing:
Cure at 320°F (160°C) for about 90–120 seconds using a heat press or conveyor dryer. Under-curing causes fading, over-curing can yellow the fabric.
4. Regular maintenance:
Clean print heads and capping stations weekly, especially if you use white ink (it clogs easily). Keep humidity around 45–60% to avoid nozzle drying.
Wash Test & Durability
To check long-term quality, perform a simple wash test:
- Print a test shirt and cure it properly.
- Wash it inside-out in cold water, tumble dry low.
- Inspect for color fading, peeling, or cracking after 5–10 cycles.
If you’re printing for customers, include these care tips with every order:
- Wash inside-out in cold water.
- Use mild detergent, no bleach or fabric softeners.
- Tumble dry low or hang dry.
- Don’t iron directly on the print.
💡 Bonus: Offering a printed care card adds a professional touch and reduces refund requests.
Maintenance Schedule
Regular maintenance keeps your printer running like new — and saves you from costly downtime.
| Task | Frequency | Why It Matters |
|---|---|---|
| Clean print heads & nozzles | Daily or before each print session | Prevents clogging, ensures smooth ink flow |
| Check platen height & alignment | Weekly | Keeps prints crisp and evenly applied |
| Wipe ink overspray & lint | After every run | Reduces banding and stray marks |
| Replace filters & caps | Monthly | Keeps ink system stable |
| Full system calibration | Quarterly | Maintains accurate color output |
💡 Example: Kornit Digital recommends daily cleaning of print heads and capping stations, especially when running white ink, to extend printer life.
Looking for your first machine? Our guide on the Top DTG Printers for Newbies covers models that balance print quality, speed, and ease of setup.
Scaling Your DTG Business & Best Practices
Investing in scalable tech and automation early can double your output without doubling your workload.

Workflow Optimization
Efficiency is everything when your orders start piling up. Streamlined systems save hours and help you handle more jobs with the same setup.
Key ways to speed things up:
- Batch jobs by shirt type and color: This reduces platen swaps and ink changes.
- Use print queues and automation tools: Most RIP software (like Caldera or Brother GTX Graphics Lab) lets you queue multiple prints in advance.
- Standardize design templates: Keep consistent file sizes, placements, and DPI settings for faster prep.
- Pre-treat in batches: Pre-treat and dry multiple shirts ahead of time to keep printing continuous.
💡 Pro tip: Label shirt stacks by size and color before printing to cut down handling time between jobs.
Inventory & Fulfillment
Scaling isn’t just about printing faster, it’s about delivering efficiently.
You have three main fulfillment models:
| Model | How It Works | Best For |
|---|---|---|
| In-house production | You print and ship directly | Local brands or small shops |
| Print-on-demand | Integrate with Etsy, Shopify, or Printify | Artists, creators, and e-commerce startups |
| Dropshipping | Partner with suppliers who print & ship for you | Scaling without storage space |
Inventory tips:
- Store blanks in a cool, dry, lint-free area to avoid pretreat or ink issues.
- Track stock digitally with barcodes or spreadsheets.
- Start small with popular colors (black, white, heather gray) and expand as orders grow.
💡 Example: Many Subli Genius Print clients use DTG-on-demand to fulfill online store orders without holding bulk inventory.
Marketing & Customization
This is where DTG really shines — unlimited creativity. Use it to build a brand that feels personal and memorable.
Ideas to market your DTG services:
- Offer limited drops or seasonal collections to drive urgency.
- Promote customization: Names, logos, or small design tweaks add perceived value.
- Collaborate with influencers or local artists for co-branded designs.
- Show behind-the-scenes videos of your printing process — it builds trust and curiosity.
💡 Tip: Make your brand visible on every order, tags, packaging, or care cards turn one-time buyers into repeat customers.
Sustainability & Eco-Friendly Angle
DTG printing naturally supports a greener approach compared to older methods.
Why it’s eco-friendlier:
- Water-based inks: Non-toxic and safe for skin contact.
- Minimal waste: No screens, no chemicals, no leftover prints.
- On-demand production: Print only what’s sold, avoiding overstock and landfill waste.
- Less energy use: Compact machines and targeted curing mean lower power draw.
💡 Note: Kornit Digital emphasizes sustainability as a major trend, developing DTG systems that recycle wastewater and use biodegradable inks.
Future Trends in DTG Printing
DTG tech is evolving fast. Staying ahead of these trends can help your business stay competitive:
- Hybrid printing systems: DTG + DTF combos for both cotton and polyester prints.
- Faster, industrial-level machines: High-speed units capable of 100+ shirts per hour.
- Expanded fabric compatibility: Better performance on blends, synthetics, and textured surfaces.
- Automated pre-treat and curing units: Reducing manual steps and improving consistency.
- AI-driven color correction and job routing: Smarter, more efficient production management.
If you’re still deciding which printing method fits your business, check out our full breakdown on DTG vs Sublimation printing to see how each one handles color, cost, and fabric options.