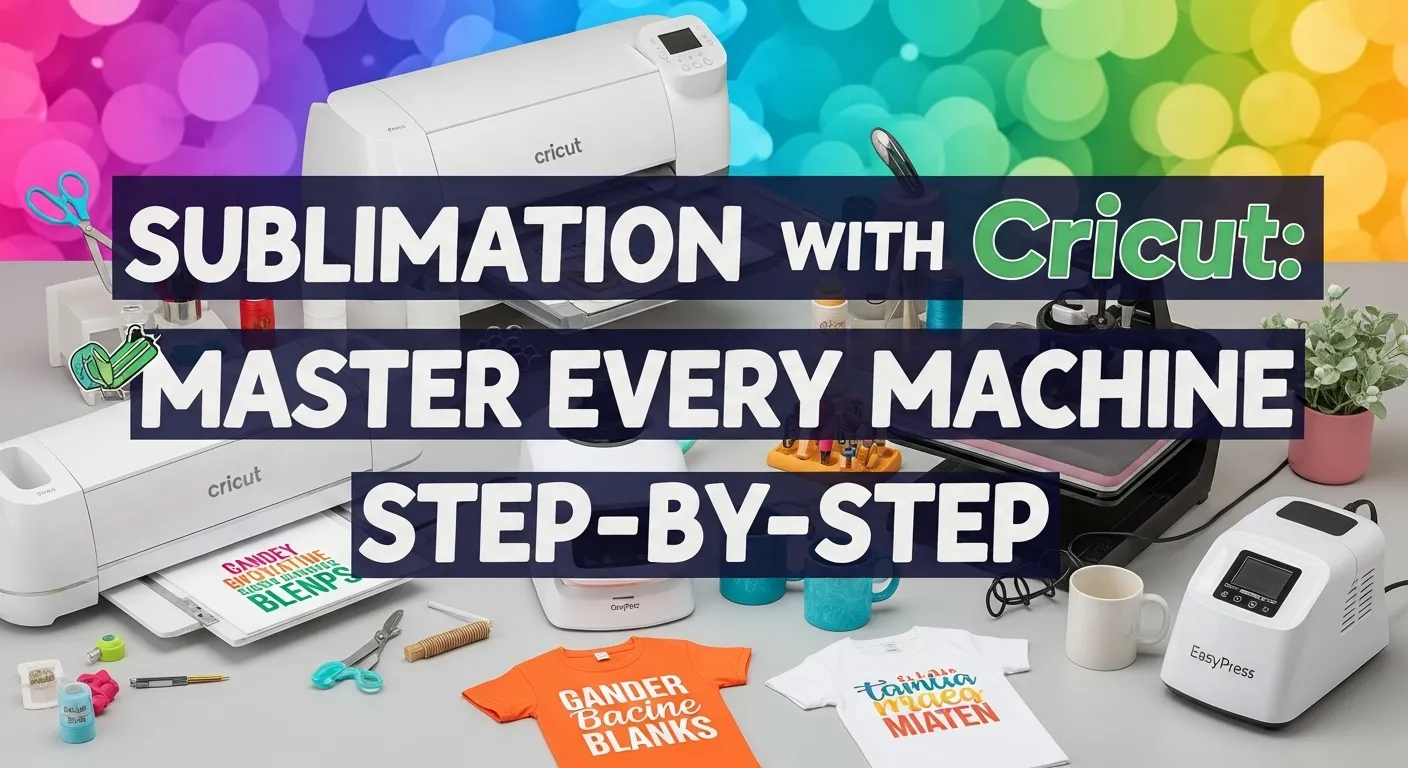
Sublimation with Cricut: Master Every Machine Step-by-Step
Sublimation with Cricut opens the door to pro-level printing at home, but most beginners hit a wall trying to make it work. Maybe your designs look faded, your mug press leaves ghosting, or you’re just not sure which Cricut machine to use.
You’ll get clear, tested steps for turning any Cricut setup into a sublimation powerhouse, no guesswork, no wasted blanks. Whether you’re crafting shirts, mugs, or tumblers, everything you need is covered.
Here’s what you’ll learn:
- Which Cricut machines actually work for sublimation
- Must-have tools and materials (and what to skip)
- Easy setup for Design Space, presses, and printers
- Pro tips to avoid common mistakes
Why Sublimation with Cricut Matters
Sublimation with Cricut brings custom printing within reach. If it’s a mug, t-shirt, or tote bag, users want crisp, lasting results without needing a commercial setup. That’s where this combination stands out. It offers a creative workflow that pairs artistic control with practical application.
The process starts with a few key tools:
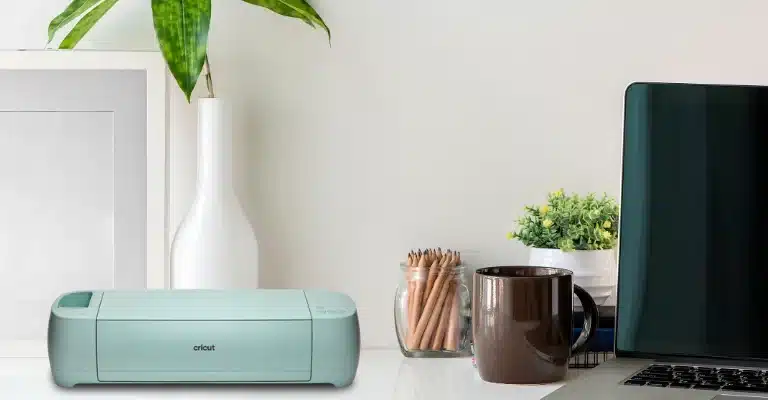
- A Cricut machine (like Maker 3, Explore Air 2, or Joy)
- A sublimation printer loaded with compatible ink
- A heat press (EasyPress, Mug Press, or similar)
Each plays a distinct role. Cricut handles precision cutting and design setup. The printer lays down vibrant ink on special transfer paper. Then the heat press fuses the design into the blank surface using controlled time and temperature.
This guide cuts through the clutter and answers the most common questions:
- Which Cricut machines support sublimation workflows?
- What materials work best for different projects?
- How should settings be adjusted for paper, heat, and pressure?
- Which combinations of tools give consistent results without trial and error?
What Is Dye Sublimation?
Dye sublimation uses heat to turn ink into gas, bonding it directly into polyester or coated materials. This creates permanent, high-resolution prints that resist fading, cracking, or peeling.
It works only with:
- Polyester fabrics (65% or more)
- Polymer-coated blanks (mugs, tumblers, etc.)
- Ink and transfer paper
Unlike vinyl, sublimation has no raised surface and offers full-color flexibility. It outlasts heat transfer vinyl and gives better control than Cricut Infusible Ink.
| Method | Durability | Feel | Materials |
|---|---|---|---|
| Sublimation | Permanent | No texture | Polyester, coated |
| HTV | Can peel/crack | Raised feel | Cotton, blends |
| Infusible Ink | Permanent | Smooth | Polyester only |
Why Use Cricut for Sublimation?
Cricut machines handle cutting and design tasks that make sublimation easier and cleaner. With tools like Design Space and Print Then Cut, users can prep transfers with precision.
Top Cricut tools:
- Cricut Maker 3 and Explore Air 2 (Print Then Cut)
- EasyPress and Mug Press (heat control)
- Joy and Mini Press (compact projects)
Pairing Cricut with a sublimation printer gives creators full control, low setup cost, and pro-quality results without commercial gear.
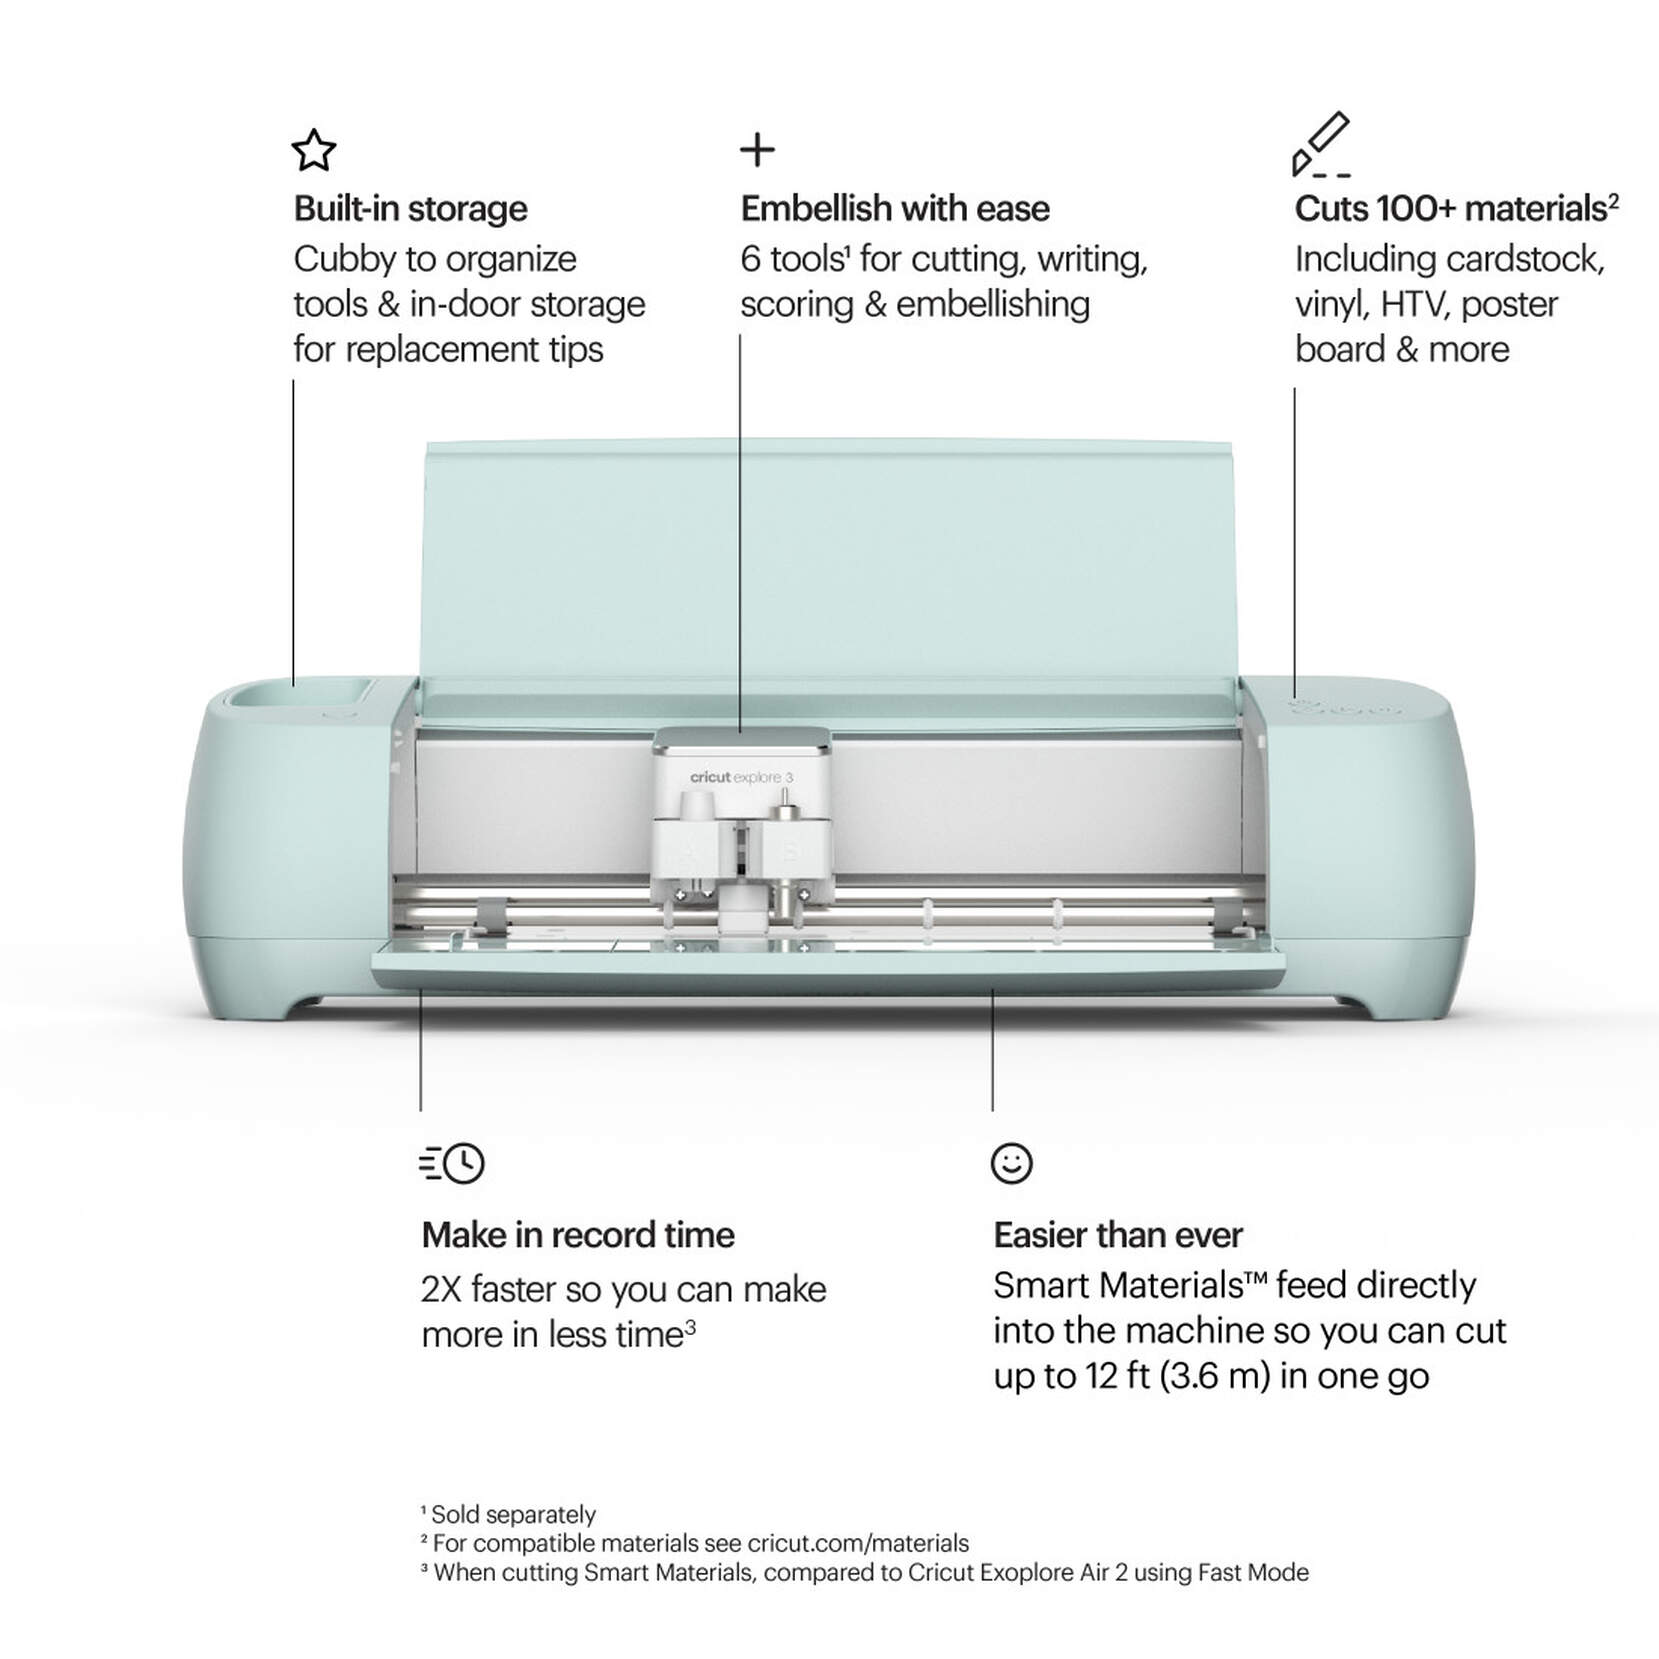
Cricut Maker 3
This is the powerhouse. Maker 3 handles almost anything you throw at it. It supports Print Then Cut, takes larger cuts, and has the strength to work with thicker materials. If you’re serious about sublimation or want room to grow, this one feels the most flexible.
Why it stands out
• Perfect alignment with Print Then Cut
• Larger workspace for shirts, totes, and big transfers
• Great for cutting jigs, templates, and thicker blanks
• Fast and reliable for daily use
| Pros | Cons |
|---|---|
| Fast, powerful cuts | Higher price |
| Great for large sublimation designs | May feel advanced for beginners |
| Handles templates, stencils, jigs | Larger footprint |
| Best Print Then Cut accuracy | — |
Cricut Explore Air 2
This is the “starter favorite” because it gives you all the essentials without the price jump. It supports Print Then Cut, cuts well, and handles most sublimation prep tasks easily.
Why people love it
• Super beginner friendly
• Cuts clean and fast
• Works great for trimming sublimation transfers
• Affordable compared to Maker models
| Pros | Cons |
|---|---|
| Affordable and beginner friendly | Slower than Explore 3 |
| Solid Print Then Cut | Can’t cut as many thick materials |
| Great for shirts and medium items | Less future-proof |
Cricut Explore 3
Think of Explore 3 as the Air 2 but faster and smoother. It still supports Print Then Cut, works with your usual materials, and helps you move through projects a little quicker.
Why it’s a nice upgrade
• Faster cutting
• Better tracking and registration
• Great balance of price and performance
| Pros | Cons |
|---|
| Faster and smoother | Costs more than Air 2 |
| Great for Print Then Cut | Not as strong as Maker models |
| Good for shirts and larger transfers | — |
Cricut Maker (Original)
This one is still powerful. It’s not as fast as the Maker 3, but it cuts almost the same materials and supports Print Then Cut perfectly. A solid option if you find it on sale.
Why it still holds up
• Strong cutting force
• Good for stencils, templates, and jigs
• Reliable Print Then Cut
| Pros | Cons |
|---|---|
| Strong cuts and great versatility | Slower than Maker 3 |
| Excellent for sublimation setups | Older model |
| Handles thick materials | — |
Cricut Joy Xtra
This version finally supports Print Then Cut, which makes it way more useful for sublimation prep. It cuts medium-sized designs and works great for shirts, stickers, tags, and smaller transfers.
Where it fits best
• Medium-size projects
• Printable sticker sheets
• Small apparel and labeling
• Better overall than the original Joy for sublimation tasks
| Pros | Cons |
|---|
| Print Then Cut support | Smaller max size |
| Great for stickers, small shirts | Medium cutting force only |
| Compact and easy to store | Not ideal for large apparel |
Cricut Joy (Original)
This one is tiny, simple, and limited if you’re doing sublimation. There’s no Print Then Cut, so you’d be trimming everything by hand. Still great for micro crafts.
Good for small crafts only
• Labels
• Patches
• Name tags
• Small trims and accents
| Pros | Cons |
|---|---|
| Simple and tiny | No Print Then Cut |
| Great for patches and labels | Very small cut area |
| Cheap and portable | Limited sublimation usefulness |
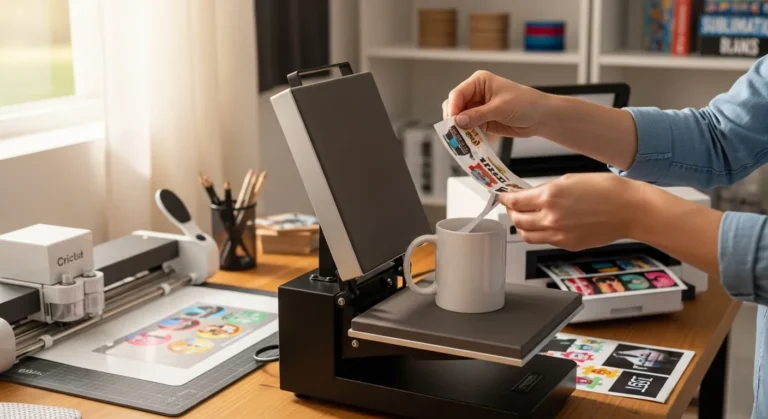
Step-by-Step Sublimation Workflow with Cricut
Taking your Cricut sublimation projects from idea to finished product is easier when you follow a clear workflow. Here’s the step-by-step process for shirts, mugs, tumblers, and more.
Step 1: Design in Cricut Design Space
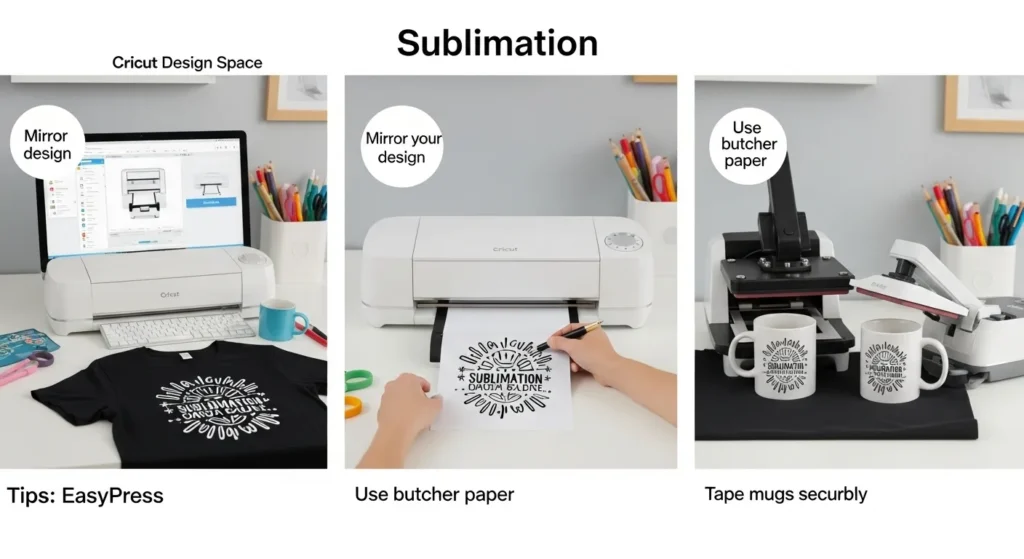
- Open Design Space and create or upload your design.
- Use “Print Then Cut” for precise transfers.
- Tip: Mirror your design if you’re applying it to a t-shirt or reverse-print item.
- Use high-resolution PNGs for best color output.
Step 2: Print with Sublimation Printer
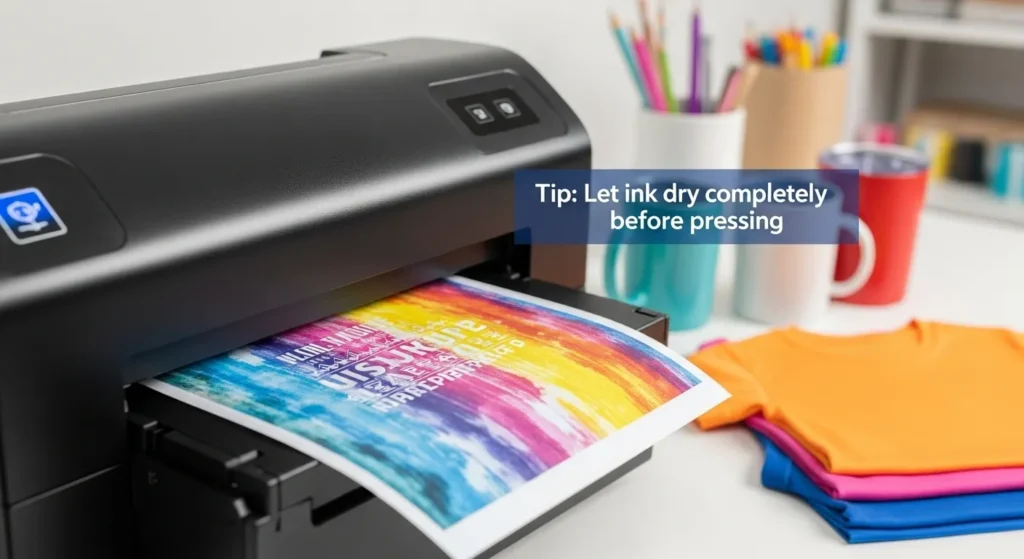
- Print your design on sublimation transfer paper using a compatible sublimation printer.
- Ensure your printer settings are optimized for color and paper type.
- Tip: Let the ink dry completely before pressing to avoid smudges.
Step 3: Prepare Your Blank
- Choose a polyester garment or polymer-coated item.
- Preheat the blank for a few seconds to remove moisture and wrinkles.
- Tip: For tumblers or mugs, wrap your design securely with heat-resistant tape to prevent shifting.
Step 4: Press Your Design
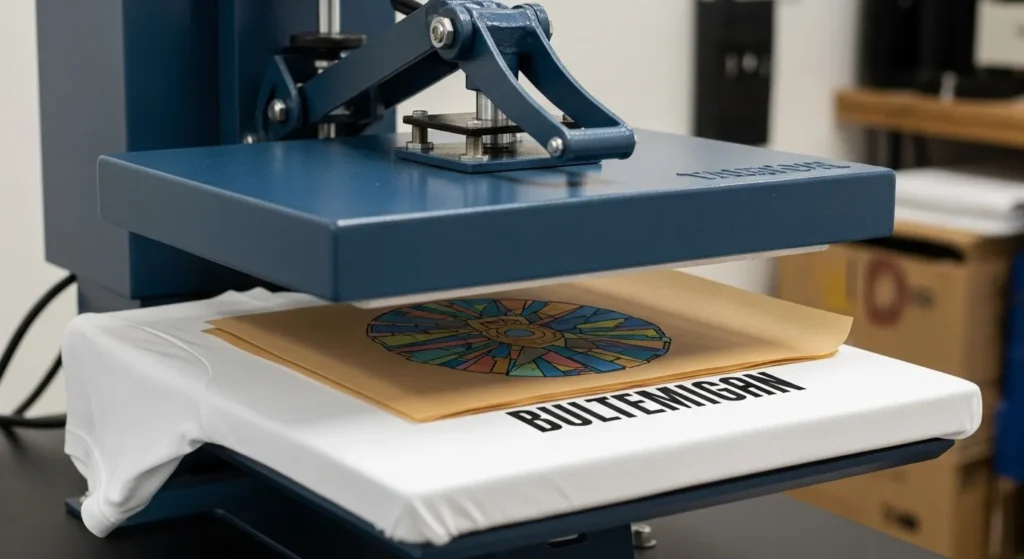
- Use an EasyPress, Mug Press, or Mini Press depending on your blank.
- Set the correct temperature, time, and pressure according to your material.
- Tip: Always use butcher paper or a protective sheet between the heat source and design to avoid scorch marks.
Step 5: Cool and Finish
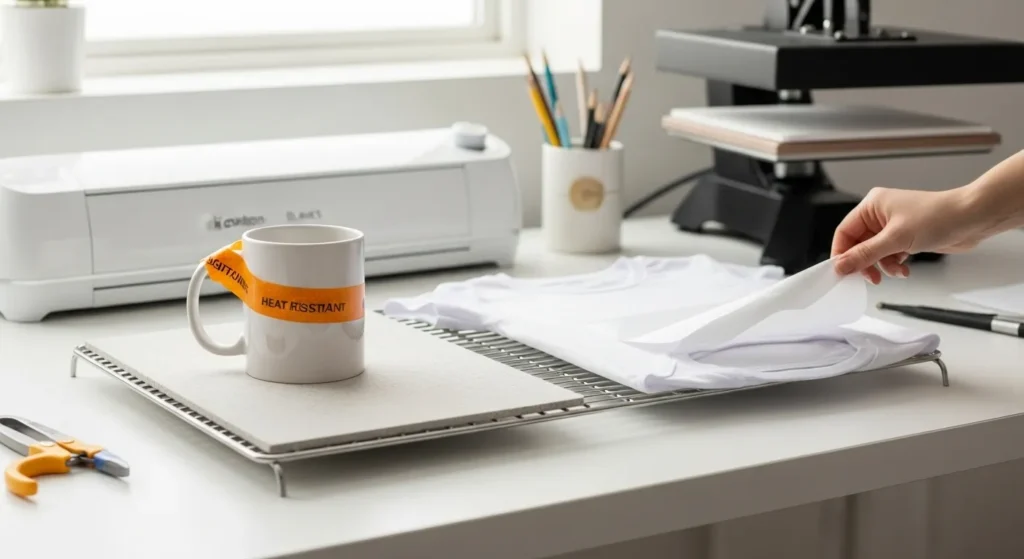
- Allow the blank to cool before removing the transfer paper or tape.
- Inspect your design for sharpness and vibrant colors.
- Tip: For tumblers and mugs, let them cool fully before hand-washing.
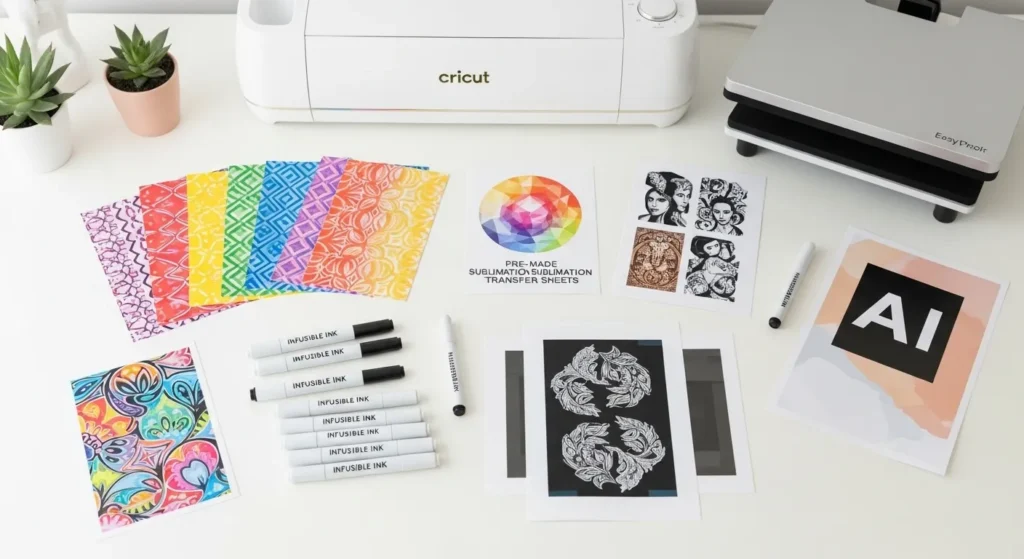
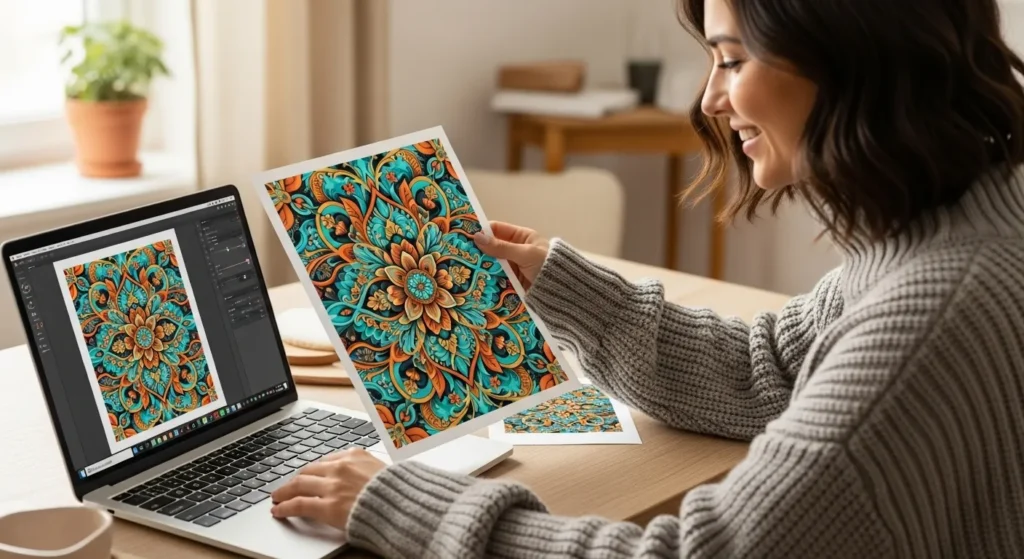
AI-Assisted Sublimation Design Tools
Sublimation gets way easier when you mix your Cricut setup with a few smart AI tools. These apps can spark ideas, generate ready-to-print artwork, and even help you pick color combos that look great on polyester or coated blanks.
Top AI Tools for Sublimation
MidJourney / DALL-E
These image generators turn text prompts into high-res artwork you can print.
Example, “bright watercolor sunflower for sublimation on a 20 oz tumbler” gives you a print-ready design in seconds.
Canva AI
Super simple for quick layouts.
You can tweak templates, swap colors, and export crisp PNGs that work perfectly for sublimation.
Google AI Tools
Google’s AI tools are great for idea-hunting and early design planning.
Search generates reference images, trending styles, and real-world examples so you can build better concepts before you even start designing.
Google Images and their AI-powered results help you find shape references, background ideas, or patterns to inspire your final sublimation artwork.
Other Tools
DeepSeek or Grok are solid for finding design ideas, trending patterns, or style directions.
AI palette generators make it easy to pick colors that pop after pressing.
Why AI Matters for Sublimation
• It’s fast, so you skip hours of trial and error.
• It keeps your colors and styling consistent across multiple items.
• You can try bold ideas without wasting ink or paper.
• Even beginners can create pro-level graphics.
Always check your design resolution before pressing. Aim for 300 DPI, and don’t forget to mirror your image for shirts, mugs, or anything you flip during pressing.
Selecting Cricut Machines & Accessories
Not every Cricut machine supports sublimation the same way. Each model has different strengths, especially when it comes to cutting, image registration, and project size.
1. Cricut Machine Comparison
| Cricut Model | Print Then Cut | Max Size | Cutting Power | Best Uses | Sublimation Use Level | Notes |
|---|---|---|---|---|---|---|
| Maker 3 | Yes | 12 x 24 in | Very strong | Big prints, jigs, thick materials | Excellent | Best all-around for sublimation workflows |
| Explore Air 2 | Yes | 12 x 24 in | Strong | Beginner projects, shirts, totes | Great | Ideal for first-time sublimation users |
| Explore 3 | Yes | 12 x 24 in | Strong | Faster cutting, medium-large projects | Great | Smooth tracking, better speed |
| Maker (Original) | Yes | 12 x 24 in | Strong | Templates, stencils, multi-material crafts | Excellent | Slightly slower than Maker 3 |
| Joy Xtra | Yes | 8.5 x 11 in | Medium | Small-medium sublimation pieces | Good | Great compact Print Then Cut machine |
| Joy (Original) | No | 4.5 x 6.5 in | Low-medium | Labels, tags, tiny crafts | Limited | No Print Then Cut, hand-trimming required |
2. Heat Press Options
Cricut’s heating tools control the transfer process. Choosing the right one depends on your project type and volume.
| Tool | Best For | Heat Range | Size Limitations |
|---|---|---|---|
| EasyPress 2 | Flat items (shirts, bags) | Up to 400°F | 9 × 9 or 12 × 10 inches |
| EasyPress Mini | Hats, patches, shoes | Up to 400°F | Compact items only |
| Mug Press | 11 oz to 15 oz mugs | Auto-adjusts | Cricut-compatible mugs |
| AutoPress | High volume pressing | Digital control | 15 × 12 inch plate |
All Cricut heat tools support sublimation temperatures. For mugs and tumblers, the Mug Press simplifies the curve pressing process with auto timing and heat.
If you’re working with custom drinkware or running batch jobs, the AutoPress offers speed, automation, and even pressure across large blanks.
5 Ways To Sublimate With Cricut Without a Printer
If you don’t have a sublimation printer yet, don’t stress. You can still make awesome projects with your Cricut setup. A lot of beginners start this way because it’s cheaper, faster, and lets you learn the process before buying more gear.
You don’t need your own sublimation printer to start making great Cricut sublimation projects. These five methods let you experiment, practice, and even sell items while keeping your setup simple and affordable.
1. Cricut Infusible Ink Sheets
This is the simplest way to get sublimation-style results. These sheets already come with the dye baked in, so all you do is cut your design and press it.
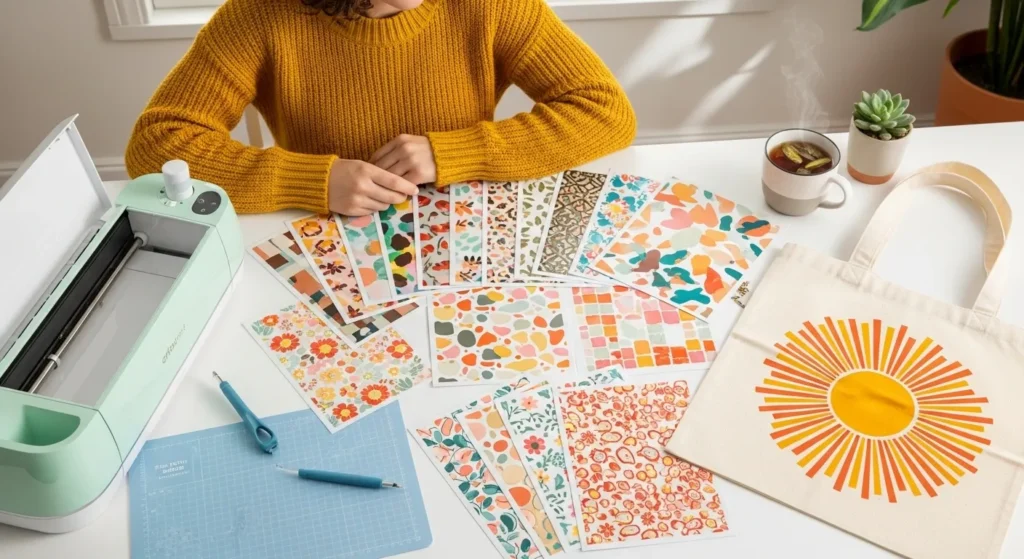
Why it works
The dye transfers into polyester the same way regular sublimation ink does. No raised texture, no peeling, just smooth color.
Best for
Shirts, totes, coasters, patches.
Quick tip
Use light colored polyester blanks for the brightest results.
2. Infusible Ink Markers
These are fun because you’re basically hand drawing your sublimation design. You sketch on plain laser paper, then press it like a normal sublimation sheet.
Why it works
The special marker ink sublimates when heated, so your doodles turn into permanent prints.
Best for
Kids crafts, simple graphics, handwriting, labels.
Quick tip
Draw bold lines for better color after pressing.
3. Pre-Made Sublimation Transfers
You can buy ready-to-press sublimation transfers from online shops or local makers. They print the designs for you, and you just press them with your Cricut heat tools.
Why it works
You get pro-quality prints without buying a printer or dealing with color management.
Best for
Shirts, mugs, tumblers, holiday gifts.
Quick tip
Make sure the transfer is sized correctly before pressing. Some shops offer multiple size options.
4. Screen-Printed Sublimation Transfers
These are specialty transfers made by shops that use larger sublimation printers. They’re often more vibrant than standard premade sheets and perfect if you want a premium finish.

Why it works
They’re printed with real sublimation ink, so the colors pop the same way they would from your own printer.
Best for
High-detail graphics, saturated colors, small business orders.
Quick tip
Press at the exact temperature listed on the transfer because these sheets can be sensitive to overheating.
5. AI Artwork Printed By a Transfer Vendor
If you love designing in AI apps like MidJourney, Canva AI, or DALL-E, you can create the art yourself and send it to a shop that prints sublimation transfers. You still get the creativity of custom designs without needing the printer.
Why it works
You control the design, they handle the printing, your Cricut handles the pressing. It’s the perfect hybrid setup for beginners.
Best for
Matching shirts, themed bundles, custom gifts.
Quick tip
Export at 300 DPI so the print shop gets a clean, sharp file.
Printer-Free Sublimation Options at a Glance
| Method | Best For | Color Quality | Difficulty |
|---|---|---|---|
| Infusible Ink Sheets | Shirts, totes | Bold & bright | Easy |
| Infusible Ink Markers | Kids, handwriting | Soft colors | Very easy |
| Pre-Made Transfers | Clothing, drinkware | High quality | Easy |
| Screen-Printed Transfers | Bold detail artwork | Ultra vibrant | Easy |
| AI Art + Vendor Printing | Custom designs | Varies | Moderate |
Sublimation vs. Heat Transfer Vinyl (HTV)
Depends on the surface, the look you want, and how you plan to scale your projects. Both methods have their strengths. The key is knowing when to lean into the speed and vibrancy of sublimation and when the cut-and-press flexibility of HTV makes more sense.
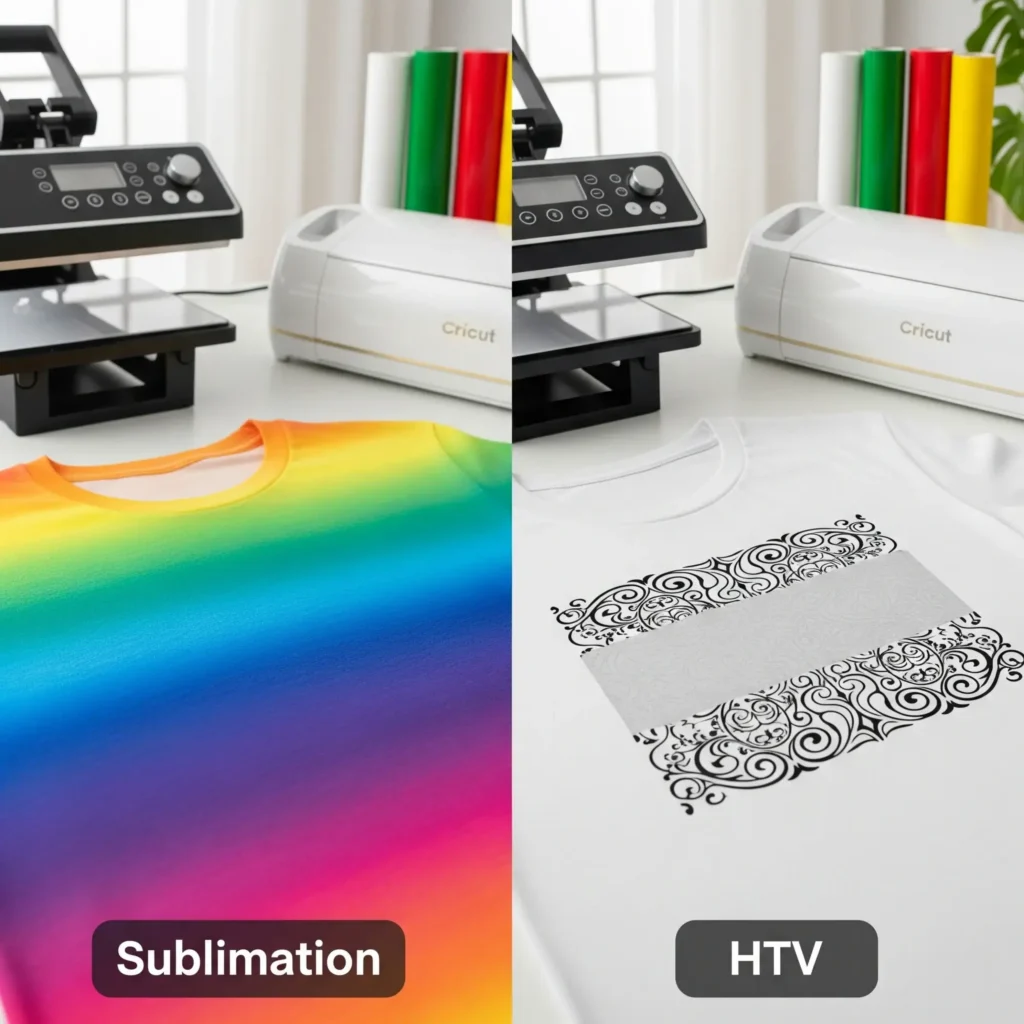
What Is Heat Transfer Vinyl (HTV)?
Heat Transfer Vinyl is a colored film that gets cut into shapes or text, then pressed onto a material using heat and pressure. It sticks to the surface, forming a durable design that sits on top of the fabric.
HTV comes in matte, glossy, glitter, and even glow-in-the-dark finishes. It’s widely used for team shirts, slogans, and multi-layered text designs.
Where Sublimation Pulls Ahead
It fuses into the fabric or coated blank. That makes it ideal for long-lasting prints where durability and vibrancy matter most.
Why choose sublimation:
- Colors stay bright, even after dozens of washes
- No cracking, peeling, or lifting over time
- Perfect for polyester garments, mugs, tumblers, and coated metal
- Skip the weeding process, just print, press, and go
- Better suited for full-color, photo-quality prints
What HTV Does Well
HTV still holds its ground, especially where fabric flexibility and color variety matter. It cuts clean on a Cricut and can be layered, making it ideal for multi-tone graphics without complex printing.
Where HTV works better:
- Applies to cotton, polyester, and blends
- Works on dark or colored garments using opaque vinyl
- Great for small text, fine lines, or sharp edges
- Ideal when a textured, raised design is preferred
- No printer required
Side-by-Side Comparison
| Feature | Sublimation | Heat Transfer Vinyl (HTV) |
|---|---|---|
| Durability | Ink becomes part of material | Vinyl layer sits on top |
| Fabric Compatibility | Polyester, poly-coated items | Cotton, blends, polyester |
| Works on Dark Colors | No (unless using EasySubli) | Yes (with opaque vinyl) |
| Full-Color Prints | Yes (photo-quality) | No (limited to vinyl colors) |
| Equipment Needed | Sublimation printer, heat press | Vinyl cutter, heat press |
| Design Flexibility | Best for full prints, gradients | Best for simple, layered shapes |
| Startup Cost | Higher | Lower |
💰 Maximize your sublimation profits with our easy-to-use craft calculators!
Try Our Calculators Now →Which Method is Better Suited for Specific Projects?
Depend on the specific needs of your project. Sublimation printing is better suited for projects that require vibrant and long-lasting prints on various materials.
At the same time, HTV is better suited for projects that require intricate designs and the ability to print on dark materials. Ultimately, the choice will depend on your specific project requirements and budget.
Comparison table of features
| Features | Sublimation | Heat Transfer Vinyl (HTV) |
|---|---|---|
| Material | Dye is infused into fabric | Vinyl film adhered to fabric |
| Image Quality | High resolution, vibrant | Crisp, solid colors |
| Durability | Long-lasting, won’t crack | Durable, but may crack over time |
| Fabric Compatibility | Polyester, polyester blends | Wide range of fabrics |
| Production Time | Takes longer, requires heat press | Quick and easy, can be done with an iron |
| Design Flexibility | Can print all-over designs | Limited by the size of the vinyl roll |
| Cost | More expensive upfront | Less expensive upfront |
| Complexity | Requires more technical expertise | Easy to use and beginner-friendly |
| Environmentally-Friendly | Produces waste in the form of paper | Produces waste in the form of vinyl scraps |
Pros:
| Pros | Sublimation | Heat Transfer Vinyl (HTV) |
|---|---|---|
| Image Quality | High resolution, vibrant | Crisp, solid colors |
| Durability | Long-lasting, won’t crack | Durable, but may crack over time |
| Design Flexibility | Can print all-over designs | Limited by the size of the vinyl roll |
| Fabric Compatibility | Polyester, polyester blends | Wide range of fabrics |
| Production Time | Takes longer, requires heat press | Quick and easy, can be done with an iron |
| Cost | More expensive upfront | Less expensive upfront |
Cons:
| Cons | Sublimation | Heat Transfer Vinyl (HTV) |
|---|---|---|
| Material | Dye is infused into fabric | Vinyl film adhered to fabric |
| Complexity | Requires more technical expertise | Easy to use and beginner-friendly |
| Environmentally-Friendly | Produces waste in the form of paper | Produces waste in the form of vinyl scraps |
| Cost | More expensive upfront | Less expensive upfront |
| Durability | N/A | May crack over time |
✨ See Guide about Sublimation Printing ✨
Find out sublimation printing our comprehensive resources! If you’re a beginner or looking to upgrade your skills, we’ve got you covered. 🎨
- 🖨️ Professional printer recommendations
- 🌈 Color management techniques
- 👕 Tips for perfect transfers every time
Start creating stunning sublimation projects today! ✨
Real Project Examples with Cricut Sublimation
Trying sublimation for the first time? Here are some real projects you can make with your Cricut + sublimation setup, plus expert tips to make each one look professional.
1. Mugs
- Use polymer-coated mugs compatible with sublimation.
- Wrap your printed design tightly with heat-resistant tape to prevent shifting.
- Use a Mug Press or a heat wrap on a standard press for even heat distribution.
- Tip: Let mugs cool fully before hand-washing to preserve colors.
2. Tumblers
- Sublimation works great on stainless steel or coated tumblers.
- Wrap designs securely with heat-resistant tape and use a sublimation wrap or jig for even pressure.
- Tip: Use parchment paper or butcher paper to avoid transferring ink to your press or other surfaces.
3. Shirts / Apparel
- Only use polyester or high-polyester blend shirts for crisp, vibrant results.
- Use an EasyPress 2 or similar flat press. For small areas, the 12×12 mat works perfectly.
- Tip: Preheat the shirt for a few seconds to remove moisture and wrinkles before pressing.
4. Totes / Bags
- Choose polyester canvas totes or polymer-coated bags for the best sublimation results.
- Flatten the surface, preheat briefly, and protect the back with cardboard or butcher paper.
- Tip: For multi-color designs, press one section at a time to prevent color bleeding.
✅ Quick Pro Tips Across Projects:
- Always mirror designs when needed.
- Use butcher paper or protective sheets under the press to avoid scorch marks.
- Pre-test a blank if you’re using a new type of material.
- Keep your workspace bright and organized, small mistakes happen when things are rushed.
Cost & ROI Tips for Sublimation Projects
Turning your Cricut sublimation projects into a profitable business starts with understanding costs and setting smart prices. Here’s how to approach it step-by-step.
1. Calculate Material Costs
Break down every item used in your project:
| Item | Example Cost | Notes |
|---|---|---|
| Sublimation Ink | $0.50 per print | Cost per ml or per print size |
| Transfer Paper | $0.25 per sheet | Depends on size of design |
| Blank Item | $3–$10 | Shirt, mug, tumbler, tote, etc. |
| Heat Press / EasyPress Wear & Tear | $0.10 | Estimated per item |
| Tape / Butcher Paper | $0.05 | Small usage per project |
| Misc Supplies | $0.05 | Gloves, mitts, etc. |
💡 Tip: Total material cost for a mug may be ~$4–5, a shirt ~$5–8 depending on blank quality.
2. Factor in Labor & Time
- Estimate time spent per project, including design, printing, pressing, and finishing.
- Decide your hourly rate for labor.
- Example: If it takes 30 minutes for a shirt and your labor rate is $20/hr → add $10 per shirt.
3. Add Overhead & Profit Margin
- Include electricity, workspace, marketing, and equipment depreciation.
- Add your desired profit margin, typically 50–100% markup on total costs.
Example Pricing Formula:
Total Material Cost + Labor + Overhead = Base Cost
Base Cost x Profit Margin = Suggested Price
Example:
- Mug: $5 materials + $2 labor + $1 overhead = $8
- Profit margin 75% → $8 x 1.75 ≈ $14 retail price
4. Pricing Tips
- Offer bundle deals for shirts, mugs, or tote sets to increase average order value.
- For custom multi-color or multi-layer designs, charge extra for complexity.
- Track best-selling items to adjust pricing strategy.
- Keep a spreadsheet of costs, so pricing stays consistent and profitable.
💡 Pro Tip: Always test the market. Start with a slightly lower price for early customers to gain reviews, then increase as demand grows.
Troubleshooting Common Sublimation Errors
Even experienced crafters hit snags sometimes. Here’s how to fix the most common sublimation problems when using Cricut setups.
1. Ghosting (Blurry or Double Images)
- Cause: Design shifted during pressing or heat/pressure was inconsistent.
- Fix:
- Use heat-resistant tape to secure your transfer.
- Ensure the blank surface is completely flat and stable.
- Double-check alignment in Cricut Design Space before pressing.
2. Faded Prints
- Cause: Incorrect temperature, insufficient time, or low-quality sublimation ink/paper.
- Fix:
- Verify your heat press temperature and timing match the material.
- Use high-quality sublimation ink and paper.
- Preheat the blank to remove moisture for vibrant colors.
3. Misalignment
- Cause: Design placement is off, especially with Print Then Cut.
- Fix:
- Use registration marks in Design Space for accurate cutting.
- Ensure the blank is properly positioned on the press.
- For larger items, consider pressing in sections to maintain alignment.
4. Bleeding or Smudging
- Cause: Ink spreads outside the intended design, often due to excess heat, pressure, or moisture.
- Fix:
- Use butcher paper or protective sheets to control heat transfer.
- Avoid over-saturating the transfer paper.
- Check that the blank is completely dry before pressing.
💡 Pro Tip: Always do a test press on a small area or sample blank before running full projects, especially with new blanks or inks.
Advanced Tips & Pro Tricks for Sublimation with Cricut
Once you’ve mastered the basics, these advanced techniques will help you create more professional, creative, and unusual sublimation projects.
1. Sublimating on Unusual Items
- Think beyond shirts and mugs—sublimation works on items like phone cases, metal water bottles, coasters, keychains, and ornaments.
- Tip: Make sure the blank is polymer-coated or polyester-based for vibrant, permanent results.
- For curved or uneven surfaces, use heat-resistant wraps or jigs to maintain pressure evenly.
2. Masking Techniques
- Masking helps prevent accidental ink transfer to areas you want to remain blank.
- How: Use heat-resistant tape or masking sheets to block parts of your blank during pressing.
- Tip: Perfect for multi-color designs, layered effects, or partial prints on apparel or bags.
3. Multi-Layer Designs
- Combine sublimation with cut vinyl or Cricut Infusible Ink for layered looks.
- Pro Tip: Press each layer carefully and ensure alignment using registration marks in Design Space.
- Test layering on scrap blanks first to avoid misprints.
4. Color Optimization
- Use AI tools or color palette generators to pick combinations that pop on polyester or coated surfaces.
- Tip: High-contrast colors appear more vibrant; pastel shades may require slightly higher heat or multiple passes on coated items.
5. Speed and Batch Production
- For batch projects, organize blanks, press times, and designs in advance.
- Tip: Use AutoPress or EasyPress mats for consistent pressure across multiple items.
- Keep a checklist of temperature, time, and pressure settings for each material type.
💡 Pro Tip: Always do a small test print when trying a new blank, technique, or color combination. It saves time, ink, and frustration.

2 Comments