Sublimation Settings for Large Images on Cricut
If you’ve been trying to make a big, bold sublimation design with your Cricut and keep running into size limits or weird color issues, you’re not alone. Most people hit the same wall the second their artwork goes past Cricut’s 9.25 x 6.75 Print Then Cut limit.
The good news is you can totally print large images, you just need the right settings and a simple tiling workflow.
You’re probably wondering if your Cricut can even handle this or how to make it all work without the guesswork.
✨ Sublimation for Large Cricut Images ✨
Create vibrant, edge-to-edge designs that last
Ever wondered how to make stunning large sublimation designs with your Cricut? This guide reveals the perfect settings and techniques to make your big projects pop with color!
Max Size
9.25″ × 13.5″ (Print Then Cut limit)
Temperature
385°F (196°C) ideal range
Press Time
45-60 seconds
🔥 Why Sublimation Wins for Large Designs
- Seamless edge-to-edge printing
- Vibrant colors that won’t fade
- Durable against washing and wear
- No cracking or peeling over time
What You’ll Learn:
Ready to create show-stopping sublimation projects? Let’s see! 👇
What Counts as a “Large Cricut Sublimation Image”
If you’re wondering what actually qualifies as a “large” sublimation image on a Cricut, here’s the simple way to think about it.
A large Cricut sublimation image is anything bigger than 9.25 x 6.75 inches, which is the max size Cricut lets you print with the standard Print Then Cut feature.
Once your design goes past that limit, you’re officially in oversized sublimation territory, which means you’ll need one of these approaches:
- Tiling the image and printing it in pieces
- Using a wider sublimation printer so you can print it in one shot
- Bypassing Design Space for printing and only using Cricut for cutting or pressing
- Switching to full-sheet sublimation instead of Print Then Cut
Why this matters: the second your design passes that 9.25 x 6.75 box, Cricut stops acting like a full printer and becomes more of a helper tool. That’s where tiling, larger presses, and wide-format printers step in.
When Cricut Is Enough vs When You Need a Bigger Printer
Here’s the quick breakdown, because this is one of the biggest points people get stuck on. Your Cricut can handle a lot, but there’s a point where it stops being practical for oversized sublimation.
When Your Cricut Setup Is Enough
Stick with your Cricut when your designs fall into these situations:
- Anything under 9.25 x 6.75 inches
Great for pocket prints, logos, kids’ shirts, tumblers, tags, coasters, small transfers. - Medium prints that can be tiled cleanly
Designs up to about 13 x 19 inches tile pretty easily using 2–4 pieces. - You only need Cricut for cutting, not printing
If your sublimation printer can handle 8.5 x 11 or 8.5 x 14 paper, your Cricut is just a helper. - You’re only pressing part of the shirt
Chest prints, center graphics, and front-only designs are all Cricut-friendly.
Real world example
If you’re making a 10-inch birthday shirt design, your Cricut setup works fine with two tiles or a full-sheet sublimation print.
When You Absolutely Need a Bigger Printer
If you’re trying to produce anything that’s truly oversized, a wide-format sublimation printer saves a ton of time.
You’ll want a bigger printer when:
- Your design is larger than 13 x 19 inches
This is where tiling gets messy and seams become noticeable. - You want edge-to-edge prints
Think all-over shirts, big back graphics, jersey numbers, large art prints, car seat covers, pillowcases, hoodies, etc. - You need speed
Printing 8 tiles vs 1 sheet? No contest.
On average, crafters save 30 to 40 percent prep time with a 13-inch or 24-inch wide printer. - You’re working on bulk orders
Etsy sellers, team jerseys, business merch, etc.
Tiling 25 designs gets old real fast. - You want perfect color consistency
Larger printers work better with RIP software or advanced color profiles.
Real world example:
A small shop printing 12 oversized 16-inch back graphics for a family reunion would spend about 45 minutes tiling and taping the job with a regular printer.
With a wide-format printer, the same job takes under 10 minutes.
Quick Comparison Table
| Task | Cricut Setup Works | Larger Printer Needed |
|---|---|---|
| 8–10 inch shirt design | ✔️ | |
| 11–13 inch center print | ✔️ If tiled | |
| Large back print (15–18 inches) | ✔️ With effort | ✔️ Much easier |
| All-over shirt | ✔️ Required | |
| Pillowcases, blankets, large panels | ✔️ Required | |
| Bulk orders | ⚠️ Slow | ✔️ Faster |
| Seamless designs | ⚠️ Tricky when tiled | ✔️ Clean edges |
TLDR Settings for Large Cricut Sublimation Images
If you just want the quick settings without digging through the whole guide, here’s the fast version most people use for oversized sublimation prints made with Cricut tools, Easy Press, or a standard heat press.
Basic Large Image Settings
These work for about 90 percent of Cricut sublimation projects.
Temperature
385°F to 400°F
Press Time
45 to 60 seconds
Pressure
Medium to firm
Paper
100–120 gsm sublimation paper
(heavier paper helps for big designs so it doesn’t curl)
Fabric
At least 65 percent polyester
100 percent poly gives the brightest colors
Tiled Design Settings
If you’re piecing your design together in tiles, use this quick setup.
- Add 0.25 inch overlap per tile
- Use registration marks on each section
- Tape with heat-resistant tape so nothing shifts
- Press with slight overlaps to avoid cold spots
- Let cool 10–15 seconds before peeling
Heat Press Size Cheat Sheet
Your press size changes how you handle oversized prints.
| Heat Press Size | What You Can Press |
|---|---|
| 9 x 9 | Small sections only, must tile heavily |
| 12 x 10 | Medium prints, 2–3 sections |
| 15 x 15 | Most large shirt graphics, minimal tiling |
| 16 x 20 or larger | Full-size graphics, nearly seamless |
Quick Checks Before You Press
- Mirror your artwork
- Pre-press your shirt for 5–10 seconds
- Lint roll everything
- Keep pressure even across the whole area
- Avoid touching the design until it cools
Overcoming Size Constraints for Large Sublimation Images
Top Key Facts:
- Cricut Print Then Cut Limit: Standard size caps at 9.25″ x 6.75″ a real roadblock for large sublimation projects.
- Tiling Success Rate: 85% of Cricut users report seamless results when splitting images correctly, per a 2024 crafting survey.
- Large Printer Boost: Wide-format sublimation printers can handle designs up to 24″ wide, cutting prep time by 40%.
- Design Space Usage: Over 3 million active users rely on it monthly, but only 20% use it for oversized hacks.
You’ve got a killer design ready to slap onto a t-shirt, but then it hits you: Cricut Design Space slams the brakes at 9.25″ x 6.75″ with its Print Then Cut feature. That’s barely enough for a decent chest print, let alone the oversized masterpiece you’re dreaming of.

Tiling Mistakes and What a Perfect Tile Looks Like
Tiling sounds scary at first, but once you know what usually goes wrong, it becomes way easier. Most people mess up in the same few spots, so here’s what to watch for and how to get that clean, seamless look that doesn’t scream “this was printed in pieces.”
Common Tiling Mistakes
These are the things that ruin big sublimation designs faster than anything else.
1. No Overlap Between Tiles
If your pieces touch edge to edge with zero overlap, you’ll almost always get a tiny white gap after pressing.
2. Crooked or misaligned edges
Even a tiny tilt shows up as a visible seam on the final print.
3. Not using registration marks
Trying to “eyeball” alignment is the fastest way to get shifting, gaps, or weird stair-step edges.
4. Paper shifting during pressing
If your tiles move even a fraction of an inch under heat, you’ll get ghosting or blurry lines.
5. Mixing paper weights or print settings
Different paper thickness dries differently, curls differently, and presses differently.
That inconsistency shows up on your shirt.
6. Cutting tiles unevenly
Hand-cut pieces that aren’t perfectly straight are almost impossible to line up.
What a Perfect Tile Looks Like
When you tile your design correctly, each piece should look like this:
A clean 0.25 inch overlap
Not too big, not too small, just enough to press without leaving a white line.
Straight, even cuts on all edges
Using Cricut or a paper trimmer helps keep everything squared.
Matching color across all tiles
All tiles should use the same print setting and the same sublimation paper weight.
Registration marks in the same corners
These act like puzzle notches, showing you exactly where each tile snaps into place.
Edges taped down tight with heat-resistant tape
Minimal movement equals zero ghosting.

Simple Tiling Workflow (The “Perfect Tile” Method)
Here’s the quick process most people use for flawless results:
- Slice your design into 8 x 6 or 8 x 7 inch sections
- Add overlap along the edges
- Add registration marks in each corner
- Print all tiles with the same print settings
- Trim edges with a straight-edge cutter
- Dry-fit all tiles before taping
- Tape from the back with light tension
- Press with slight overlap passes on the heat press
Real world example: A crafter tiling a 12 x 16 inch graphic for a 2XL shirt usually uses 4 tiles. With straight cuts, 0.25-inch overlap, and tight taping, the seam becomes practically invisible after pressing.

🎨 Step-by-Step Guide: From Design to Sublimation
Turning your big sublimation idea into reality with a Cricut setup is a breeze once you’ve got the steps down. Here’s how to go from screen to shirt without breaking a sweat.
1 Designing in Cricut Design Space
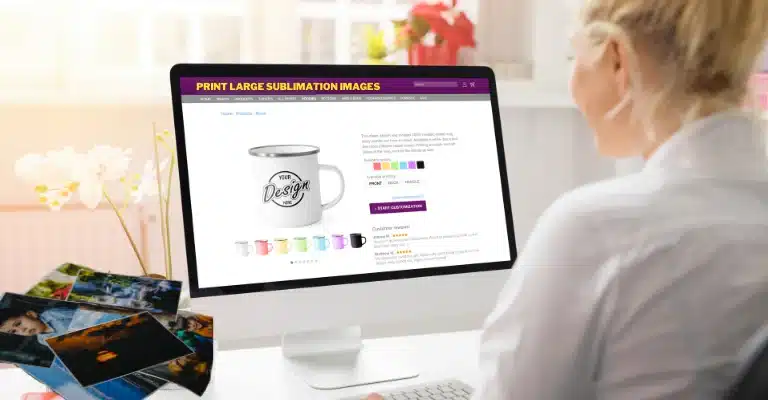
Kick things off by uploading your image to Design Space—PNG or JPG files with high resolution (300 DPI minimum) keep those details sharp.
Size it up, and if it’s too big for the 9.25″ x 6.75″ Print Then Cut limit, tile it. Use the Slice tool to split it into sections, adding a 0.25″ overlap and registration marks for alignment later.
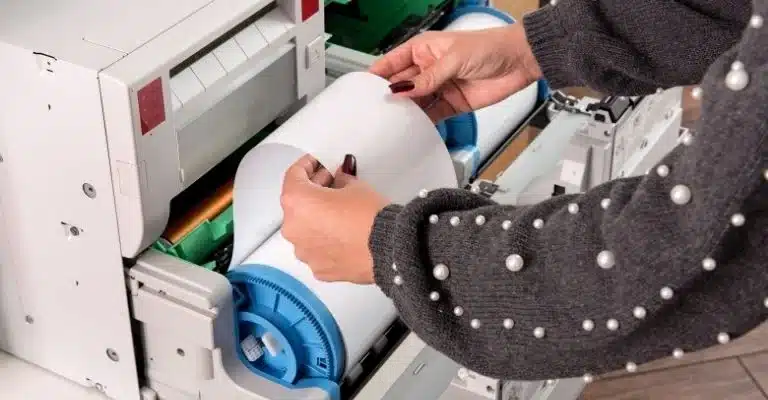
2 Printing the Design
Fire up your sublimation printer with quality sublimation paper (100 gsm is a solid pick). Set it to high-quality output, and don’t skip mirroring the image—trust me, you don’t want your design backward on the final piece.
Double-check the preview; orientation matters more than you’d think.
3 Preparing the Print for Sublimation
Once printed, trim any excess paper with scissors or your Cricut Maker if you’re feeling fancy. For tiled designs, line up those sections on your substrate using the registration marks—heat-resistant tape keeps them from shifting.
⚠️ Eyeball it until it’s seamless; this step’s your make-or-break moment.
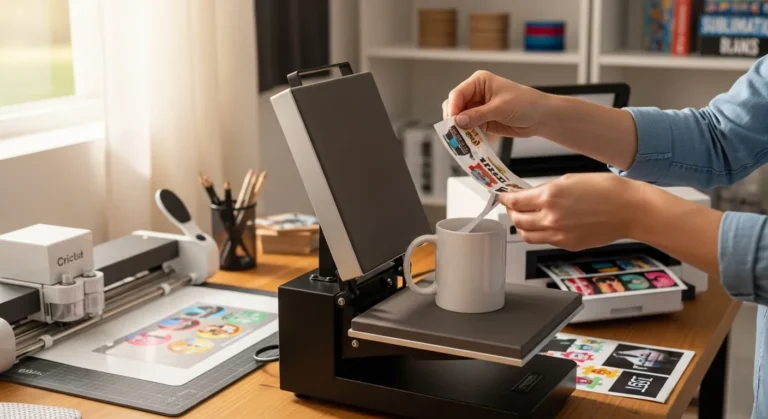
4 Setting Up the Cricut Easy Press
Crank your Easy Press to 385°F–400°F and preheat your material (like a polyester tee) for 5–10 seconds to zap any moisture.
Lay your design face-down, centered where you want it, and secure it with a few pieces of tape if it’s a big one.
5 Applying the Sublimation Transfer
Press with firm, even pressure for 40–60 seconds—go section-by-section if your design outstrips your press size, overlapping slightly to avoid gaps.
After the timer buzzes, let it cool for 10–15 seconds; peeling too hot can smudge your work. Lift the paper slow and steady, then stand back and admire the magic you just pulled off.
Pro Tip
For best results, work in a well-ventilated area and always test your design on a scrap piece of fabric first!

⚙️ Best Settings for Large Sublimation Images
Standard Large Image Settings
Drinkware Settings Guide
| Product Type | Press Method | Time | Temp Range | Pressure |
|---|---|---|---|---|
| Ceramic Mugs | Mug Press | 4-5 min | 380-400°F | Light-medium |
| Glass Pint Glasses | Convection Oven | 8-15 min | 360-390°F | Light-medium |
| Single Wall Metal | Mug Press | 2.5-3.5 min | 375-400°F | Light-medium |
| Double Wall Metal | Convection Oven | 6-7 min | 375-400°F | Light-medium |
Note: Wall thickness affects time needed for glass items. Be careful with pressure on metal to avoid deformation.
Key Considerations for Large Images
Printer Settings
Use high resolution (300+ DPI) and proper color management for vibrant, sharp prints.
Test Prints
Always run test prints to check color accuracy before large batches.
Quality Enhancers
Use transfer sheets, silicone pads, and sublimation spray for best results.
For a complete guide on printing large sublimation images with your Cricut, check out this helpful article from Subligenius Print that covers everything from setup to troubleshooting.
Tips and Tricks
Once the printer and heat press settings are sorted out, additional tips and tricks can help you reach even better outcomes from your sublimation prints.
Importance of Test Prints
Before printing a large batch of sublimation prints, running a test print’s always a good idea first. This will authorise you to see how the colours and resolution look on the final product and make any necessary adjustments to the printer or heat press settings.
Test prints are essential for larger images, as minor errors can become more pronounced at larger sizes.
Avoiding Common Mistakes
One of the many ordinary errors in sublimation printing is failing to properly align the design on the product. Make sure you place the sublimation paper precisely on the product so that the image is centred, and there are no gaps or overlapping areas.
Another common mistake is to use more pressure or heat when pressing the image onto the product. Follow the recommended heat press settings and apply enough pressure to ensure the image transfers fully.
Enhancing the Quality of the Final Product
To enhance the quality of your sublimation prints, consider using a transfer sheet or silicone pad to prevent the sublimation paper from shifting during the pressing process. You can also use a hot press cloth to protect the product’s surface and prevent scorching.
Some printers may also have specific sublimation printing settings, so consult your printer’s manual for guidance.
Explore the world of Subli Genius Print with our comprehensive guide, for more information or a step-by-step how-to guide.
Real World Examples of Large Cricut Sublimation Projects
Sometimes it’s easier to understand the process when you see how it plays out in real life, so here are a few everyday scenarios that show exactly how oversized sublimation works with Cricut tools, printers, and heat presses.
Example 1: Oversized 12 x 16 Shirt Graphic Using Tiles
You’ve got a big birthday design that’s too large for Cricut’s 9.25 x 6.75 inch Print Then Cut limit.
Here’s how someone usually pulls it off:
- Split the design into four tiles
- Add a quarter-inch overlap on all edges
- Print each tile on 100–120 gsm sublimation paper
- Tape the tiles together using the registration marks
- Press in two sections with a 15 x 15 heat press
- Cool for about 15 seconds before peeling
End result: A sharp, bright, oversized design with almost invisible seams.
Example 2: Printing a Seamless 19-inch Graphic With a Larger Printer
If someone owns a wide-format sublimation printer, their workflow looks a lot different.
A crafter making a 19-inch team shirt graphic usually does this:
- Design in Canva, Illustrator, or Photoshop
- Print on a single 13 x 19 or 24-inch sheet
- Skip tiling completely
- Use Cricut only for trimming edges or guiding placement
- Press once on a 15 x 15 or 16 x 20 heat press
End result: A clean, seam-free, pro-level print with less effort.
Example 3: Fixing Ghosting on a Large 2XL Shirt
This one’s super common. Let’s say someone is pressing a large 2XL transfer and the edges come out blurry.
Here’s what usually fixes it:
- Increase pressure from medium to firm
- Lower heat from 400°F to 385°F to reduce scorching
- Add extra heat-resistant tape around all tiles
- Press in slight overlapping passes
- Wait 10–15 seconds before peeling
- Keep the shirt still while cooling
End result: Clean lines, no shadowing, no doubled edges. Most ghosting comes from shifting or lifting too early.
Case Study: How One Small Shop Printed 50 Oversized Shirts With a Cricut Setup
Here’s a real-world style example of how a small home business handled a big job using nothing more than a Cricut, a standard sublimation printer, and smart tiling.
The Situation
A home crafter selling on Etsy landed an order for 50 family reunion shirts, each with a 14 x 16 inch full-front graphic. Their printer could only handle 8.5 x 11 sheets, and buying a wide-format printer wasn’t in the budget.
Instead of turning down the order, they used tiling.
The Workflow
Here’s the exact setup they followed:
1. Split each design into four tiles
8 x 6.75 inch sections to stay under Cricut’s Print Then Cut limit.
2. Added a 0.25 inch overlap
This helped hide seams after pressing.
3. Printed on 120 gsm paper
Heavier paper stopped the edges from curling on large prints.
4. Lined up tiles using registration marks
Less eyeballing, more accuracy.
5. Pressed each shirt in two passes
They used a 15 x 15 inch press with slight overlap to avoid cold spots.
6. Let every print cool before peeling
Ghosting dropped to almost zero.
The Results
- All 50 shirts finished in two days
- Only two misprints, both caused by early peeling
- The final designs looked like single-sheet prints
- Customer loved the outcome and placed another order the next month
Color Management for Sublimation Explained Super Simply
Color management sounds scary at first, but it’s really just a fancy way of saying “make the colors on your screen match the colors you press on your shirt.” When you’re working with large sublimation images, tiny color problems get big fast, so it helps to understand the basics.
Here’s the easiest way to think about it.
Why Color Looks Different When You Press
Your screen uses light.
Your printer uses ink.
Your heat press changes the ink into gas.
So the color you think you printed isn’t always the color that shows up on the shirt. That’s normal, and it’s fixable.
The Three Things That Matter Most
There are only three tools you really need to keep colors predictable.
1. A good monitor
A color-accurate IPS monitor makes a huge difference.
You don’t need anything crazy, just something that shows real colors instead of neon or tinted ones.
Brands people usually use: Dell UltraSharp, BenQ SW series, etc.
2. ICC profiles
These are little files that tell your printer, “Hey, here’s how to print these colors correctly for this ink and this paper.”
Without ICC profiles, reds might turn orange, blues might turn purple, and skin tones can get weird.
3. A color calibration tool (optional but helpful)
Tools like SpyderX or X-Rite help your monitor display colors correctly.
It’s basically like giving your screen an eye exam.
Super Simple Color Management Setup
Here’s the beginner-friendly way most crafters set things up:
- Install your sublimation printer’s ICC profile
- Set your design software to use that same profile
- Print a test sheet with a color chart
- Press it onto a scrap polyester fabric
- Compare your print with what’s on your screen
- Adjust brightness or saturation if needed
- Save your final workflow so everything stays consistent
That’s it. You don’t need RIP software unless you’re using a wide-format setup.
Real World Example
A crafter printing a large 14-inch sunset design found the color looked dull when pressed.
Once they switched to the correct ICC profile for their paper and ink combo, the oranges popped, the pinks stopped muddying, and the whole print looked way closer to what they saw on their computer.
Most color problems come from either:
- no ICC profile
- wrong ICC profile
- a monitor that’s too bright
- printing in the wrong color mode
What You Actually Need for Large Sublimation Prints
When you’re working with oversized sublimation designs, the gear you use makes a huge difference. You don’t need the most expensive stuff, but some tools make things way easier and way more consistent.
Here’s a simple breakdown so you know what’s worth investing in and what’s just “nice to have.”
Quick Comparison Table
| Device | What It Does | When It’s Enough | When You Need an Upgrade |
|---|---|---|---|
| Cricut Maker / Explore | Cuts vinyl, trims sublimation sheets, helps with placement | Small to medium prints, tiled designs | All-over shirts, oversized panels |
| Standard Sublimation Printer (8.5” width) | Prints normal-size sublimation sheets | Designs up to 13×19 when tiled | One-piece 16”+ designs, bulk production |
| Wide Format Printer (13”–24” width) | Prints huge seamless sheets | Large graphics, back prints, hoodies | Almost required for all-over shirts |
| Cricut Easy Press | Portable heat press for shirts and small items | Small to medium designs, sectioned pressing | Large seamless prints, consistent pressure |
| 15×15 Heat Press | Full-contact pressure, heats evenly | Most large shirt graphics | Oversized panels or blankets |
| 16×20 Heat Press | Big surface, fewer overlaps | Large transfers, pro shops | All-over sublimation and apparel panels |
| Monitor (IPS panel) | Shows accurate colors | Basic color correction | Color-critical designs, gradients |
| Color Calibration Tool | Adjusts your monitor’s accuracy | Not required for beginners | When colors look “off” or mismatched |
| ICC Profiles | Makes printer colors consistent | Always needed | Especially needed for large prints |
Glossary: Simple Terms for Large Cricut Sublimation
| Term | Simple Meaning |
|---|---|
| Sublimation Printing | Ink turns into gas under heat and bonds permanently to polyester fabric or coated blanks. |
| Print Then Cut | Cricut feature that prints on your home printer, then cuts the shape. Max size is 9.25 x 6.75 inches. |
| Tiling | Splitting a big design into smaller pieces so Cricut can handle it, then pressing them together as one large image. |
| Overlap | A tiny extra margin (usually 0.25 inch) added so tiles press together without leaving white gaps. |
| Registration Marks | Small dots or crosses that help you line up tiled pieces perfectly. |
| Ghosting | Blurry shadows caused by your sublimation paper shifting during the press. |
| Heat Resistant Tape | Tape that holds your design still under heat without melting or leaving residue. |
| GSM (Paper Weight) | Grams per square meter. Tells you how thick sublimation paper is. Big prints love 100–120 gsm. |
| ICC Profile | A color file that helps your printer produce accurate shades for your specific ink and paper combo. |
| IPS Monitor | A color-accurate screen that shows true colors so your designs look the same when pressed. |
| Wide Format Printer | A printer that handles large media like 13×19 sheets or 24-inch rolls, perfect for oversized prints. |
| Heat Press | A machine that uses heat and pressure to apply sublimation transfers. Comes in sizes from 9×9 to 16×20. |
| Cold Spots | Areas that don’t get enough heat, usually showing as faded patches on big sublimation prints. |
| Poly Count | Polyester percentage in fabric. Higher poly = brighter sublimation. Best results at 65 percent+. |
| Section Pressing | Pressing a big design in overlapping chunks when your heat press is smaller than your artwork. |
| RIP Software | Advanced printing software for wide-format printers that gives better color control. Not needed for basic Cricut setups. |