Why Sublimation Prints Look Different After Pressing
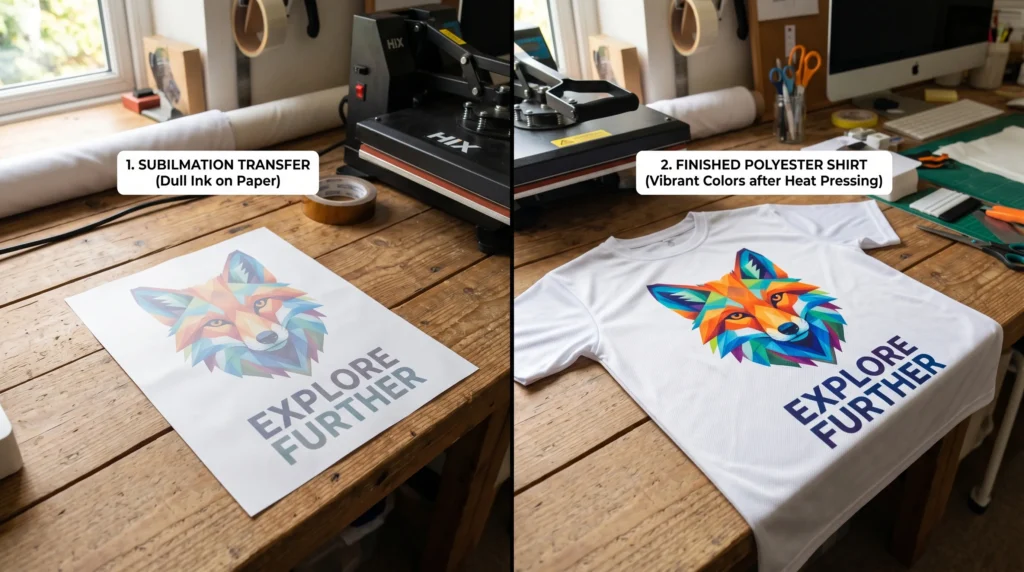
Sublimation prints often look completely different after heat pressing because sublimation ink changes during heat activation. A design that appears dull or faded on transfer paper can become vibrant once the dye bonds with polyester or a coated sublimation blank.
At the same time, some color changes are signs of real printing problems. Incorrect heat press settings, moisture, poor material compatibility, or color profile issues can all affect the final result.
We solve your changing colors problems sublimation after pressing and how to troubleshoot faded or inaccurate sublimation prints.
Why Sublimation Prints Change After Heat Pressing
Sublimation ink works differently from regular printer ink. During the sublimation transfer process, heat activates the dye and turns it into gas before it bonds with polyester fibers or polymer-coated surfaces.
Many beginners are surprised because sublimation prints usually look muted before pressing. This is completely normal.
The final color appears only after:
- heat activation
- dye diffusion
- proper pressure
- material bonding
In most sublimation setups, the printed transfer paper will look softer and less vibrant than the finished product.
This happens because the sublimation dye has not fully activated yet.
Is It Normal for Sublimation Prints to Look Faded Before Pressing?
Yes. Sublimation prints almost always look duller before pressing.
A quick answer:
Sublimation colors appear brighter after pressing because heat activates the sublimation ink and allows it to bond permanently with the material.
Many beginners think something is wrong when the transfer paper looks washed out. In reality, the heat press transfer process is what creates the final vibrant result.
You may notice that:
- blacks look gray before pressing
- reds appear dark orange
- blues seem muted
- images look less sharp on transfer paper
This is normal unless the final pressed product still looks faded.
If your finished print remains dull after pressing, the issue is usually related to:
- incorrect heat settings
- poor polyester content
- low-quality blanks
- moisture
- color profile setup
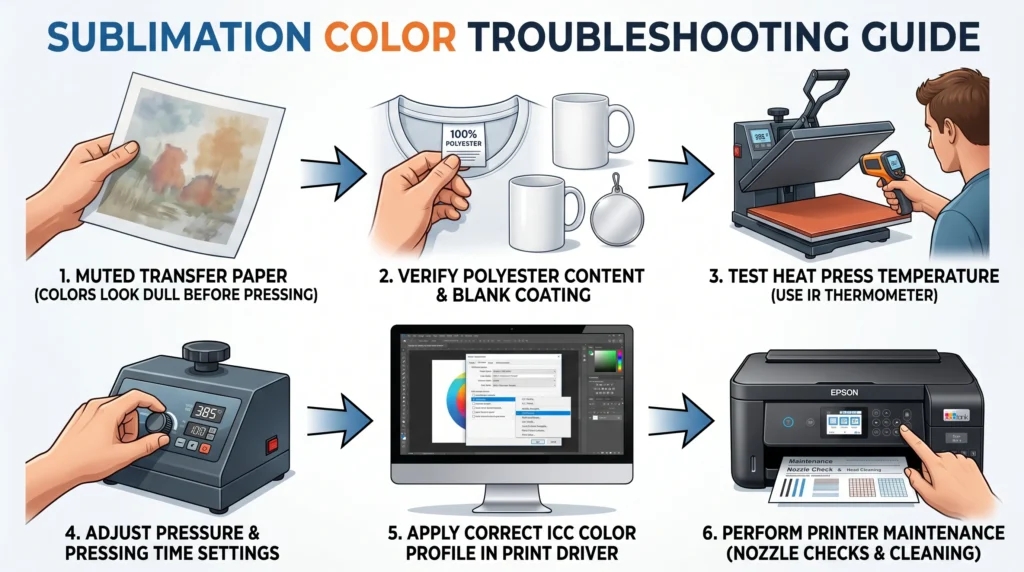
6 Common Reasons Sublimation Looks Wrong After Pressing
1. Incorrect Heat Press Temperature
Incorrect heat press temperature is one of the most common sublimation printing problems.
For most polyester sublimation projects, 385°F to 400°F works best.
If the temperature is too low:
- colors may appear faded
- ink transfer becomes weak
- prints look washed out
If the temperature is too high:
- colors may shift
- details can blur
- scorching may occur
- over-pressing becomes possible
Heat presses can also lose calibration over time. A press showing 400°F may actually be much cooler.
If you regularly experience inconsistent color vibrancy, it helps to review proper heat press sublimation settings.
2. Wrong Pressing Time
Pressing time affects how long sublimation ink remains active during transfer.
Short pressing times can leave colors underdeveloped.
Over-pressing can create:
- dull colors
- excessive gas spread
- blurry edges
- faded appearance
A common sublimation mistake is increasing time too much when colors look weak. Often the real problem is temperature or material quality.
Always test one variable at a time.
3. Pressure Problems
Uneven pressure can make one side of the design look stronger than the other.
Light pressure may prevent proper ink bonding. Excessive pressure can distort transfers and increase ghosting.
Pressure problems often cause:
- inconsistent color saturation
- blurry edges
- uneven transfer quality
- faded sections
You may notice that tumblers and thick blanks are especially sensitive to pressure consistency.
4. Material Compatibility Problems
Sublimation works best on:
- polyester fabrics
- polymer-coated blanks
- sublimation-compatible substrates
Cotton absorbs sublimation dye poorly unless a coating or sublimation HTV workflow is used.
If your sublimation print looks faded after pressing on cotton, the material is usually the main issue.
Many beginners accidentally use low-polyester shirts expecting vibrant results.
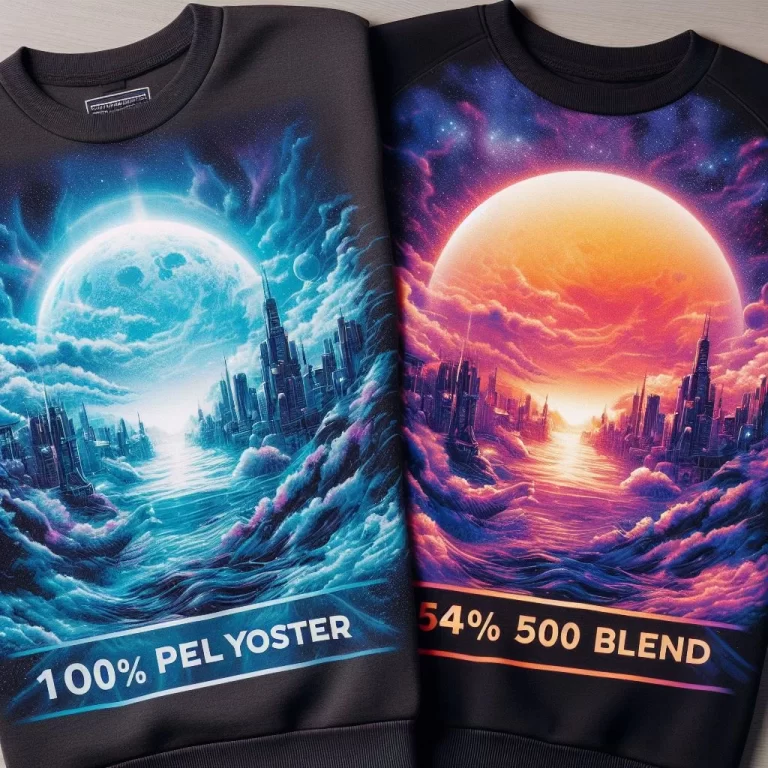
In most sublimation workflows:
- 100% polyester produces the brightest colors
- 65% polyester creates softer vintage-style results
- cotton produces weak transfers without coating
Learn more about compatible materials in this sublimation material guide.
5. Moisture in the Blank
Moisture is a major cause of sublimation transfer issues.
Even small amounts of humidity inside fabric or blanks can create:
- faded spots
- small blue dots
- uneven colors
- blurry sections
This is especially common with:
- shirts stored in humid rooms
- tumblers
- MDF blanks
- fabric blends
Pre-pressing blanks for a few seconds helps remove hidden moisture before sublimation transfer.
6. Incorrect ICC Profiles or Color Settings
Color management plays a major role in sublimation printing accuracy.
Incorrect ICC profiles can cause:
- dull colors
- oversaturated prints
- strange color shifts
- inaccurate skin tones
RGB and CMYK settings also affect sublimation color correction.
A common issue is printing with generic printer settings instead of sublimation-specific profiles.
If your colors consistently look inaccurate, review this guide on best ICC profiles for sublimation.
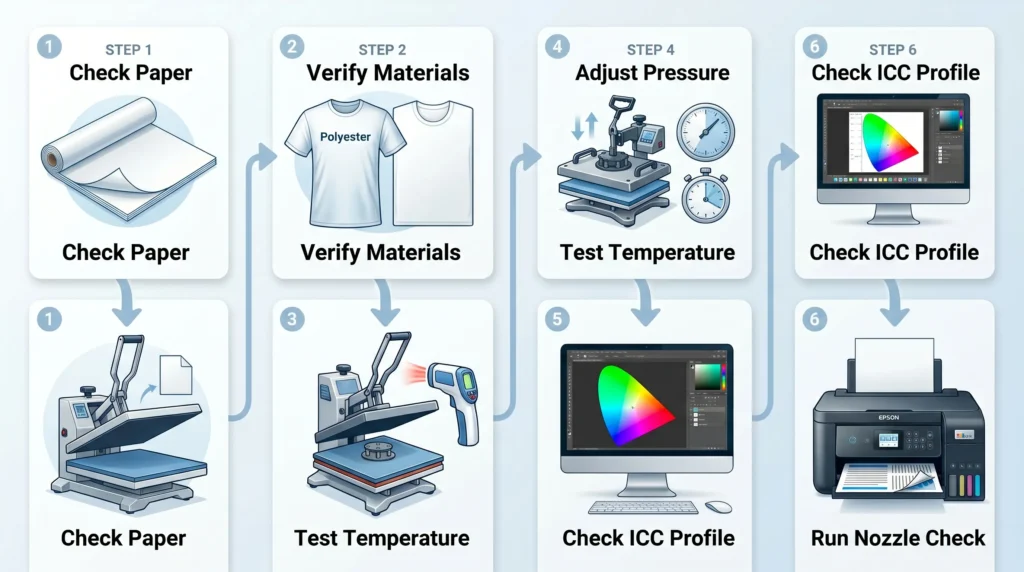
How to Diagnose Sublimation Color Problems Step by Step
If your sublimation prints look different after pressing in a bad way, use this workflow to identify the cause.
1. Check the Transfer Paper Appearance
Muted colors before pressing are normal.
Focus on the final transfer result instead of the paper appearance alone.
2. Verify Material Compatibility
Check:
- polyester percentage
- sublimation coating quality
- blank compatibility
Low-quality blanks often create weak sublimation results even with correct settings.
3. Test Heat Press Temperature
Use a heat gun or infrared thermometer to verify actual press temperature.
Many heat presses drift over time.
4. Review Pressing Time and Pressure
Small adjustments can dramatically improve color vibrancy.
Avoid changing multiple settings at once.
5. Confirm ICC Profile Setup
Incorrect color profiles are one of the biggest causes of color mismatch.
This guide on fixing sublimation color accuracy can help improve consistency.
6. Run a Printer Nozzle Check
Clogged print heads reduce ink saturation and create faded sublimation colors.
Regular printer maintenance matters, especially for converted Epson EcoTank setups.
If needed, follow this sublimation troubleshooting guide for deeper diagnostics.
How to Prevent Sublimation Color Changes
Some color shifting is natural during heat transfer sublimation, but workflow consistency helps reduce problems.
Best practices include:
- using high-polyester blanks
- calibrating your heat press
- storing materials in dry conditions
- using correct ICC profiles
- testing settings before large production runs
- keeping print heads clean
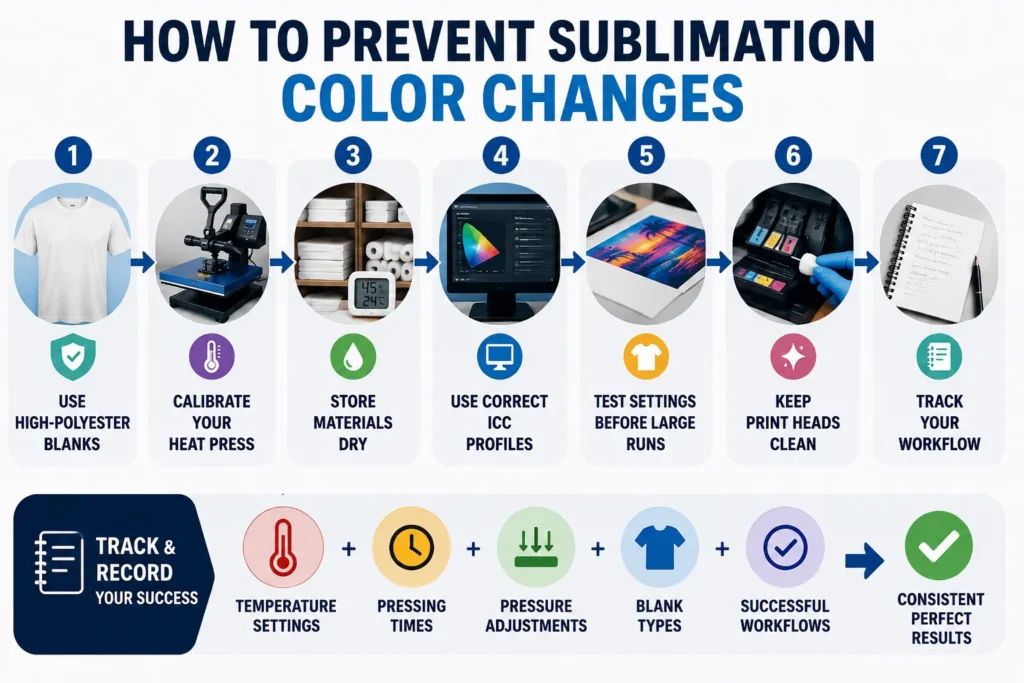
Many experienced sublimation users keep a small notebook of:
- temperature settings
- pressing times
- pressure adjustments
- blank types
- successful workflows
This makes troubleshooting much easier later.
Common Sublimation Mistakes Beginners Make
Many sublimation color problems come from simple beginner mistakes.
Common examples include:
- pressing cotton without sublimation coating
- skipping color profile setup
- overheating transfers
- using low-quality sublimation paper
- applying uneven pressure
- ignoring humidity problems
- changing too many settings at once
A common sublimation mistake is assuming every blank uses the same settings.
Different materials often require small workflow adjustments.
Frequently Asked Questions
Why does sublimation look dull before pressing?
Sublimation ink naturally appears muted on transfer paper before heat activation. The final vibrant color develops after the dye bonds with polyester or coated blanks.
Can you over press sublimation?
Yes. Overheating or pressing too long can cause faded colors, blurry edges, and excessive dye spread.
Why are my sublimation prints not vibrant?
Low heat, poor material compatibility, incorrect ICC profiles, moisture, or clogged print heads are common causes of weak sublimation colors.
Do sublimation colors always change after heat pressing?
Yes. Some color change is completely normal because sublimation ink reacts during heat activation.
Why do sublimation prints look different on fabric?
Different fabrics absorb sublimation dye differently. Polyester produces the most vibrant results, while cotton usually creates faded transfers without coating.
Quick Recap
Sublimation prints look different after pressing because heat activates the sublimation dye and bonds it with the material. Some color change is expected and completely normal.
If your finished print still looks faded or inaccurate, the issue is usually connected to:
- heat press settings
- material compatibility
- moisture
- pressure
- ICC profile configuration
Consistent testing and workflow tracking make sublimation troubleshooting much easier over time.