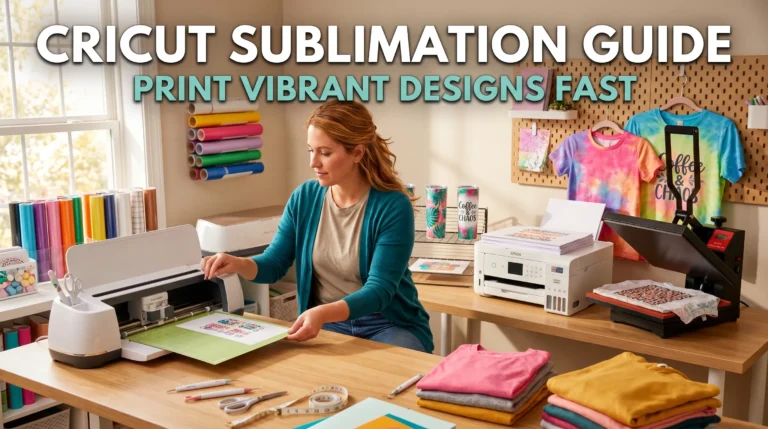
How to Use Cricut for Sublimation – Beginner’s Guide
Unlock the full potential of your Cricut for sublimation printing. Master the process from setup to finished product, including correct paper cutting settings and Design Space tips. Learn how to create vibrant t-shirts and paper crafts using your Explore Air 2 or Maker 3.
Get answers on compatible printers and materials. Transform your Cricut projects with expert sublimation techniques today.
Sublimation printer uses heat to transform special ink into a gas and bond it with polyester or coated materials. With a Cricut machine, you can create precise designs for transfers, utilizing tools such as Cricut Design Space and the Print and Cut feature to simplify the process.
The key equipment is a sublimation printer, specialized ink and paper, and a heat press. Ensure quality results by setting the heat, pressure, and time properly. The use of sublimation of printing is ideal for t-shirts, mugs, home decor, and personalized gifts.
Sublimation with Cricut
Sublimation with your Cricut machine enables you to create a multitude of creative opportunities. Let’s uncover what sublimation is and why your Cricut is the perfect companion for this craft.
What is sublimation?
Sublimation is a printing technique that transfers ink onto various surfaces using heat. The textile industry frequently utilizes it for producing customized items such as t-shirts and hats.
The resulting prints are of superior quality, durable, and boast vibrant colors that remain intact without fading or cracking over time. Here’s how it works:
- Print your design on special paper with sublimation ink
- Apply high heat (about 400°F) to the transfer
- The ink turns to gas and bonds with polyester or polymer-coated surfaces
- As it cools, your design becomes a permanent part of the item
Benefits of using Cricut for sublimation
Your Cricut machine is a great tool for sublimation projects. Here’s why:
- Precise cutting: Cricut cuts your transfers perfectly, so you don’t get white edges.
- Flexible: You can make small, detailed designs or big graphics with your Cricut.
- Easy-to-use software: Cricut Design Space helps you create and prepare your designs without fuss.
- Saves time: The Print then Cut feature lets you print and cut your designs quickly.
- Good value: Using your Cricut for sublimation means you don’t need to buy extra equipment.
Feature | Without Cricut | With Cricut |
|---|---|---|
Cutting | By hand, might have errors | Very precise, clean edges |
Design options | Limited by hand-cutting skill | Can make complex designs |
Time | Takes longer | Faster and more efficient |
Results | May vary | Consistent quality |
Essential Equipment and Materials
Let’s get you set up with the right gear for your sublimation adventures with Cricut. Here’s what you’ll need to get started:
Sublimation printer options
You’ve got a few choices when it comes to sublimation printers:
- Epson EcoTank: Many crafters swear by these. They’re easy to convert for sublimation and come in various sizes.
- Sawgrass: These are made specifically for sublimation. They’re pricier but offer great quality.
- Converted inkjet printers: Some regular printers can be changed to use sublimation ink.
Remember, once you use sublimation ink in a printer, you can’t switch back to regular ink.
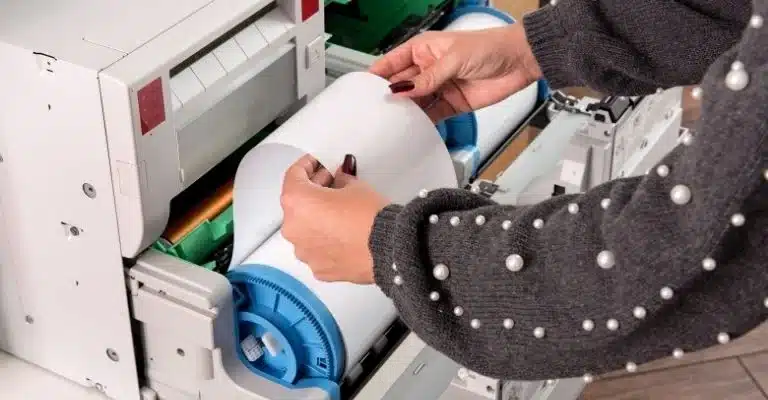
Sublimation ink and paper
- Ink: You’ll need special sublimation ink. It comes in bottles or cartridges, depending on your printer.
- Paper: Use sublimation transfer paper. It’s designed to hold the ink until it’s time to transfer your design.
Pro tip: Always match your ink and paper brands for the best results.
Cricut machine compatibility
Good news! Most Cricut machines work well for sublimation projects:
- Cricut Maker series
- Cricut Explore series
- Cricut Joy
These machines can cut your printed sublimation designs precisely. The Print then Cut feature is especially handy for this.
Heat press or EasyPress
You’ll need heat to make the sublimation magic happen. Options include:
- Heat press: Great for frequent use and larger projects.
- Cricut EasyPress: Perfect for home crafters. It’s portable and easy to store.
- Home iron: It can work in a pinch, but it’s harder to control temperature and pressure.
Here’s a quick comparison:
Tool | Pros | Cons |
|---|---|---|
Heat press | Even pressure, consistent temp | Expensive, takes up space |
EasyPress | Portable, easy to use | Smaller surface area |
Home iron | Cheap, readily available | Less consistent results |
With these tools in your crafting arsenal, you’re all set to start creating amazing sublimation projects with your Cricut. Happy crafting!
Overview of Cricut machines
The machine you choose depends on the size and complexity of your project. For most sublimation work, the Maker or Explore series will serve you well.

Let’s take a look at the Cricut machines that work well for sublimation projects. Cricut offers several models, each with its own strengths.
Cricut Maker series:
- The most versatile Cricut machines
- Can cut a wide range of materials
- Ideal for complex sublimation designs
- Models include Maker, Maker 3, and Maker 3+
Cricut Explore series:
- Great all-around machines
- Perfect for most sublimation projects
- User-friendly for beginners
- Models include Explore Air 2 and Explore 3
Cricut Joy:
- Compact and portable
- Good for small sublimation projects
- Limited to narrower materials
- Great for on-the-go crafting
These machines are all capable of using the Print-then-Cut feature. Here’s a quick comparison:
Machine | Max Cutting Width | Best For |
|---|---|---|
Maker 3 | 13 inches | Complex projects |
Explore 3 | 13 inches | Everyday use |
Joy | 5.5 inches | Small, quick projects |
Getting Started with Cricut Design Space for Sublimation
Let’s jump into using Cricut Design Space for your sublimation projects. This software is your creative playground, and with a few tips, you’ll be designing like a pro in no time.
Creating sublimation designs
Cricut Design Space offers plenty of tools to make your own designs:
- Use shapes and text to create simple designs
- Combine elements for more complex creations
- Try the “Contour” tool to adjust image layers
- Experiment with the “Slice” feature for unique effects
Remember, bright, bold colors work best for sublimation. Don’t be afraid to go vivid!
Uploading and modifying sublimation images
Got a design from elsewhere? No problem:
- Click “Upload” in Design Space
- Choose your image file
- Select “Complex” for full-color images
- Use the editing tools to clean up your design if needed
- Save as a “Print Then Cut” image
You can resize, rotate, or add elements to your uploaded image in Design Space.
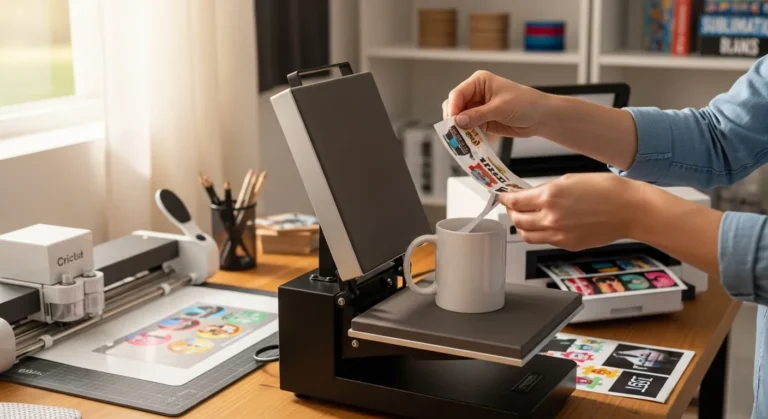
Print then Cut feature for sublimation
This feature is a game-changer for sublimation:
- Set up your design in Design Space
- Click “Make It” and choose “Print Then Cut”
- Send to your sublimation printer
- Load the printed sheet onto your Cricut mat
- Let your Cricut cut around the design perfectly
This process gives you precisely cut sublimation transfers every time.
Color management in Design Space
Getting colors right is crucial for sublimation. Here’s how to manage them:
- Use “System Dialog” when printing for more color options
- Try both “Best” and “Normal” quality settings to see what works better
- Remember that colors may look different on screen vs. printed
- Do test prints to check colors before your final project
Color comparison:
Setting | Pros | Cons |
|---|---|---|
System Dialog | More control | Takes longer |
Cricut Dialog | Faster | Fewer options |
By mastering these aspects of Cricut Design Space, you’ll be well on your way to creating stunning sublimation projects. Keep practicing, and soon you’ll be amazed at what you can create!
Step-by-Step Sublimation Process with Cricut
Follow these steps, and you’ll be creating beautiful sublimation projects with your Cricut in no time. We can create amazing custom items by following this guide.
Designing your artwork
- Open Cricut Design Space
- Start a new project
- Create your design using shapes, text, or uploaded images
- Make sure your design fits your blank item
- Use bright colors – they work best for sublimation
Tip: Keep your design about 1/4 inch inside the edges of your item for best results.
Printing your sublimation transfer
- Click “Make It” in Design Space
- Choose “Print Then Cut”
- Select your sublimation printer
- Use system dialog for more color options
- Print on sublimation paper
Remember: Always print a mirror image of your design for sublimation.
Cutting your design with Cricut
- Load your printed sheet onto a Cricut mat
- Follow Design Space prompts to load the mat into your machine
- Let Cricut cut around your design
- Carefully remove the cut design from the mat

Preparing your sublimation blank
- Clean your blank item with lint-free cloth
- Pre-heat your item if it’s heat-safe
- Use heat-resistant tape to secure your transfer
- Add a protective paper layer over and under your project
Heat pressing and transferring the design
- Set your heat press to the right temperature (usually 380-400°F)
- Place your item with the transfer on the heat press
- Press for the recommended time (often 45-60 seconds)
- Let it cool slightly, then carefully peel off the transfer paper
Here’s a quick reference for common items:
Item | Temperature | Time |
|---|---|---|
T-shirt | 385°F | 45-60 seconds |
Mug | 400°F | 180-360 seconds |
Mouse pad | 390°F | 50-60 seconds |
Importance of using Cricut for sublimation projects
- Precision Cutting: Cricut machines ensure accurate cuts, perfect for aligning designs on substrates for a professional finish.
- Versatility: They handle various materials, making them ideal for creating personalized sublimation blanks like t-shirts, mugs, and phone cases.
- Time-Saving: Cricut machines cut intricate designs faster than hand-cutting, speeding up project completion.
- Consistency: Perfect for businesses, they produce identical designs efficiently, maintaining a uniform look across products.
- Creativity: Cricut enables custom graphic design and precise cutting, allowing users to craft unique, personalized items.
Materials needed for sublimation with Cricut
- Sublimation printer: A printer is necessary for printing your design onto sublimation paper using sublimation ink.
- Sublimation blanks: T-shirts, mugs, keychains, and other charming trinkets are scattered everywhere and eagerly waiting for exploration.
- Sublimation paper: A sublimation paper transfers the design onto the sublimation blank. It has a polymer coating that reacts with the sublimation ink when heated.
- Heat press: It uses heat and pressure to transfer the ink from the sublimation paper onto the substrate.
- Heat-resistant tape: Used to secure the sublimation paper to the substrate during the transfer process.
Software for sublimation with Cricut
Finally, you’ll need software to design your graphics for sublimation projects with Cricut.
1. Cricut Design Space: Cricut Design Space is a free online software compatible with all Cricut machines. It allows you to design custom graphics using various tools and images.
2. Adobe Creative Suite: A software that includes programs such as Adobe Photoshop and Illustrator. These programs allow for more advanced graphic design and editing capabilities.
3. CorelDRAW: A professional-level graphic design software compatible with Cricut machines. It allows for more advanced design capabilities and is popular among sublimation professionals.
Sublimation Projects and Ideas
Starting with these ideas, you can begin creating incredible sublimation projects with the only limit being your imagination. Keep experimenting and you’ll soon have a collection of unique, personalized items.
Are you excited to put your sublimation skills to use? Let’s explore some exciting projects you can create with your Cricut and sublimation setup.
T-shirts and apparel
Sublimation works great on polyester fabrics:
- Custom t-shirts with vibrant designs
- Sports jerseys with player names and numbers
- Tote bags with eye-catching patterns
- Socks with funky prints
Pro tip: Use a lint roller on your fabric before sublimating to remove any dust or fibers.
Mugs and drinkware
Create drinkware that stands out:
- Coffee mugs with funny quotes
- Water bottles with motivational messages
- Wine glasses with custom designs
- Travel tumblers with family photos
Remember to use mugs with a polymer coating for best results.
Home decor items
Spruce up your living space:
- Throw pillows with artistic designs
- Ceramic tiles for unique coasters
- Photo panels for wall art
- Personalized doormats
Tip: Test your design on a small area first, especially for textured surfaces.
Personalized gifts
Make presents extra special:
- Phone cases with custom graphics
- Makeup bags with fun patterns
- Luggage tags with travel-themed designs
- Keychains with names or initials
Quick guide to popular blank items:
Item | Material | Difficulty |
|---|---|---|
T-shirt | 100% polyester | Easy |
Mug | Ceramic with coating | Medium |
Mouse pad | Polyester top | Easy |
Phone case | Polymer-coated | Medium |
Troubleshooting and Tips for Best Results
You might need to adjust based on your specific materials and equipment. Keep a notebook of what works best for each type of project. With practice, you’ll be creating perfect sublimation projects in no time!
Let’s tackle some common problems you might face with sublimation and how to get the best results from your Cricut projects.
Common sublimation issues and solutions
- Faded colors:
- Make sure you’re using the right temperature and time
- Check if your sublimation paper is facing the right way
- Use fresh ink and high-quality paper
- Ghosting or blurry images:
- Secure your transfer paper well with heat-resistant tape
- Don’t move the item during pressing
- Make sure your blank is completely dry before pressing
- White spots or lines:
- Clean your blank thoroughly before pressing
- Use a lint roller to remove dust or fibers
- Press with even pressure across the whole design
Achieving vibrant colors
To make your designs pop:
- Use high-quality sublimation ink
- Print at the highest quality setting
- Adjust your printer settings for more saturation
- Remember colors will look darker on paper than when pressed
Try this trick: Boost color saturation in your design software by 10-15% for brighter results.
Proper heat and pressure settings
Getting these right is key for good results:
- Heat: Most items need 380-400°F (193-204°C). Use an infrared thermometer to check your heat press temperature
- Pressure: Medium to firm pressure works for most items. Mugs need special pressure wraps for even results
- Time: Usually between 45-60 seconds for flat items. Mugs might need 3-6 minutes
Here’s a handy chart for common items:
Item | Temperature | Time | Pressure |
|---|---|---|---|
T-shirt | 385°F (196°C) | 45-60 sec | Medium |
Mug | 400°F (204°C) | 180-360 sec | Firm |
Mouse pad | 390°F (199°C) | 50-60 sec | Medium |
Comparing Sublimation to Other Cricut Techniques
Each method has its strengths. Sublimation is great for detailed, colorful designs on light items. Infusible Ink is perfect for beginners wanting long-lasting results. HTV is your go-to for versatility, especially on dark fabrics.
Let’s compare and help you choose the best method for your project.
Sublimation vs. Infusible Ink
- Works on polyester and polymer-coated items
- Needs a special printer and ink
- Allows full-color, detailed designs
- Lasts as long as the item itself
- Works on Cricut blanks and polyester items
- No special printer needed
- Limited color options
- Also very long-lasting
Key differences:
- Sublimation offers more color choices
- Infusible Ink is easier for beginners
- Sublimation works on more types of items
Sublimation vs. Heat Transfer Vinyl (HTV)
- Becomes part of the fabric
- No texture or raised feel
- Best on white or light-colored items
- Needs special materials and equipment
- Sits on top of the fabric
- Has a slight raised texture
- Works well on dark fabrics too
- Can use regular Cricut materials
Main differences:
- HTV is more versatile for fabric colors
- Sublimation feels smoother on the item
- HTV can be peeled off, sublimation can’t
Here’s a quick comparison:
Feature | Sublimation | Infusible Ink | HTV |
|---|---|---|---|
Color options | Many | Limited | Many |
Fabric types | Polyester | Polyester | Most fabrics |
Durability | Very high | Very high | Good |
Ease of use | Medium | Easy | Easy |
Advanced Techniques and Expanding Your Skills
New creative possibilities are opened up by these advanced techniques. Don’t hesitate to experiment and experiment with new combinations. With practice, you’ll be creating professional-level multi-technique projects in no time!
By following these tips, you can create even more amazing projects with your Cricut.
Working with different substrates
Sublimation isn’t just for t-shirts and mugs. Try these:
- Wood: Use MDF boards with a white polymer coating
- Metal: Aluminum sheets or pre-coated metal items work great
- Glass: Special sublimation-ready glass is available
- Fabric: Experiment with different polyester blends
Tips:
- Always check the material’s sublimation compatibility
- Adjust your heat and time settings for each substrate
- Use a heat-resistant pad under your item when pressing
Creating multi-layer designs
Add depth to your projects with layers:
- Design separate elements in different colors
- Print and cut each layer separately
- Press one layer at a time, starting with the bottom layer
- Align carefully using heat-resistant tape between layers
Remember: Let each layer cool before adding the next to avoid color blending.
Combining sublimation with other Cricut features
Mix and match techniques for unique results:
- Sublimation + vinyl: Add vinyl details to sublimated backgrounds
- Sublimation + embroidery: Sublimate fabric, then add embroidered elements
- Sublimation + etching: Sublimate part of a glass item, etch another part
Try this: Sublimate a design onto fabric, then use your Cricut to cut it into shapes for patches or appliques.
Here’s a quick guide to layering times:
Layer | Time | Notes |
|---|---|---|
First | Full time | Base layer |
Second | 75% of full time | Builds on first layer |
Third | 50% of full time | Adds final details |