Sublimation Color Matching Tool: Free RGB/HEX Swatch Generator

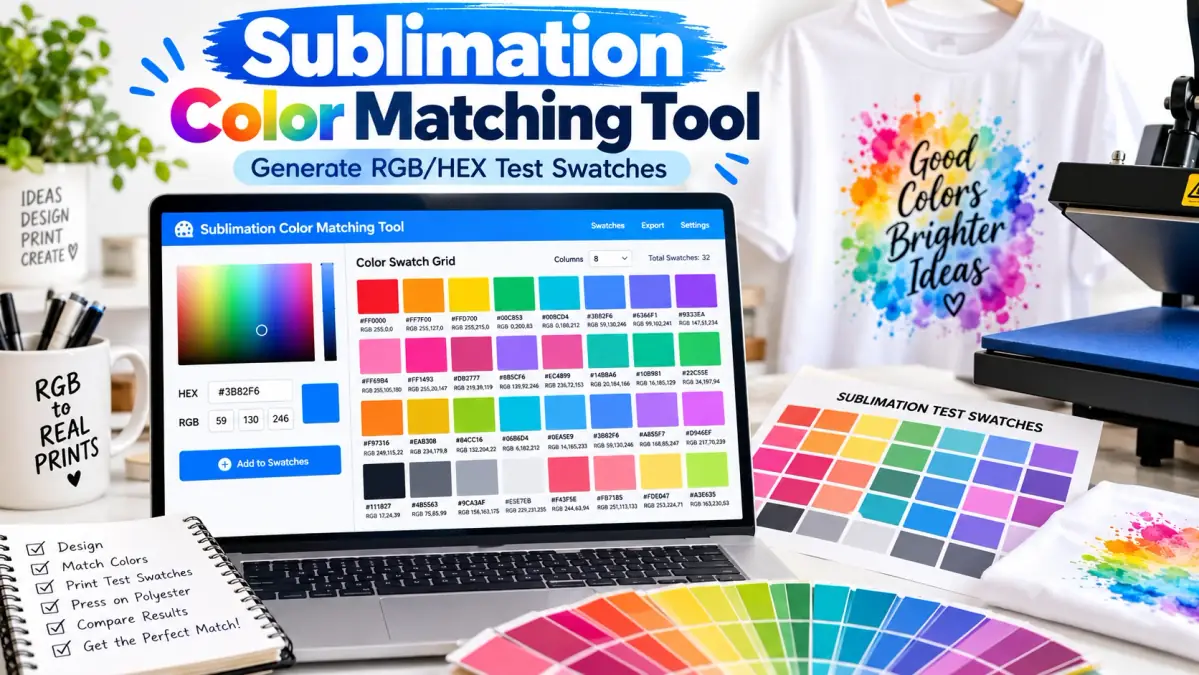
A sublimation color matching tool helps you turn one RGB or HEX color into a controlled grid of nearby test swatches. Print the grid through your normal sublimation workflow, press it on the actual substrate, then choose the physical swatch that comes closest to the color you need.
The tool below does not predict the final pressed color. Printer, ink, transfer paper, color management, substrate, heat, time, and pressure can all change the result. The useful reference is the finished pressed swatch, not the screen preview.
Sublimation Color Matching Tool
Generate Sublimation Test Swatches
Start with the digital color you want to match. The tool builds nearby RGB/HEX candidates for physical print-and-press testing.
Test Sheet Record
How the Sublimation Color Matching Tool Works
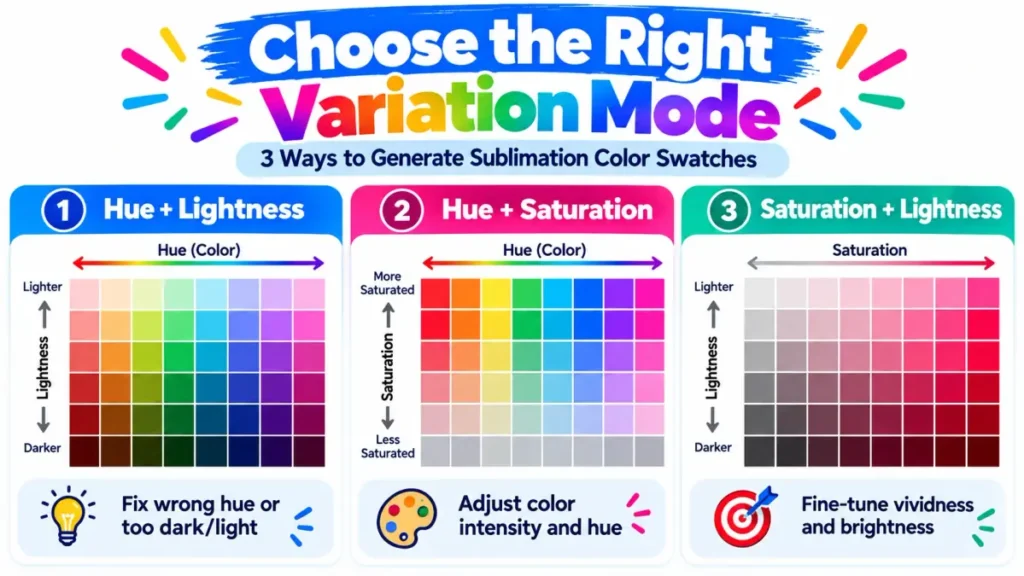
The workflow is simple: enter a starting color, generate nearby swatches, print, press, compare, then refine around the closest result.
- Enter the HEX or RGB value closest to the color you want.
- Choose the grid size and variation mode.
- Generate the candidate swatches.
- Print the test sheet through the same workflow used for production.
- Press the sheet on the actual product material.
- Select the closest finished swatch and use its HEX or RGB code.
- If the match is still off, use that swatch as the new center and generate a tighter range.
If you need a fixed reference instead of a custom test, use the main sublimation color chart.
Generate Your First Sublimation Test Swatches
Start with the digital color that is closest to your target. The tool accepts a visual color picker, a six-digit HEX code, or RGB values from 0 to 255.
Enter a HEX or RGB starting color
Use the value from your artwork, brand reference, or closest known digital color. The HEX and RGB fields stay synchronized, so changing one updates the other.
Choose the grid size
| Grid | Best use |
|---|---|
| 5 × 5 | Fast test with fewer swatches |
| 7 × 7 | Balanced starting point for most color matching |
| 9 × 9 | Broader physical comparison when the color is difficult |
Choose what changes across the grid
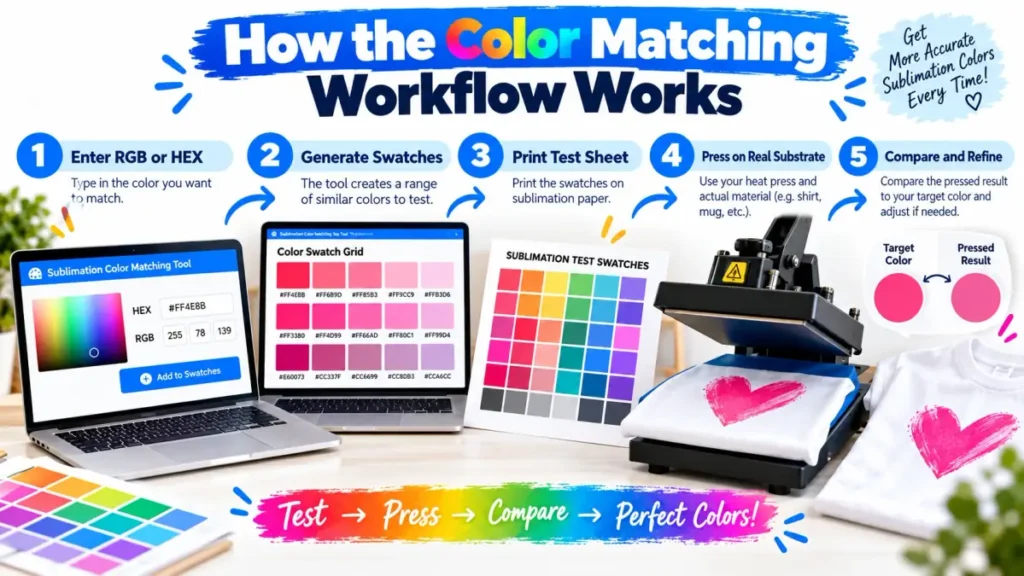
| Variation mode | Use it when |
|---|---|
| Hue + Lightness | The color is drifting toward the wrong hue or pressing too dark/light |
| Hue + Saturation | The hue is close but the result looks too vivid or too muted |
| Saturation + Lightness | The basic hue is right and you only need intensity and brightness changes |
Start with the medium range when you are unsure. Use a wide range when the finished color is far from the target. Once a swatch is close, click it and use Refine Around This Color to cut the range down for a second test.
Print the Swatch Sheet With Your Normal Production Setup
A color test is only useful when it travels through the same workflow as the job you are trying to match. Do not create special printer settings only for the swatch sheet.
- Use the same printer and sublimation ink.
- Use the same transfer paper.
- Print from the same software and file workflow.
- Keep the same ICC profile or printer color-management method.
- Use the same print-quality and media settings.
- Mirror the test sheet only when your normal workflow requires manual mirroring.
If you are unsure where RGB, CMYK, and profiles fit into the print path, review RGB vs CMYK and ICC profiles for sublimation color before changing the workflow.
Press the Swatches on the Actual Substrate
The screen and transfer paper are not the final reference. Press the swatches on the same type of substrate used for the finished job, following the blank or material manufacturer’s guidance when available.
A color that looks right on white polyester may not look the same on coated ceramic or metal. Surface color, coating, material, heat behavior, and viewing conditions can all change the finished appearance. The sublimation color shift chart explains why separate physical references are useful for different substrates.
Record the printer, ink, paper, profile, substrate, temperature, time, and pressure in the tool before printing. Those fields are included on the printable test sheet so the result can be traced back to the exact workflow.
Find the Closest Color and Refine It
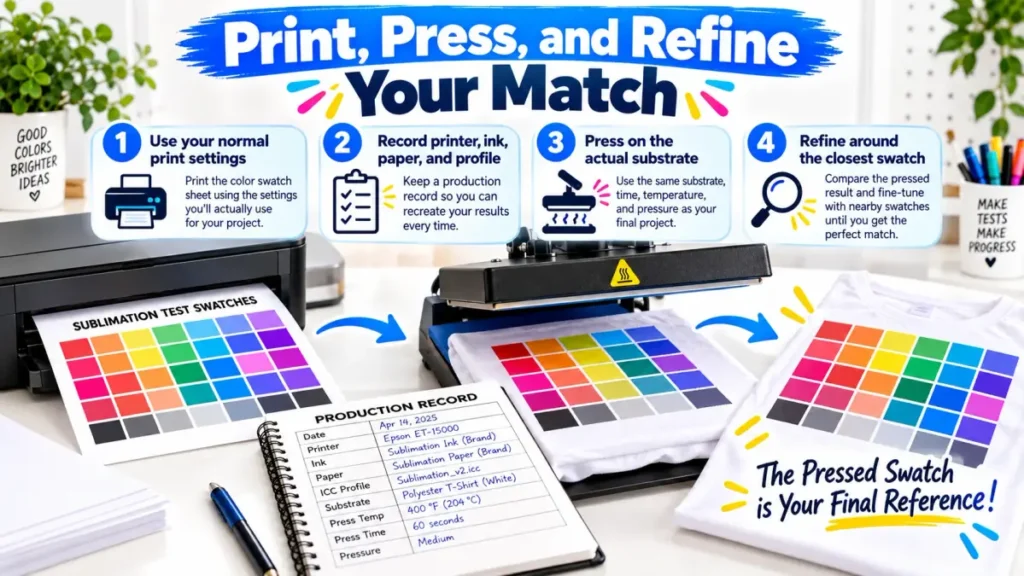
The first grid does not need to contain the final answer. Its job is to get you closer.
- Compare the finished pressed swatches against your physical target.
- Find the closest swatch and note its grid label, HEX value, and RGB value.
- Click that swatch in the tool.
- Choose Refine Around This Color.
- The selected swatch becomes the new center and the variation range becomes narrower.
- Print and press the new test sheet.
- Repeat only if a closer match is still needed.
This broad-to-fine approach is more controlled than making random hue, brightness, or saturation changes in artwork and hoping the next print lands closer.
For a complete color-control workflow beyond the tool, use the five-step sublimation color matching process.
When You Need a New Color Test Sheet
A saved HEX value is only meaningful when the production setup remains similar to the setup that created the physical match.
- Print a new sheet after changing the printer.
- Retest after changing sublimation ink.
- Retest after changing the ICC profile or color-management method.
- Retest after a major driver or print-quality change.
- Retest after switching transfer paper when color behavior changes.
- Create a separate reference for a different substrate or coating.
- Retest if a nozzle or print-quality problem affected the previous sheet.
Label successful color codes with the production setup they belong to. A code without that context can become misleading after the workflow changes.
Why the Tool Cannot Guarantee an Exact Screen-to-Press Match
This tool generates digital color variations. It does not measure your printer, ink, profile, transfer paper, substrate, heat press, or viewing light.
| The tool can do | The tool cannot do |
|---|---|
| Generate nearby RGB/HEX candidates | Predict the exact pressed result |
| Create repeatable labeled test grids | Correct a clogged nozzle |
| Help narrow a difficult color in stages | Replace the correct ICC or color-management workflow |
| Record production variables on the sheet | Guarantee identical results on every substrate |
| Provide a physical testing workflow | Certify a Pantone or brand color match |
For strict brand-color work, compare the pressed swatches against the brand-approved physical sample or authorized color standard. Do not treat a monitor preview as certified proof.
If None of the Swatches Match
Use the pattern across the whole sheet to decide what to change next.
| What you see after pressing | Next test |
|---|---|
| Every swatch is too dark | Generate a lighter range, then verify color management and press conditions if the shift is severe |
| The hue is consistently wrong | Use Hue + Lightness or Hue + Saturation with a wider hue range |
| The color is too vivid or too muted | Use a mode that changes saturation |
| One swatch is close | Refine around that swatch with a narrower range |
| The whole sheet looks unexpectedly wrong | Check nozzle output, profile/settings, paper, and press conditions before generating more colors |
| The sheet matches on one material but not another | Create a separate physical reference for the other substrate |
If the entire color system looks wrong rather than one target color, stop adjusting individual artwork. Use the sublimation color problems and fixes guide to check the production workflow first.
When the problem points to color management, the ICC profile resource can help you verify whether the printer, ink, and profile combination is appropriate.
Frequently Asked Questions
Does this sublimation color matching tool replace an ICC profile?
No. An ICC profile manages color conversion for a specific printing workflow. This tool creates nearby candidate swatches for physical testing. A good profile and a physical swatch reference can work together, but they solve different parts of the problem.
Should I use RGB or HEX for sublimation color matching?
Either works in this tool because HEX is another way of representing RGB values. Use the format your design software handles most easily, then keep the same print and color-management workflow when testing the swatches.
Why do the swatches look dull on sublimation paper?
Do not choose the final match from the transfer paper alone. Sublimation dye changes during the heat-transfer process. Compare the finished pressed swatches on the real substrate before deciding which code is closest.
Do I need a separate swatch sheet for each substrate?
Create separate references when the substrates are materially different or when color accuracy matters. Polyester fabric, ceramic, and coated metal can produce visibly different results from the same digital file.
Can this tool match a Pantone or brand color exactly?
It can help you search for a closer physical result, but it cannot certify an exact Pantone or brand-color match. Compare pressed swatches against an authorized physical reference when strict color approval is required.
When should I reprint my color reference?
Retest after a meaningful change to printer, ink, color profile, transfer paper, substrate, major print settings, or production conditions. Reprint after fixing a nozzle or print-quality problem that affected the original sheet.
Can I use the final HEX code in Canva, Photoshop, or Illustrator?
Yes, when the software lets you enter HEX or RGB values. Save the code together with the printer, ink, profile, paper, substrate, and press setup that produced the successful physical match.
Use the Pressed Swatch as the Reference
The sublimation color matching tool is most useful as a controlled testing system, not a screen-color predictor. Generate a reasonable range, print it through your normal workflow, press it on the actual substrate, and refine around the closest finished swatch.
Once you have a successful match, save the HEX or RGB code with the production record. That gives you a repeatable reference for future artwork instead of starting from zero each time.