
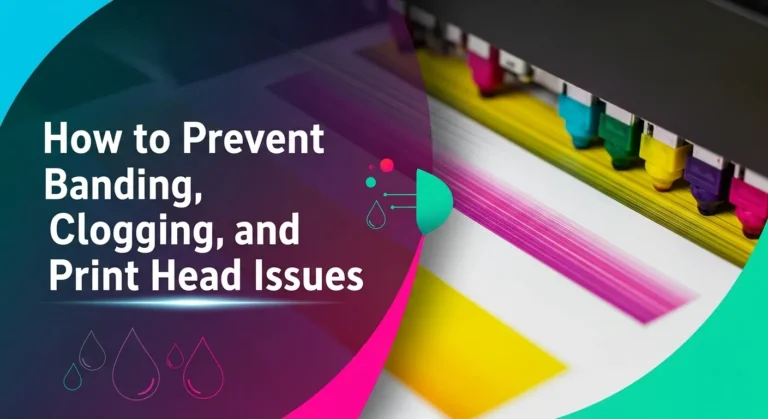
Sublimation Metal Blanks: Fix Faded Prints, Peeling Designs
Sublimation metal blanks are specially coated surfaces designed to accept dye sublimation prints. Aluminum blanks, a common type, are lightweight and provide excellent color vibrancy.
Both are used for creating custom products like photo panels, nameplates, and keychains. They require heat, pressure, and sublimation ink to produce durable, high-quality images.
What is Sublimation Metal Printing?
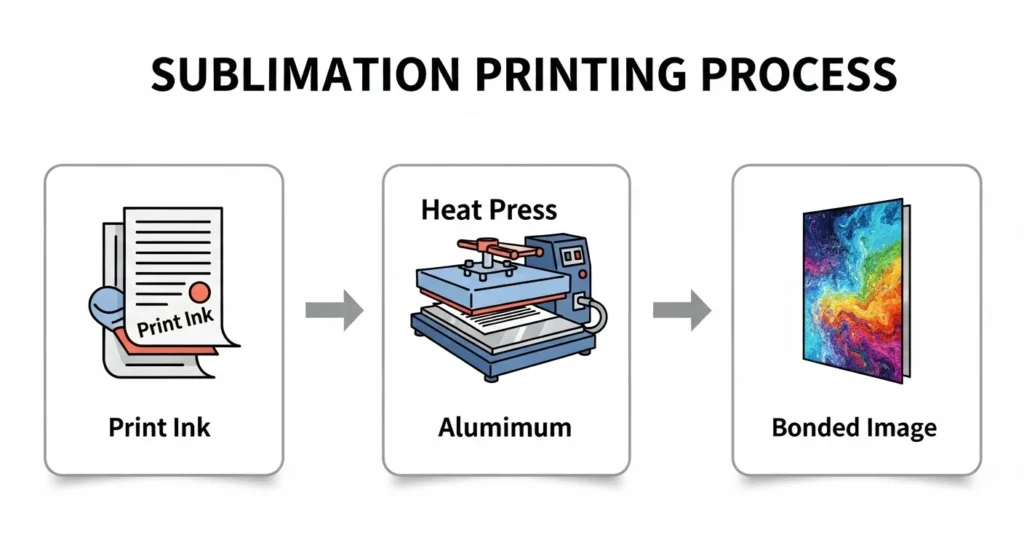
Sublimation metal printing is a process that transfers dye-based ink onto coated metal using heat and pressure, creating durable, full-color designs.
- Design Creation: Craft your artwork using digital design software.
- Printing: Use a sublimation printer to print the design onto transfer paper with sublimation inks.
- Heat Transfer: Place the transfer paper onto the metal surface and apply heat and pressure. The inks transform into gas and embed into the metal coating, resulting in a durable, high-resolution image.
How Does Sublimation on Metal Differ from Other Materials?
Sublimation works with other substrates, but metal offers unique advantages:
- Durability: Unlike fabrics that may fade or wear over time, sublimated metals are resistant to scratches and UV exposure, ensuring longevity.
- Vividness: The smooth, reflective nature of metal enhances color vibrancy, making images pop with a luminous quality.
- Surface Preparation: Metals require a specialized polyester coating to bond the sublimation inks effectively, whereas materials like polyester fabrics are naturally receptive.
Check out How I Choose the Best Sublimation Blanks and Substrates
Why Choose Sublimation Metal Blanks for High-Quality Prints?
Opting for sublimation on metal blanks offers several compelling benefits:
- Professional Finish: The end product boasts a sleek, glossy appearance, ideal for high-end displays and art pieces.
- Customization: Perfect for personalized items, from photo panels to custom signage, catering to both personal and commercial needs.
- Efficiency: Once set up, the process allows for quick production, making it cost-effective for small to medium batches.
Best Sublimation Metal Blanks
Choosing the right metal blanks is crucial for vibrant and lasting prints. Here’s what to consider:
Aluminum Blanks: Lightweight and offering excellent color reproduction, aluminum is a popular choice. Brands like Beclumas provide 8″x10″ aluminum photo blanks, perfect for personalized photo displays.
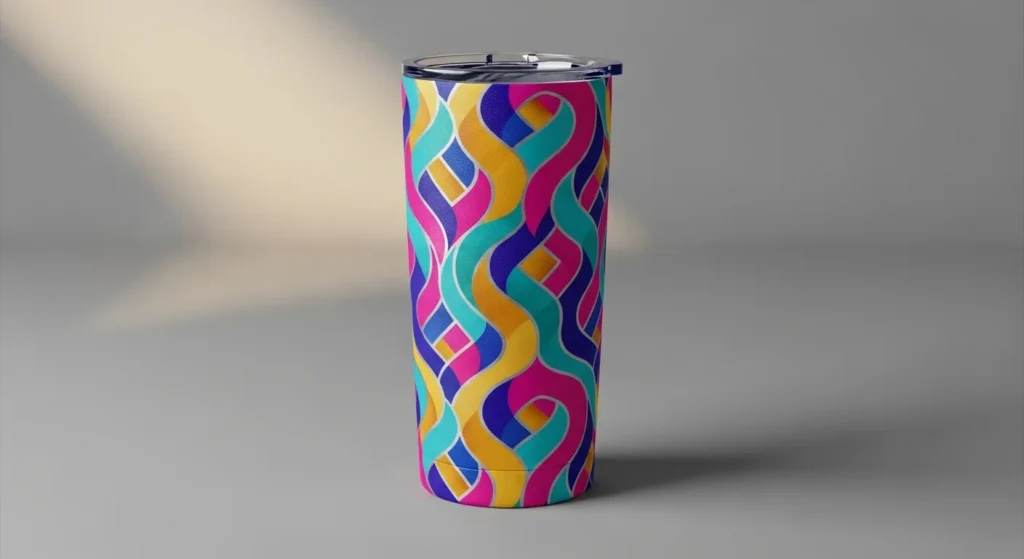
Stainless Steel Blanks: Known for their durability and sleek finish, stainless steel blanks are ideal for items like tumblers and mugs. Products such as the MURRICON 20 oz sublimation tumblers offer a premium feel and are ready for customization.

Recommended Printers, Inks, and Transfer Papers
The quality of your equipment directly impacts your results. Here’s what seasoned sublimation enthusiasts recommend:
- Printers:
- Sawgrass SG500: A purpose-built sublimation printer known for high-quality output and reliability.
- Epson EcoTank Series: Models like the ET-2803 are popular among crafters for their affordability and ease of conversion to sublimation use.
- Inks:
- Hiipoo Sublimation Ink: Widely used for its vibrant colors and compatibility with various Epson EcoTank models.
- Sawgrass Sublijet-UHD: Designed specifically for Sawgrass printers, ensuring optimal performance and color accuracy.
- Transfer Papers:
- A-SUB Sublimation Paper: Renowned for its high transfer rate and compatibility with multiple substrates, making it a favorite among professionals.
Must-Have Heat Press and Accessories for Consistent Results
Achieving consistent, high-quality transfers requires the right heat press and accessories. Here’s what to look for:
- Heat Press Machines:
- Clamshell Heat Press: Ideal for flat items like plaques and photo panels.
- Mug Press Attachments: Essential for curved items such as mugs and tumblers, ensuring even pressure and heat distribution.
- Essential Accessories:
- Heat-Resistant Tape: Secures your transfer paper in place, preventing any shifting during the pressing process.
- Teflon Sheets: Protects both your design and heat press platen from ink residue and ensures even heat distribution.
- Protective Heat Press Mats: Provides a stable pressing surface and helps in achieving even pressure across your substrate.
Why Use Metal Blanks:
Metal isn’t just for industrial use anymore. When it comes to sublimation, metal blanks are a game-changer. Here’s why:
- Durability: Sublimated metal prints can last for years without losing their vibrancy, even in high-traffic areas.
- Professional Finish: The glossy or matte coating gives your designs a polished, high-end look.
- Versatility: From photo panels to custom signage, metal blanks adapt to a wide range of projects.
- Eco-Friendly: Many metal blanks are recyclable, making them a sustainable choice for eco-conscious creators.
Common Applications:
Metal blanks aren’t just functional; they’re transformative. Here are some popular ways they’re used:
| Application | Why It Works |
|---|---|
| Photo Prints | Preserve memories with stunning, gallery-quality images that pop off the metal. |
| Custom Signage | Create eye-catching signs for businesses, events, or home decor. |
| Personalized Gifts | Design unique keepsakes like keychains, coasters, or wall art. |
| Artistic Displays | Showcase artwork or photography with a modern, industrial edge. |
For instance, did you know that 85% of small businesses using custom metal signage report increased customer engagement? That’s the power of a well-designed metal print.
How to Sublimate on Metal Blanks: Step-by-Step Guide
To sublimate on metal blanks, print your design on sublimation paper, place it on a coated metal surface, then apply heat and pressure using a heat press.
What You’ll Need
Before you start, gather these essentials:
- Sublimation Printer and Ink: Regular ink won’t cut it—sublimation ink is a must.
- Metal Blanks: Opt for coated blanks (like aluminum) designed for sublimation.
- Heat Press: A reliable heat press with even pressure is key.
- Sublimation Paper: High-quality paper ensures vibrant transfers.
- Heat-Resistant Tape: To keep your design in place during pressing.
- Protective Paper: To shield your heat press and blanks from excess ink.
Step 1: Design Preparation
Start by creating or selecting your design. Use graphic design software like Adobe Illustrator, Canva, or even free tools like GIMP. Keep these tips in mind:
- Mirror Your Design: Always flip your image horizontally before printing—it’ll transfer correctly onto the metal.
- Size Matters: Ensure your design fits the dimensions of your metal blank.
- Color Calibration: Sublimation inks can look different on metal, so test your colors if possible.

Step 2: Print Your Design
Load your sublimation paper into the printer and print your design. A few pro tips:
- Use the highest quality print settings for crisp, vibrant results.
- Let the ink dry for a minute or two to avoid smudging.
- Handle the paper by the edges to prevent fingerprints or oil transfer.

Step 3: Prepare the Metal Blank
Before pressing, make sure your metal blank is ready:
- Clean the Surface: Wipe it down with a lint-free cloth to remove dust or oils.
- Pre-Press (Optional): Some creators pre-press the blank for 5-10 seconds to remove moisture and ensure a smooth surface.

Step 4: Press Your Design
This is where the magic happens! Here’s how to do it right:
- Secure the Design: Use heat-resistant tape to attach the printed design (ink-side down) to the metal blank.
- Add Protective Paper: Place a sheet of protective paper on top to catch any excess ink.
- Set Your Heat Press:
- Temperature: 380°F to 400°F (193°C to 204°C).
- Time: 45 to 60 seconds.
- Pressure: Medium to firm (follow your heat press manual).
- Press It: Close the heat press and let it work its magic. Avoid peeking—it can disrupt the transfer!

Step 5: Cool and Reveal
Once the timer goes off, carefully remove the metal blank using heat-resistant gloves. Let it cool for a minute or two before peeling off the sublimation paper. You’ll see your design come to life in vivid detail!

Step 6: Finishing Touches
- Inspect Your Work: Check for any imperfections or areas that didn’t transfer fully.
- Seal (Optional): Some creators use a clear sealant to add extra durability, especially for items like coasters or keychains.
Quick Troubleshooting Tips
- Faded Colors? Increase the temperature slightly or extend the pressing time.
- Blurry Design? Ensure the design is taped securely to prevent shifting.
- Uneven Transfer? Check that your heat press applies even pressure.
Sublimation on Metal: Time, Temperature, and Pressure Settings
Time, temperature, and pressure settings is crucial to obtaining the perfect sublimation print on metal blanks. These three factors are the foundation of a successful transfer, and even minor adjustments can make a significant difference.
Check out Sublimation Temperature & Pressure Calculator
Why Settings Matter
Too little heat, and your design won’t transfer fully. Too much pressure, and you risk damaging the blank. Nailing the right balance ensures vibrant, durable prints that look like they came straight out of a professional studio.
Recommended Settings for Metal Blanks
Here’s a quick reference table to get you started:
| Setting | Recommended Value | Why It’s Important |
|---|---|---|
| Temperature | 380°F to 400°F (193°C to 204°C) | High enough to convert ink into gas but not so high that it damages the coating. |
| Time | 45 to 60 seconds | Ensures the ink fully transfers without overexposing the metal. |
| Pressure | Medium to firm (adjust based on your heat press) | Even pressure prevents blurring or uneven transfers. |
Breaking Down Each Setting
1. Temperature: The Sweet Spot
Sublimation ink turns into a gas when heated, bonding with the coating on the metal blank. Here’s what you need to know:
- Too Low: The ink won’t fully transfer, leaving your design faded or patchy.
- Too High: You risk burning the coating or warping the metal.
- Pro Tip: Start at 380°F and increase in 5°F increments if needed. Always test on a small area first!
2. Time: Patience Pays Off
Timing is crucial for a clean transfer. Here’s why:
- Too Short: The ink won’t have enough time to bond, resulting in a weak transfer.
- Too Long: Overheating can cause colors to bleed or the coating to degrade.
- Pro Tip: For thicker blanks or larger designs, lean toward 60 seconds. Smaller items may only need 45 seconds.
3. Pressure: Even and Consistent
Pressure ensures the design transfers evenly across the entire surface. Keep these points in mind:
- Too Light: Parts of the design may not transfer fully, leaving gaps.
- Too Heavy: You could damage the blank or create a “ghosted” effect.
- Pro Tip: Use a heat press with adjustable pressure settings and test on scrap blanks to find the perfect balance.
Adjusting for Different Metal Blanks
Not all metal blanks are created equal. Here’s how to tweak your settings for common types:
| Metal Type | Adjustments |
|---|---|
| Aluminum Blanks | Stick to the standard settings—they’re the most forgiving and widely used. |
| Stainless Steel | Slightly higher temperature (390°F to 400°F) and longer time (up to 70 seconds). |
| Coated Steel | Lower temperature (375°F to 385°F) to avoid damaging the coating. |
Common Mistakes and How to Fix Them
Even with the right settings, things can go wrong. Here’s how to troubleshoot:
- Faded Colors: Increase the temperature by 5°F or extend the time by 10 seconds.
- Blurry Design: Check that the pressure is even and the design is taped securely.
- Uneven Transfer: Ensure the heat press plate is level and the blank is positioned correctly.
Sublimation Printing on Aluminum: A Practical Guide
Sublimation printing on aluminum transfers designs onto coated metal using sublimation ink and heat presses. Produces durable, full-color results quickly.
How Sublimation on Aluminum Works
- Coated Surface Required
- Aluminum must have a polymer or polyester coating to accept sublimation inks.
- Uncoated aluminum will not hold the design.
- Heat Transfer Process
- Ink is first printed on sublimation paper.
- A heat press or specialized sublimation press applies heat (typically 350–400°F) and pressure.
- Heat causes the ink to turn into gas and bond with the coated aluminum.
- Cooling and Finishing
- After pressing, allow the aluminum to cool.
- The result is a permanent, scratch-resistant image.
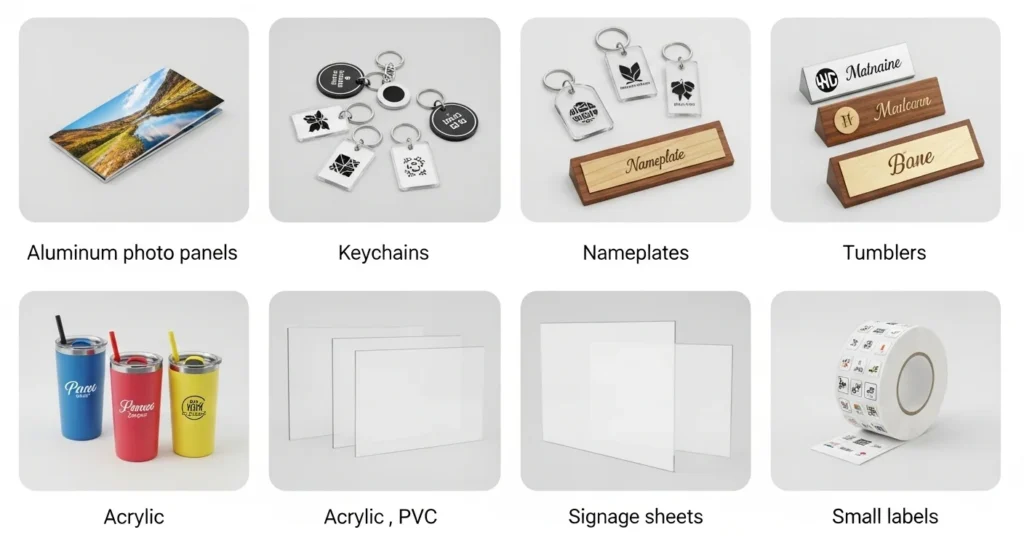
Suitable Aluminum Products
Sublimation works best on coated aluminum items, including:
| Product Type | Typical Use |
|---|---|
| Aluminum photo panels | Wall art, signage |
| Keychains and tags | Personal accessories |
| Nameplates and badges | Office, events |
| Drinkware (tumblers, bottles) | Custom gifts |
| Industrial or signage sheets | Branding and signage |
Advantages of Sublimation on Aluminum
- Produces sharp, full-color images.
- Coating ensures durability and scratch resistance.
- Ideal for outdoor or long-term use, unlike paper or fabric prints.
Limitations and Considerations
- Only works on polymer-coated aluminum.
- Standard sublimation ink is not UV-stable, may fade under prolonged sun exposure.
- Requires temperature and pressure control; inconsistent heat can cause color issues.
- Aluminum can expand slightly under heat; small warping is possible on thin sheets.
Tips for Consistent Results
- Use high-quality coated aluminum sheets.
- Calibrate your heat press temperature and pressure.
- Protect the design with protective paper or Teflon sheet during pressing.
- Test prints on scrap aluminum to verify color accuracy before full production.
Troubleshooting Common Problems
1. Faded or Dull Colors: Causes and Fixes
There’s nothing more disappointing than pulling your design off the heat press only to find the colors are lackluster. Here’s why it happens and how to fix it:
Causes:
- Incorrect Temperature: Too low, and the ink won’t fully transfer; too high, and the colors can burn out.
- Poor-Quality Ink or Paper: Not all sublimation supplies are created equal.
- Inadequate Pressure: Uneven or insufficient pressure can lead to patchy transfers.
Fixes:
- Adjust Temperature: Start at 380°F and increase in 5°F increments if needed. Test on a small area first.
- Upgrade Supplies: Invest in high-quality sublimation ink and paper designed for metal blanks.
- Check Pressure: Ensure your heat press is set to medium or firm pressure for even transfers.
Pro Tip: If colors still look dull, try increasing the pressing time by 10-15 seconds. Sometimes, a little extra time is all it takes to bring your design to life.
2. Uneven Prints: How to Ensure Consistent Pressure
Uneven prints can ruin an otherwise perfect design. Here’s how to avoid this frustrating issue:
Causes:
- Uneven Heat Press Plates: If the plates aren’t level, pressure won’t be distributed evenly.
- Improper Blank Placement: If the blank isn’t centered or secured, parts of the design may not transfer.
- Inconsistent Pressure Settings: Too much or too little pressure can cause uneven results.
Fixes:
- Level Your Heat Press: Use a spirit level to check if your heat press plates are even. Adjust if necessary.
- Secure the Blank: Use heat-resistant tape to hold the design in place and prevent shifting.
- Test Pressure Settings: Run a few test presses on scrap blanks to find the perfect pressure for your machine.
Pro Tip: If you’re working with larger blanks, consider using a sublimation pad or silicone sheet to ensure even pressure across the entire surface.
3. Design Peeling or Scratching: Tips for Durability
A sublimated design should be durable enough to withstand everyday use. If it’s peeling or scratching, here’s what might be going wrong:
Causes:
- Incomplete Transfer: If the ink doesn’t fully bond with the coating, the design won’t last.
- Low-Quality Blanks: Not all metal blanks are created equal—some coatings are more durable than others.
- Improper Cooling: Removing the design too quickly can weaken the bond.
Fixes:
- Optimize Settings: Ensure you’re using the correct time, temperature, and pressure for a full transfer.
- Choose Quality Blanks: Look for blanks with a high-quality polyester coating designed for sublimation.
- Let It Cool: Allow the blank to cool completely before removing the sublimation paper.
Pro Tip: For extra durability, consider applying a clear sealant or protective spray designed for sublimated surfaces. This is especially useful for items like coasters or keychains that see a lot of wear and tear.
Check out Sublimation Ornaments: Create, Customize, and Source Blanks Easily
Tips for Perfect Sublimation on Metal
1. Pre-Pressing Blanks to Remove Moisture
Moisture is the enemy of sublimation. Even a tiny amount can cause bubbles, uneven transfers, or dull colors. Here’s how to tackle it:
- What to Do: Before pressing your design, pre-press the metal blank for 5-10 seconds at the same temperature you’ll use for sublimation (380°F to 400°F). This removes any trapped moisture and ensures a smooth, dry surface.
- Why It Works: Pre-pressing not only dries the blank but also helps the coating adhere better to the metal, resulting in a more vibrant and durable transfer.
Pro Tip: If you’re working in a humid environment, store your blanks in a dry, airtight container to prevent moisture absorption.
2. Using High-Quality Sublimation Paper
Not all sublimation paper is created equal. The right paper can make or break your design. Here’s what to look for:
- Key Features:
- Fast-Drying Ink Absorption: Prevents smudging and ensures sharp details.
- High Release Rate: Transfers more ink to the blank for vibrant colors.
- Compatibility: Designed specifically for sublimation printers and inks.
- Why It Matters: Cheap paper can lead to faded colors, uneven transfers, or even damage your heat press. Investing in quality paper ensures consistent, professional results.
Pro Tip: If you’re unsure which paper to use, look for brands with good reviews from other sublimation artists. A little research goes a long way!
3. Experimenting with Small Batches for Optimal Results
Sublimation is as much about experimentation as it is about technique. Here’s why starting small can save you time, money, and frustration:
- What to Do:
- Test different time, temperature, and pressure settings on a few small blanks before committing to a large project.
- Keep a log of your settings and results to track what works best.
- Why It Works: Small batches let you fine-tune your process without wasting materials. Plus, they’re a great way to test new designs or techniques.
Pro Tip: Use scrap blanks or cut larger ones into smaller pieces for testing. This way, you can experiment without breaking the bank.
Bonus Tips for Flawless Results
- Clean Your Blanks: Wipe them down with a lint-free cloth and isopropyl alcohol to remove dust, oils, or fingerprints.
- Mirror Your Design: Always flip your image horizontally before printing—it’ll transfer correctly onto the metal.
- Use Heat-Resistant Tape: Secure your design to the blank to prevent shifting during pressing.
- Let It Cool: Allow the blank to cool completely before removing the sublimation paper. This ensures the ink sets properly.
Creative Ideas for Sublimation Metal Projects
1. Personalized Photo Panels
Turn your favorite memories into timeless keepsakes with personalized photo panels.
Why It Works:
- Metal’s glossy or matte finish gives photos a professional, gallery-quality look.
- Durable and long-lasting, these panels are perfect for displaying cherished moments.
Ideas to Try:
- Family Portraits: Create a stunning wall display for your home.
- Pet Photos: Celebrate your furry friends with vibrant, lifelike prints.
- Travel Memories: Showcase your favorite vacation snapshots in a unique way.
Pro Tip: Use high-resolution images for the best results. A little editing (like adjusting brightness and contrast) can make your photos pop even more.
2. Custom Signage and Wall Art
From home decor to business branding, custom signage on metal blanks makes a bold statement.
Why It Works:
- Metal’s durability makes it ideal for both indoor and outdoor use.
- The sleek, modern look adds a touch of sophistication to any space.
Ideas to Try:
- Home Decor: Create inspirational quotes, family names, or custom artwork for your walls.
- Business Signage: Design eye-catching signs for storefronts, trade shows, or office spaces.
- Event Decor: Make personalized welcome signs, table numbers, or directional signs for weddings, parties, or corporate events.
Pro Tip: Pair your designs with complementary colors and fonts to create a cohesive look. For outdoor signage, consider using a protective sealant to enhance durability.
3. Unique Gifts
Sublimation metal blanks are perfect for creating one-of-a-kind gifts that leave a lasting impression.
Why It Works:
- Personalized gifts show thoughtfulness and effort, making them extra special.
- Metal’s durability ensures your creations will be cherished for years to come.
Ideas to Try:
- Keychains: Design mini photo panels or custom logos for a practical yet sentimental gift.
- Coasters: Create sets featuring family photos, monograms, or fun patterns.
- Ornaments: Make holiday decorations with personalized names, dates, or designs.
- Phone Docks: Combine functionality with style by sublimating sleek metal phone stands.
Pro Tip: For gifts, consider packaging your creations in a way that matches the theme—like a gift box with tissue paper or a reusable tote bag.
4. Artistic Displays
Push your creative boundaries by using metal blanks as a canvas for your artwork.
Why It Works:
- Metal’s smooth surface and vibrant color reproduction make it ideal for artistic designs.
- The modern, industrial look adds a unique touch to any art collection.
Ideas to Try:
- Abstract Art: Experiment with bold colors and patterns for a contemporary feel.
- Nature-Inspired Designs: Create stunning landscapes, floral patterns, or wildlife scenes.
- Typography Art: Combine words and visuals to make a powerful statement.
Pro Tip: Use metallic or neon sublimation inks to add an extra layer of depth and shine to your designs.
5. Functional Items with a Creative Twist
Why settle for ordinary when you can make everyday items extraordinary?
Why It Works:
- Combining functionality with creativity makes these items both practical and memorable.
- Metal’s durability ensures your designs stand up to daily use.
Ideas to Try:
- Bookmarks: Design sleek, personalized bookmarks for book lovers.
- Magnets: Create custom fridge magnets featuring photos, quotes, or logos.
- Jewelry: Make unique pendants, earrings, or cufflinks with sublimated designs.
Pro Tip: For functional items, focus on designs that are both visually appealing and meaningful to the recipient.
For inspiration and a practical walkthrough, see our guide on creating, customizing, and sourcing sublimation ornaments using blanks of various shapes and sizes: Sublimation Ornaments: Create, Customize, and Source Blanks Easily.

One Comment