How to Do Sublimation: Master Dark Shirts, Mugs at Home
To sublimate dark shirts and mugs at home, start with coated blanks or polyester-rich fabric. Print your design using sublimation ink and paper, then apply with a heat press at the correct temperature and pressure.
For dark fabrics, use sublimation HTV as a base. The result is a vibrant, durable print ideal for custom gifts or products.
Quick Start Guide:
- Choose a Printer: Epson EcoTank ET-2800 with sublimation ink (~$200).
- Get a Heat Press: Basic 15×15 model (~$150).
- Use Polyester or Coated Blanks: Skip cotton unless using sprays.
- Press at the Right Temp: 400°F for shirts, 380°F for mugs.
- Test First: Always try a scrap to avoid costly mistakes.
Sublimation Basics: What Beginners Need to Know
How Sublimation Works
- Solid to Gas, No Mess: Special sublimation ink turns into gas at 400°F (204°C), bonding directly to polyester fibers or polymer-coated surfaces (think mugs, tumblers, or phone cases). No liquid phase, no fuss!
- Why It’s Awesome: Unlike vinyl or screen printing, sublimation designs become part of the material. They won’t crack, peel, or fade, even after tons of washes.
- Perfect For: Light-colored polyester items (like yoga leggings, team jerseys, or tote bags) and coated ceramics (custom pet photo mugs, coasters, or phone cases).
Sublimation vs. Traditional Printing Here’s why sublimation steals the show:
| Traditional Printing | Sublimation |
|---|---|
| Peels or cracks over time | Bonds to fabric for lasting results |
| Best for simple designs | Handles photorealistic prints (gradients galore!) |
| Works on cotton | Needs polyester or coated surfaces |
Sublimating Dark Fabrics: What You Need to Know
Here’s the deal: sublimation ink is translucent, so it fades on dark fabrics like watercolors on black paper. Plus, it only bonds to polyester, not cotton (unless you’re sneaky). But don’t worry—here are two pro workarounds to make dark shirts pop:

- Heat-Transfer Vinyl (HTV) Hack: Print your design on white HTV, cut it with a Cricut, and press it onto the shirt. You’ll get bright colors on black tees, but it won’t feel as seamless as true sublimation.
- Best for: Small logos or text designs.
- Sublimation Spray Coatings: Spray a polymer layer (like Siser EasySubli) onto dark cotton or poly-blend shirts to give the ink something to grip. Test a small patch first—some sprays leave a slight sheen.
- Best for: Budget-friendly DIY projects.
Pro Tip: Always use heat-resistant gloves when working with a 400°F press to stay safe. Want to try sublimation on a budget? You can start with a converted Epson EcoTank and basic press for under $500.
Dark Fabric Fixes at a Glance
| Problem | Solution | Best For |
|---|---|---|
| Faded prints on black shirts | HTV overlay | Small designs (logos, text) |
| Cotton or poly-blend fabrics | Sublimation spray | Affordable DIY projects |
The Dark Fabric Dilemma, Solved:
| Problem | Solution | Best For |
|---|---|---|
| Faded prints on black shirts | HTV overlay | Small designs (logos, text) |
| Cotton/poly blends | Sublimation spray | DIY projects on a budget |
Step-by-Step: How to Do Sublimation at Home
Tools You Can’t Skip
Let’s cut to the chase: sublimation isn’t a “use what’s in your junk drawer” kind of craft. But don’t panic, you only need four essentials to start:
- Sublimation Printer
Your trusty sidekick. Unlike regular printers, this one uses heat-activated ink that turns into gas (no, really!).- Budget hack: Convert an Epson EcoTank just swap the ink for sublimation cartridges.
- Avoid this rookie mistake: Never use sublimation ink in a non-dedicated printer. Clogged nozzles = tears.
- Sublimation Paper
Think of it as the Uber for your design, it transports the ink to your fabric or mug.- Go for high-release paper to avoid ghosting (when ink sticks to the paper instead of your project).
- Heat Press
The muscle of the operation. A $200 basic model works, but if you’re pressing mugs, grab one with adjustable pressure.- No heat press? A hair straightener might work for tiny patches. Keyword: might.
- Sublimation Blanks
Shirts, mugs, tumblers anything polyester or polymer-coated. Cotton is a hard no (unless you’re using spray coatings from Section 1).
Pro Tip: Skip the fancy gear at first. A used printer + basic press = under $500 to start.
The 5-Minute Sublimation Process
Here’s how to go from blank to brag-worthy in minutes:
- Design & Flip Create your design in Canva, Photoshop, or Cricut Design Space. Want a bold galaxy print or a custom pet photo? Go wild! Just make sure to mirror it horizontally (unless you’re cool with backward text—we’ve all done it).
- Print with Precision Load sublimation paper into your printer. Use ICC color profiles if your software offers them to avoid washed-out colors (like those sad, pale blues). Print at high quality for crisp results.
- Prep Like a Pro Wipe your blank (shirt, mug, etc.) with rubbing alcohol to banish dust and oils. For shirts, lint-roll first, then tape the paper face-down with heat-resistant tape to prevent slipping. For mugs, wrap the paper tightly—no gaps!
- Press with Confidence
- Shirts: Set your heat press to 400°F (204°C) for 45 seconds. Apply even, medium pressure (40-50 PSI). Don’t lean on one side!
- Mugs/Tumblers: Use a mug press at 380°F (193°C) for 5-6 minutes. Rotate halfway for even heat. Pro Tip: Place a Teflon sheet over your design to protect it and absorb excess ink.
- Peel & Reveal Let your project cool for 10-15 seconds (patience is key!). Peel the paper slowly to reveal your vibrant design. If ink sticks to the paper, you pressed too soon—repress for 10 seconds to fix it.
Quick Troubleshooting Cheat Sheet
| Issue | Likely Culprit |
|---|---|
| Faded colors | Check ink quality or bump heat to 410°F for 10 more seconds. |
| Paper sticks | Use a Teflon sheet or lower humidity with a dehumidifier. |
| Blurry edges | Secure paper tighter with extra tape. |
How to Sublimate Shirts at Home (Yes, Even Dark Ones!)
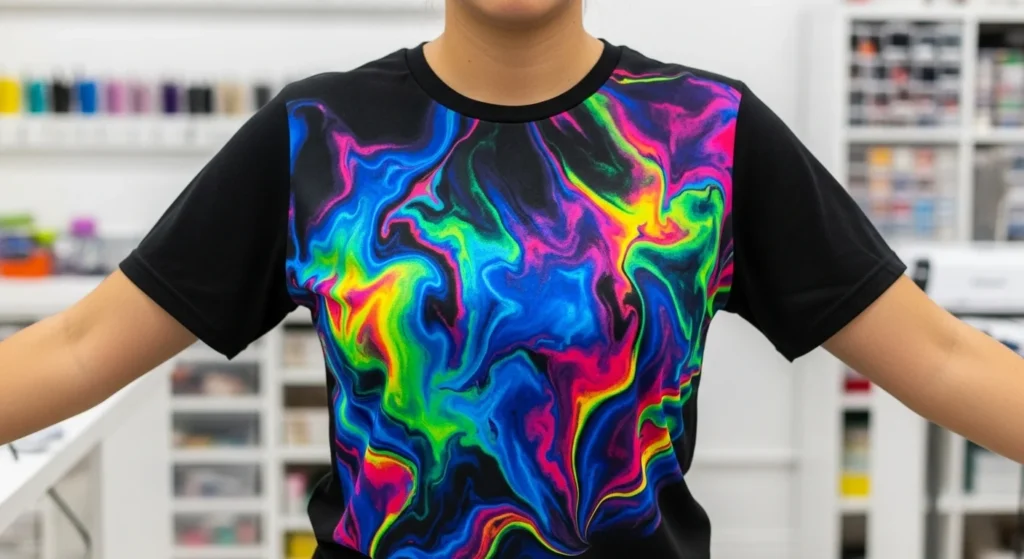
Sublimating shirts is the ultimate way to create vibrant, custom designs that last—whether it’s a bold team jersey or a quirky pet-themed tee. Light polyester shirts are a breeze, but dark fabrics? They’re the rebels of the sublimation world.
Don’t worry, though, with a few clever tricks, you can master both. Here’s your beginner-friendly guide to sublimating shirts at home, including sneaky workarounds for those tricky black tees.
What You’ll Need
- Polyester shirts (light or dark, ~$3 each—check X for bulk deals).
- Sublimation printer with ink (e.g., Epson EcoTank ET-2800).
- Sublimation paper (A-Sub works great).
- Heat press (15×15, ~$150).
- For dark shirts: White heat-transfer vinyl (HTV, like Siser Glitter) or sublimation spray (e.g., Siser EasySubli).
- Extras: Heat-resistant tape, rubbing alcohol, lint roller.
Pro Tip: Always use heat-resistant gloves when pressing at 400°F to stay safe!
Sublimating Light Polyester Shirts Light-colored polyester shirts (think white or pastel yoga tees) are sublimation’s best friend. Follow these steps:
- Pre-Press: Heat your shirt at 300°F (149°C) for 5 seconds to zap wrinkles and moisture. No regrets later!
- Design & Print: Create your design in Canva or Cricut Design Space (e.g., a vibrant sunset or team logo). Mirror it, then print on sublimation paper with high-quality settings.
- Secure It: Lint-roll the shirt, then tape the paper face-down with heat-resistant tape. No sliding allowed!
- Press It: Press at 400°F (204°C) for 45 seconds with medium pressure (40-50 PSI). Use a Teflon sheet to protect the design.
- Peel & Admire: Cool for 10 seconds, then peel slowly to reveal your masterpiece.
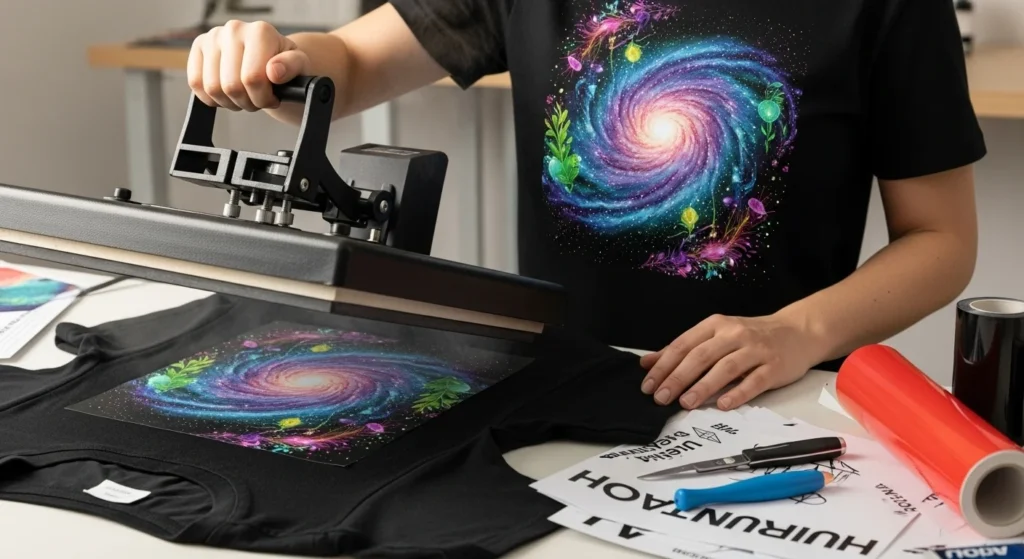
Sublimating Dark Shirts (The Workaround) Dark shirts (like black or navy) don’t play nice with sublimation ink—it’s translucent and fades on dark fabrics. But here’s how to outsmart them:
Best for: Budget-friendly projects or full-shirt designs.
Option 1: HTV Hack
- Print your design on white HTV (e.g., Siser Glitter HTV).
- Cut it with a Cricut or scissors, then press it onto the shirt at 305°F for 15 seconds.
- Sublimate your design on top of the HTV at 400°F for 45 seconds. Boom—vibrant colors on black tees!
- Downside: HTV adds a slight texture, unlike true sublimation’s seamless feel.
- Best for: Small logos or text (e.g., band merch designs).
Option 2: Sublimation Spray
- Spray a polymer coating (like Siser EasySubli) onto dark cotton or poly-blend shirts. Apply 2-3 light coats and let dry for 24 hours.
- Sublimate as usual (400°F, 45 seconds). Test a scrap first—some sprays leave a sheen.
- Best for: Budget-friendly projects or full-shirt designs.

For Dark Fabrics (The Sneaky Workaround):
- Option 1: Use white heat-transfer vinyl (HTV) as a base.
- Print your design on white HTV, cut it with scissors or a Cricut, and press it onto the shirt first.
- Sublimate on top of the HTV. Boom vibrant colors on black tees!
- Option 2: Spray-and-pray (but smarter).
- Coat dark cotton with sublimation spray (like Siser EasySubli), let it dry, then press as usual.
Pro Tip: “Think of HTV as the ‘white canvas’ for dark shirts. It’s like giving your ink a stage to shine!”
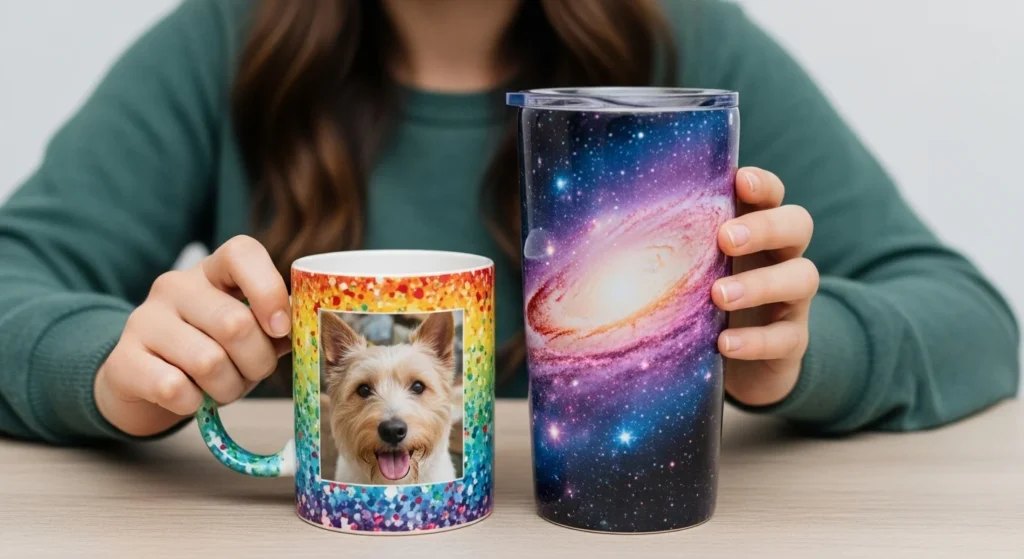
Mug & Tumbler Sublimation Made Easy
What You’ll Need
- Sublimation-ready mugs or tumblers (polymer-coated, ~$2 each—check X for bulk deals).
- Sublimation printer with ink (e.g., Epson EcoTank ET-2800).
- Sublimation paper (A-Sub is a solid pick).
- Mug press or tumbler attachment (~$100 add-on for heat presses).
- Extras: Heat-resistant tape, rubbing alcohol, sandpaper (for tumbler seams).
Pro Tip: Always use heat-resistant gloves when handling 380°F presses to stay safe!
Why Coatings Are Key Sublimation ink only bonds to polymer-coated surfaces. Uncoated mugs? You’ll get a faded, ghostly design that’s more “meh” than “wow.” Stick to “sublimation-ready” mugs or tumblers (test a cheap one first to be sure).
5 Steps to Sublimate Mugs & Tumblers
- Design Your Masterpiece Create a vibrant design in Canva or Photoshop—think family photos, funny quotes, or galaxy patterns. Mirror it horizontally to avoid backward text.
- Print with Care Load sublimation paper into your printer and use high-quality settings. ICC color profiles (if available) keep colors bold and true.
- Prep the Surface Wipe the mug or tumbler with rubbing alcohol to remove dust or oils. For tumblers, lightly sand any seams to prevent wrinkles in the design.
- Wrap & Press
- Secure the design to the mug/tumbler with heat-resistant tape—no gaps allowed!
- Use a mug press at 380°F (193°C) for 5-6 minutes. Rotate halfway for even heat.
- Tumbler Tip: Spin the tumbler slowly in the press to avoid “flat spots” in the design.
- Add a Teflon sheet to protect the print and catch excess ink.
- Cool & Reveal Let it cool for 10 minutes (no ice baths—cracks are real!). Peel the paper slowly to reveal your vibrant design. If ink sticks, repress for 10 seconds.
Common Mug Disasters (And Fixes):
| Issue | Solution |
|---|---|
| Fading | Use higher-quality ink (don’t cheap out!) |
| Cracks | Cool gradually—no ice baths! |
| Wrinkles | Sand tumbler seams before pressing |
Check out 25 Creative Sublimation Ideas
Sublimation with Cricut: Design Cutting Hacks
Want to add raised textures or metallic accents to your sublimation designs? Enter the Cricut.
Layered Design Workflow:
- Sublimate First: Print and press your base design onto the shirt/mug.
- Cut Vinyl with Cricut: Use HTV (heat-transfer vinyl) for accents.
- Example: Add gold foil lettering over a sublimated galaxy print.
- Press the Vinyl: Use a lower temp (305°F) to avoid melting the sublimation layer.
Pro Tips:
- Alignment Hack: Leave tiny registration marks on your sublimation print. Use them to line up Cricut cuts perfectly.
- Vinyl Types: Glitter HTV hides alignment flaws. Gloss vinyl? Shows every mistake.
Why Bother? Combining sublimation + Cricut lets you create 3D-like designs without a $10k printer.
Fixing Common Sublimation Mistakes
Why Your Prints Look Faded (Ink & Heat Press Fixes)
Faded prints are the ultimate buzzkill, like brewing coffee and getting dishwater. Here’s why it happens (and how to fix it):
Culprit #1: Cheap or Old Ink
- Sublimation ink expires faster than milk. If your bottle’s been sitting for 6+ months, toss it.
- Pro tip: Stick to name-brand inks (e.g., Hiipoo or Cosmos). Off-brands often skimp on dye concentration.
Culprit #2: Heat Press Roulette
- Too cold? Ink won’t gasify. Too hot? Colors burn out.
- Sweet spot: 400°F for fabrics, 380°F for mugs.
- Time matters: 45 seconds for shirts, 5-6 minutes for tumblers.
Quick Fix Table:
| Symptom | Fix |
|---|---|
| Colors look washed out | Increase heat by 10°F or extend pressing time by 10 seconds |
| Ink smudges | Lower heat + use Teflon sheet to absorb excess gas |
Memorable Tip:
“Treat your heat press like a soufflé precision beats guesswork every time.”
Paper Sticking? Humidity & Pressure Solutions
Nothing’s worse than peeling your paper only to find half the design stuck to it. Let’s break the cycle:
Humidity’s Sneaky Role
- Sublimation paper acts like a sponge. In humid climates, it swells and grips the ink.
- Fix: Store paper in a sealed bag with silica gel packets.
Pressure Problems
- Too much pressure flattens fibers; too little lets paper shift.
- Fabrics: Medium pressure (40-50 PSI).
- Mugs: Crank it up to 60 PSI for curved surfaces.
Cheap Hacks for Smooth Transfers:
- Parchment paper trick: Place a sheet over your design before pressing. It absorbs moisture and prevents sticking.
- Hair dryer pre-game: Blast the paper for 5 seconds to evaporate dampness.
Pro Tip: “If your paper sticks, don’t panic. Repress the design for 10 seconds—it might save the day!”
Sublimation Chemistry Explained
Let’s geek out (briefly) on why sublimation is picky about materials:
Why Polyester is King
- Sublimation ink bonds to synthetic fibers through a process called “dye diffusion.”
- 80% polyester or higher = vibrant, long-lasting prints.
- Cotton: Unless coated, it’s like trying to stain water—it just won’t stick.
Coating Sprays for Dark Fabrics
- How they work: Sprays like Poly-Flex add a polymer layer to cotton or dark fabrics, creating a faux polyester surface.
- Application: Spray 2-3 light coats (think spray sunscreen, not paint).
- Caveat: Can feel slightly plasticky. Test on a scrap first!
Science Made Simple:
| Material | Sublimation-Friendly? | Why? |
|---|---|---|
| Polyester | ✅ | Synthetic fibers open up under heat, trapping ink |
| Cotton | ❌ (unless coated) | Natural fibers repel gas-phase ink |
| Ceramic mugs | ✅ (with coating) | Polymer coating allows ink bonding |
Pro Tips for Long-Lasting Results
Choosing the Right Sublimation Paper
Sublimation paper is like the unsung hero of your projects, get it wrong, and even the best designs fizzle out. Here’s how to pick your MVP:
Budget-Friendly Paper
- Best for: Beginners, small projects, or testing designs.
- What to expect: Slightly slower ink release, may require higher heat settings.
- Top pick: A-Sub Paper – Affordable and reliable for basic shirts/mugs.
Premium Paper
- Best for: Photographic prints or dark fabrics (with coatings).
- What to expect: Crisp details, faster ink transfer, less risk of ghosting.
- Top pick: TexPrint R+ – Like upgrading from a sedan to a sports car.
Quick Comparison:
| Feature | Budget Paper | Premium Paper |
|---|---|---|
| Cost | 0.10–0.10–0.20/sheet | 0.30–0.30–0.50/sheet |
| Ideal For | Practice runs, text-based designs | High-detail art, gradients |
| Storage Tip | Keep sealed with silica gel | Store flat to prevent curling |
Pro Tip: “Start with budget paper to learn the ropes, then splurge on premium sheets for client projects. Your wallet (and customers) will thank you.”
Sublimation on Cotton? Here’s the Workaround
Let’s be real: sublimation and cotton mix like oil and water. But with a little creativity, you can bend the rules.
Hybrid Method #1: Sublimation Spray Coatings
- Spray It: Coat the cotton fabric with Siser EasySubli Spray (think of it as “polyester in a can”).
- Dry It: Let it cure for 24 hours patience is key!
- Press It: Sublimate as usual.
- Downside: The fabric feels slightly stiffer, like a well-starched shirt.
Hybrid Method #2: HTV + Sublimation Combo
- Layer 1: Press white HTV onto the cotton.
- Layer 2: Sublimate your design directly onto the HTV.
- Bonus: Adds texture (glitter, metallic) while keeping colors vibrant.
When to Use Each Method: Check My Journey with Sublimation on Cotton: Tips & Techniques

| Scenario | Best Workaround |
|---|---|
| Soft-feel cotton tees | Sublimation spray (lighter hand feel) |
| Bold designs with texture | HTV combo (hides imperfections) |
| Last-minute gifts | HTV – no 24-hour drying! |
Pro Tip: “Test on a scrap first! Cotton is finicky, and not all sprays play nice with every fabric blend.”
Professional Sublimation Printing & Wholesale Custom Products
Looking for high-quality sublimation printing for apparel, drinkware, and promotional items? Subli Genius Print delivers vibrant color, sharp detail, and long-lasting results for businesses, brands, and resellers across the U.S.
🔗 Related Guides to Improve Your Sublimation Results
Now that you understand how to do sublimation, these guides will help you refine your process, fix common mistakes, and get more consistent, professional-quality prints:
- 👉 Sublimation Process: Step-by-Step Guide for Flawless Prints
- 👉 7 Best Sublimation Ink for Any Printer
- 👉 Troubleshooting Guide for Sublimation Printing
- 👉 What is Sublimation Printing? Technology and Its Applications
💡 Pro tip: If your prints look dull, faded, or blurry, it’s usually not your design, it’s your temperature, pressure, or ink setup. Small adjustments make a huge difference.
2 Comments