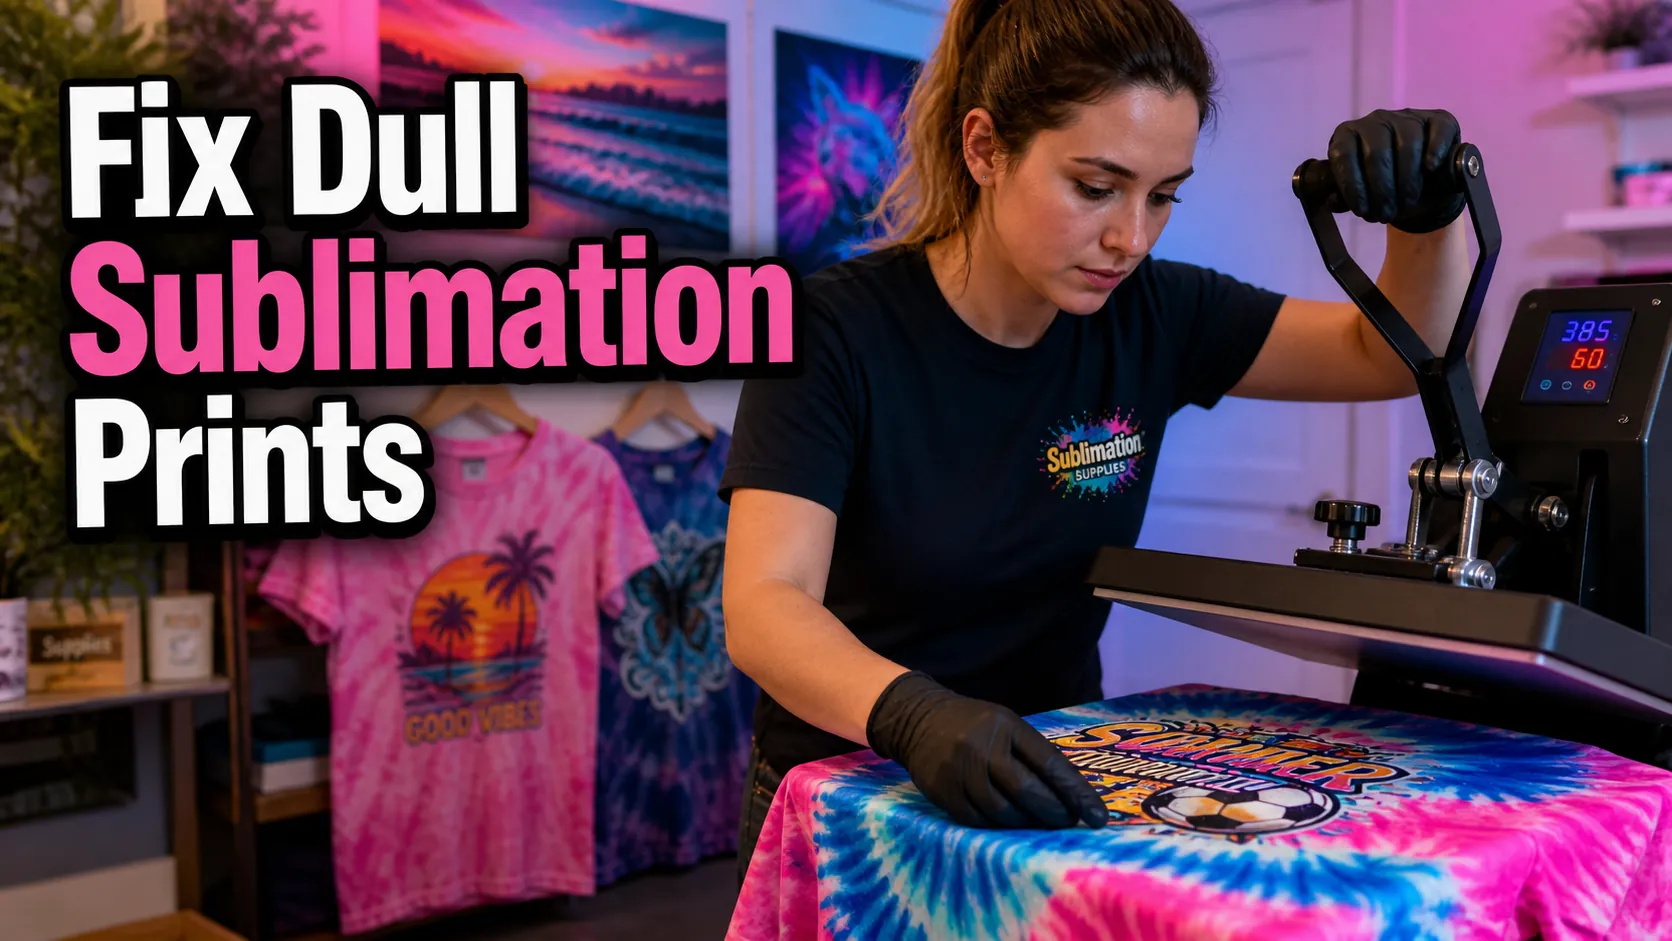
Tie-Dye Sublimation: How to Fix Dull Prints, Bleeding & Fading
Tie-dye sublimation can create bright, long-lasting shirts with vibrant patterns, but many beginners run into the same frustrating problems. Colors look dull, designs blur during pressing, or the print fades after washing.
Most of these issues come from a few common mistakes like low polyester fabric, incorrect heat press settings, moisture inside the shirt, or poor color management.
This guide explains how tie-dye sublimation works, why prints fail, and how to get cleaner, brighter, and more consistent results every time.
What Is Tie-Dye Sublimation?
Tie-dye sublimation combines traditional tie-dye aesthetics with dye sublimation printing. Instead of applying liquid dyes directly onto fabric, sublimation uses heat to transfer special sublimation ink into polyester fibers.
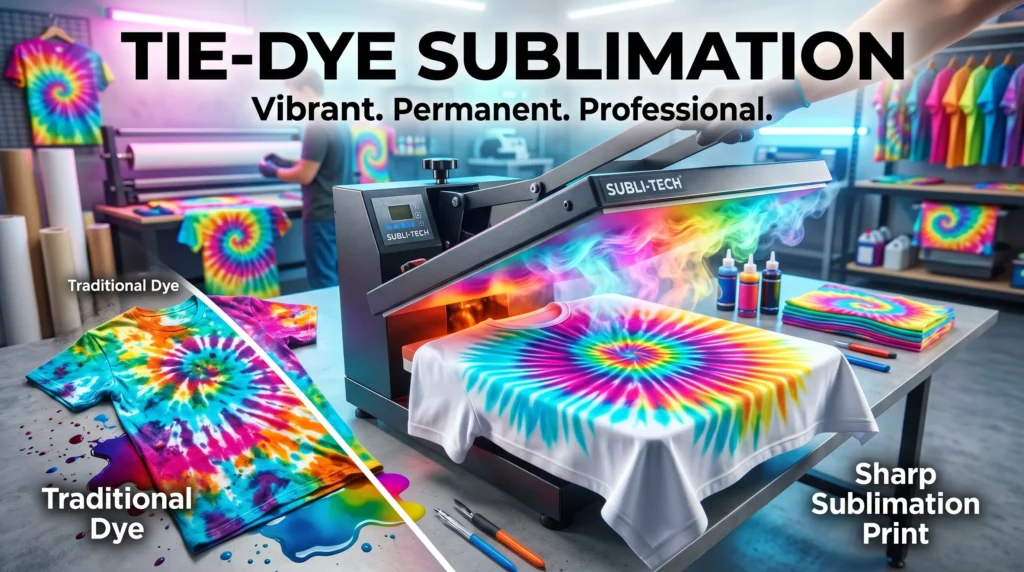
During the sublimation printing process, heat activates the ink and turns it into gas. The ink permanently bonds with polyester fabric, creating vibrant designs that become part of the material instead of sitting on top of it.
Unlike traditional tie-dye, sublimation gives you:
- cleaner patterns
- repeatable results
- sharper details
- photorealistic color blends
- long-lasting prints
This method works especially well for:
- polyester T-shirts
- activewear
- jerseys
- tote bags
- sublimation blanks
If you are new to the process, this beginner sublimation printing guide explains the complete workflow.
Why Tie-Dye Sublimation Prints Look Dull
Low Polyester Content
Tie-dye sublimation prints usually look dull because the fabric does not contain enough polyester for the sublimation ink to bond properly.
Sublimation works best on:
- 100% polyester
- light-colored polyester fabrics
- polymer-coated sublimation blanks
Cotton fibers do not absorb sublimation ink effectively. On low-poly blends, colors often appear faded or washed out after pressing.
For the brightest colors:
- use white or light polyester shirts
- avoid heavy cotton blends
- test 65/35 blends before full production
You can learn more in this polyester sublimation guide.
Incorrect Heat Press Settings
Incorrect heat press settings can reduce color vibrancy and create uneven transfers.
Common problems include:
- pressing too cold
- pressing too quickly
- uneven pressure
- overheating the transfer
Most polyester shirts work best around:
- 385°F to 400°F
- 45 to 60 seconds
- medium pressure
If the temperature is too low, the sublimation ink will not fully activate. If it is too high, colors can become muddy or over-pressed.
For more detailed settings, follow this sublimation heat press guide.
Wrong ICC Profiles or Color Settings
Many color problems happen before the transfer even reaches the heat press.
Incorrect printer color profiles can cause:
- dull reds
- faded blues
- muddy blacks
- inaccurate skin tones
Good color management improves:
- ink saturation
- color vibrancy
- consistency across prints
If your colors never look correct, review these ICC profiles for sublimation printing.
Moisture Inside the Fabric
Moisture trapped inside polyester fabric creates steam during pressing, which can lead to:
- faded patches
- blurry edges
- uneven color transfer
Always pre-press shirts for 5 to 10 seconds before transferring your design.
This removes:
- moisture
- wrinkles
- lint contamination
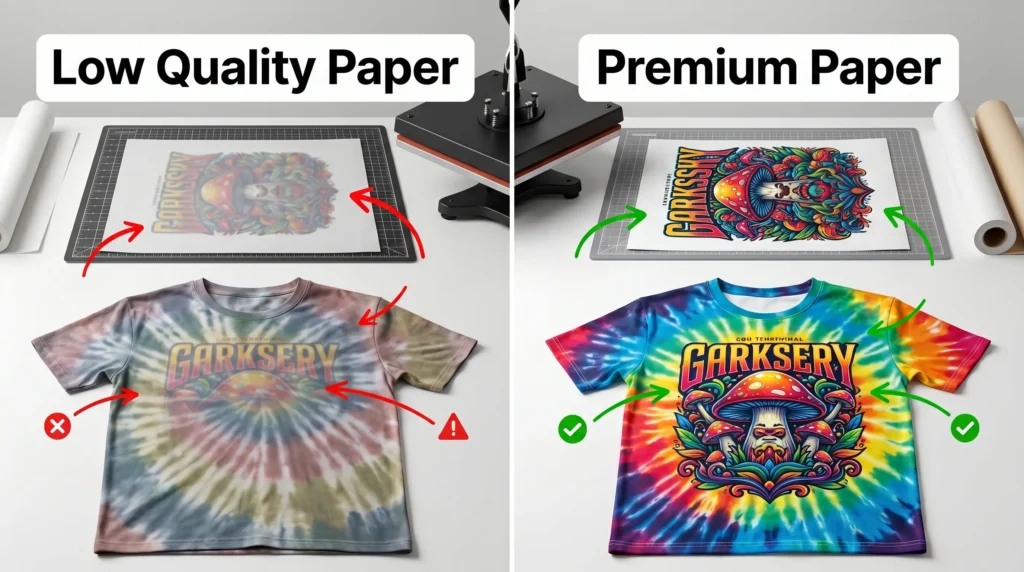
Low-Quality Sublimation Paper
Cheap sublimation paper often releases ink unevenly.
This can cause:
- weak colors
- inconsistent transfers
- blurry details
Better sublimation paper improves:
- ink release
- transfer sharpness
- color saturation
If your prints consistently look weak, upgrading paper quality can make a noticeable difference.
How to Prevent Color Bleeding and Ghosting
Secure the Transfer Paper Properly
Paper movement during pressing is one of the biggest causes of blurry tie-dye sublimation designs.
Use:
- heat-resistant tape
- firm paper positioning
- butcher paper protection
This keeps the transfer stable while heat activates the sublimation ink.
Use Proper Pressure Settings
Too much pressure can force ink outward and distort patterns.
Too little pressure creates uneven transfers.
Most polyester sublimation projects work best with medium pressure and even contact across the press surface.
Prevent Ghosting During Pressing
Ghosting happens when sublimation paper shifts during pressing or lifting, creating a blurry duplicate image.
To prevent ghosting:
- Tape the transfer securely
- Avoid opening the press too quickly
- Let the project cool slightly before removing paper
- Use butcher paper to absorb excess ink vapor
If you continue getting blurry transfers, this guide on how to get sharp sublimation prints every time can help.
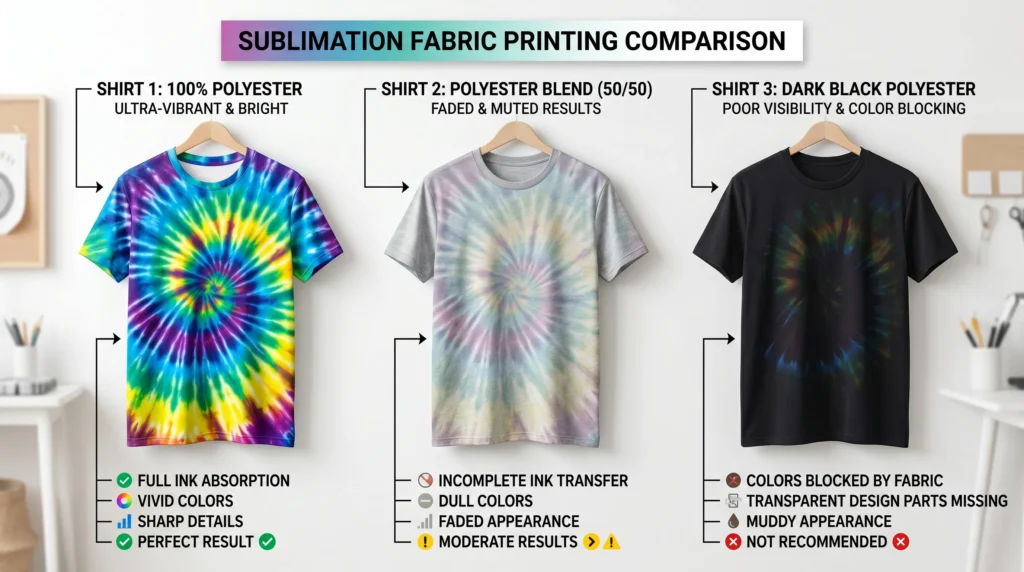
Best Shirts and Fabrics for Tie-Dye Sublimation
100% Polyester Shirts
100% polyester produces:
- the brightest colors
- the sharpest details
- the best wash durability
Athletic shirts and moisture-wicking apparel are usually ideal for sublimation printing.
65/35 Polyester Blends
Polyester blends create a softer vintage-style effect.
The lower the polyester percentage:
- the more faded the design appears
- the less vibrant the colors become
Some creators intentionally use blends for a distressed look.
Can You Sublimate on Cotton?
Sublimation does not permanently bond to cotton unless special coatings or sublimation HTV are used.
Regular cotton shirts often produce:
- faded transfers
- weak colors
- poor wash durability
If you want cotton-like softness, consider:
- polyester blends
- sublimation HTV
- coated cotton alternatives
This sublimation on cotton guide explains your options.
Light vs Dark Shirts
Sublimation ink does not print white.
Because of this:
- dark shirts reduce visibility
- black fabric blocks bright colors
- white areas remain transparent
White or light pastel shirts work best for tie-dye sublimation.
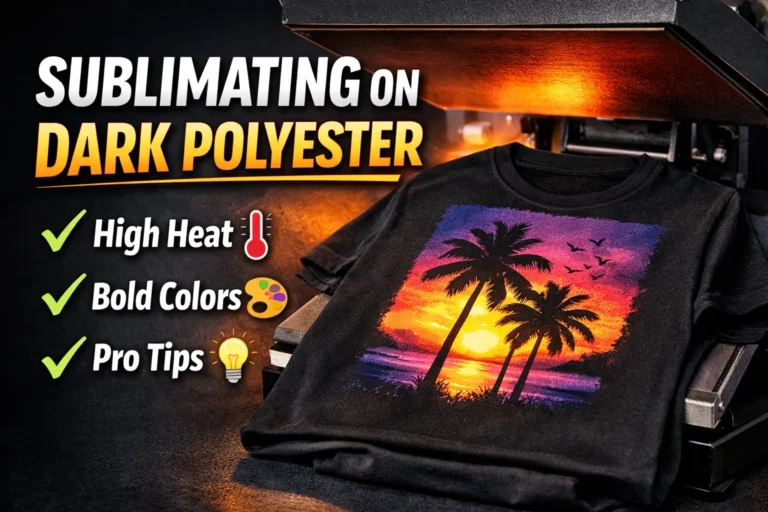
If you want darker garments, this guide explains how to sublimate on dark polyester.
Step-by-Step Tie-Dye Sublimation Workflow
Step 1: Create or Download a Tie-Dye Design
You can:
- create patterns in Photoshop
- use Canva
- buy PNG sublimation designs
- use faux tie-dye backgrounds
Popular tie-dye styles include:
- spirals
- watercolor blends
- retro swirls
- grunge tie-dye effects
Step 2: Print the Sublimation Transfer
Before printing:
- mirror the design
- select high-quality print settings
- confirm the correct ICC profile
Use sublimation transfer paper designed for your printer and ink combination.
Step 3: Prepare the Shirt
Before pressing:
- Lint-roll the shirt
- Pre-press for 5 to 10 seconds
- Remove wrinkles and moisture
This improves ink bonding and prevents transfer defects.
Step 4: Secure the Transfer
Position the transfer carefully and secure it using heat-resistant tape.
Cover everything with butcher paper to protect your heat press from ink bleed.
Step 5: Heat Press the Design
Most polyester shirts press well at:
- 385°F to 400°F
- 45 to 60 seconds
- medium pressure
Always test settings on sample materials first because fabric quality varies.
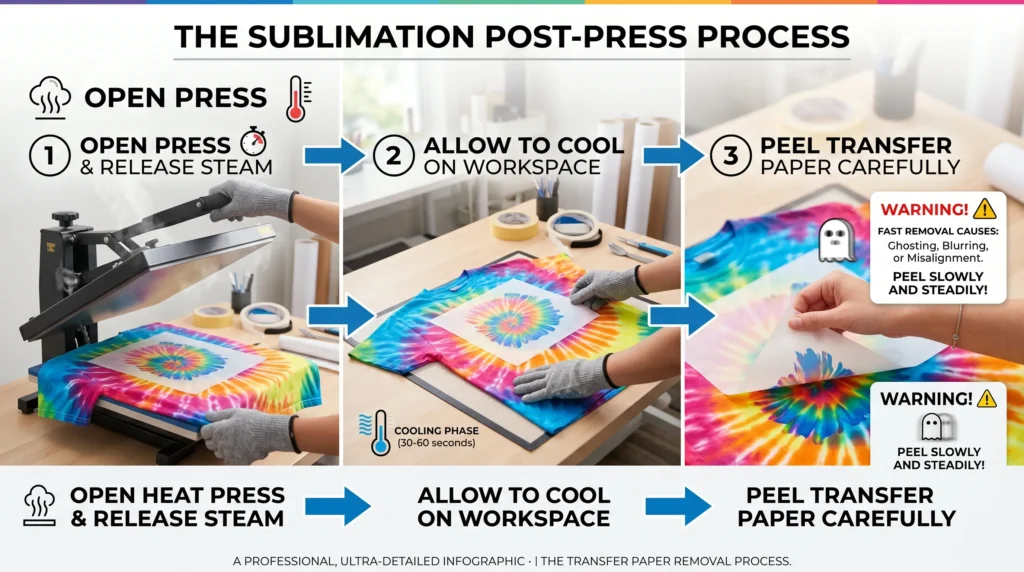
Step 6: Cool and Remove Carefully
After pressing:
- open the heat press slowly
- let the project cool slightly
- peel the paper carefully
Fast removal can create ghosting or blur the transfer.
If you are still learning the basics, this how to do sublimation tutorial explains the full process.
Common Tie-Dye Sublimation Mistakes
Using Low Polyester Shirts
Low-poly fabrics produce faded results and poor ink bonding.
Forgetting to Pre-Press
Skipping pre-pressing leaves moisture inside the fabric.
Overheating the Transfer
Too much heat can:
- discolor polyester
- oversaturate colors
- distort patterns
Removing the Paper Too Quickly
Quick removal often causes ghosting or blurry edges.
Using Incorrect Pressure
Uneven pressure creates patchy transfers and weak color areas.
Mixing Poor Ink and Paper Combinations
Some sublimation inks work poorly with certain papers.
Testing combinations helps improve consistency.
This sublimation troubleshooting guide covers more common print problems and fixes.
Tie-Dye Sublimation vs Infusible Ink
| Feature | Tie-Dye Sublimation | Infusible Ink |
|---|---|---|
| Design Flexibility | High | Moderate |
| Equipment Needed | Printer + Heat Press | Cricut + Heat Press |
| Color Range | Very Wide | Limited |
| Photorealistic Prints | Yes | Limited |
| Beginner Simplicity | Moderate | Easier |
| Long-Term Cost | Lower over time | Higher per project |
Infusible Ink is simpler for beginners, but sublimation offers:
- more customization
- larger design flexibility
- stronger production scalability
This Infusible Ink vs sublimation comparison explains the differences in more detail.
How to Wash Tie-Dye Sublimation Shirts Without Fading
Sublimation prints are durable, but proper washing still matters.
For best results:
- wash in cold water
- turn shirts inside out
- avoid harsh bleach detergents
- use low heat drying
Excessive heat can gradually reduce fabric brightness over time.
This how to wash sublimation shirts guide explains long-term care tips.
Frequently Asked Questions
Can you sublimate directly onto tie-dye shirts?
Yes, but the shirt still needs a high polyester content for proper sublimation bonding.
Why does my tie-dye sublimation look faded?
Faded sublimation usually comes from low polyester fabric, incorrect heat settings, or poor color profiles.
What polyester percentage works best for sublimation?
100% polyester produces the brightest and most durable sublimation results.
Can sublimation crack or peel?
No. Sublimation becomes part of the fabric fibers, so it does not crack or peel like vinyl.
What temperature works best for tie-dye sublimation?
Most polyester shirts work best around 385°F to 400°F with medium pressure.
Why does my sublimation look blurry?
Blurry transfers usually happen because the transfer paper shifted during pressing.
Can I use sublimation on dark shirts?
Sublimation works best on white or light-colored polyester because sublimation ink has no white layer.
Is tie-dye sublimation permanent?
Yes. Properly sublimated designs are highly durable and resist cracking, peeling, and fading.