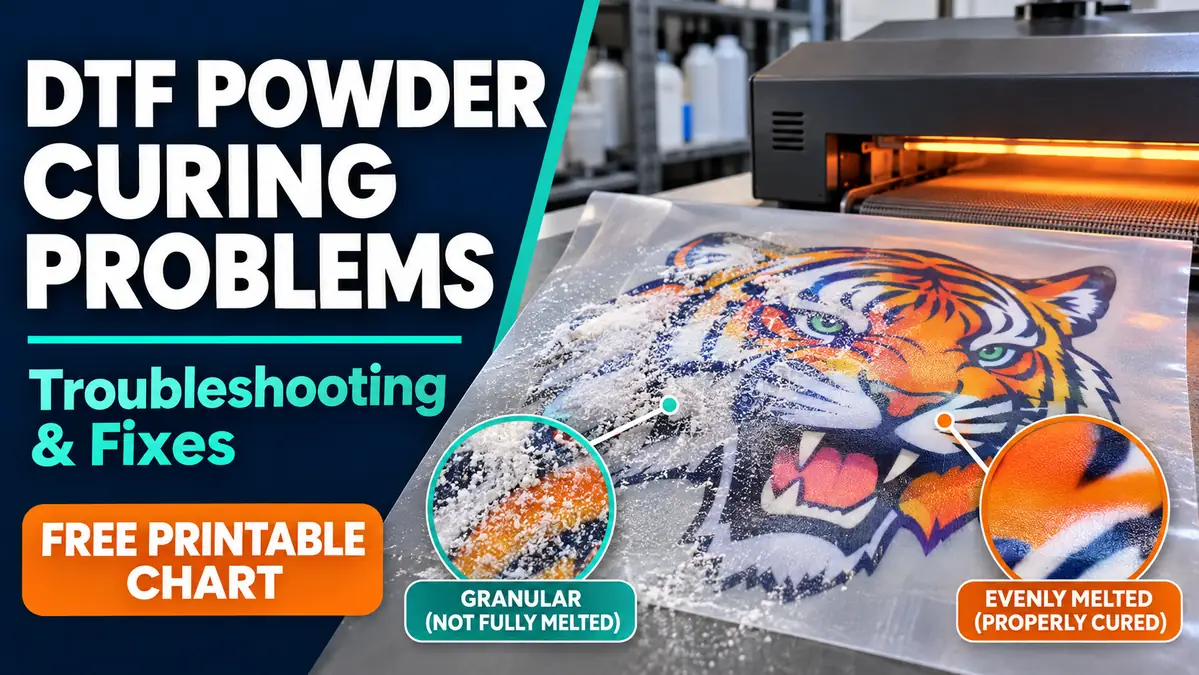
DTF Powder Curing Problems: Troubleshooting Chart & Fixes

A DTF transfer comes out of the dryer with gritty powder, or it looks smooth until the design starts peeling off a shirt. Those symptoms do not always have the same cause. DTF powder curing problems can come from uneven adhesive coverage, incomplete melting, too much heat, ink or moisture issues, or a separate mistake during heat pressing.
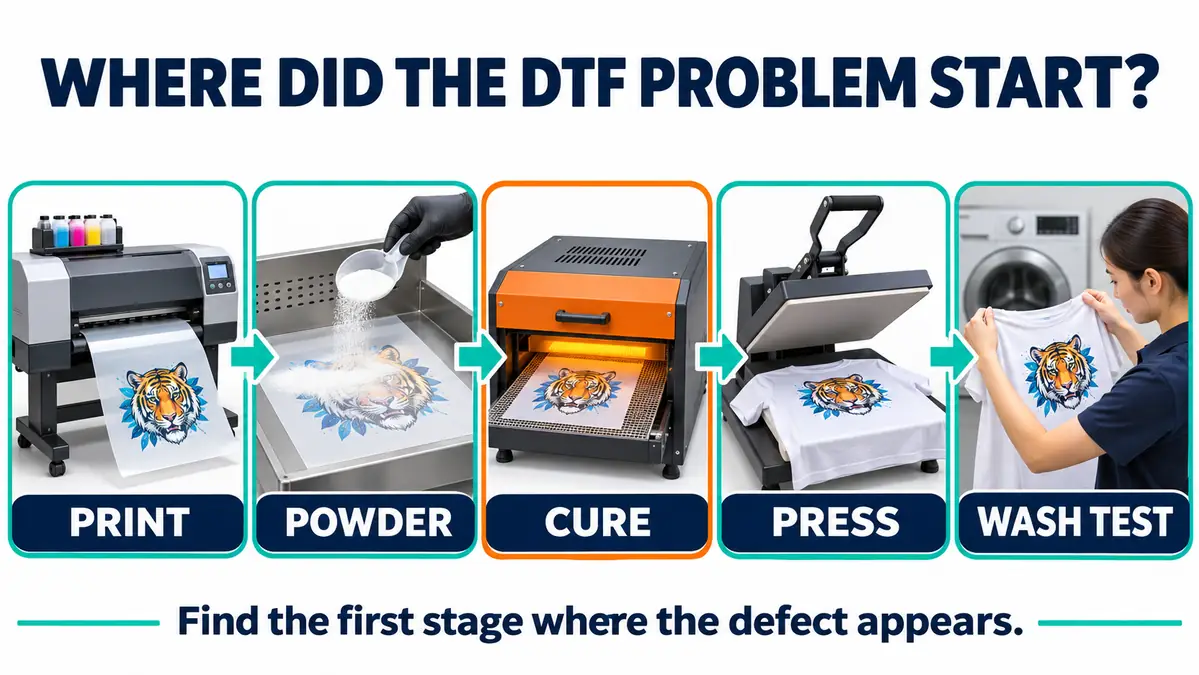
Start by finding when the defect first appeared: on the wet print, after powdering, after curing, after pressing, or after washing. Then check the instructions for your exact powder, film, ink, and machine. Changing oven temperature before identifying the stage can make the next batch worse.
DTF Powder Curing Troubleshooting Chart
Use this chart before making another transfer. Each row gives a possible explanation and a safe first check, not a confirmed diagnosis.
| What you see | What might be happening | Check this first |
|---|---|---|
| Loose, sandy grains remain after curing | Powder may not have melted fully, or heat may be uneven | Compare the supplier’s cure method with actual heat exposure across the design |
| Film curls, distorts, or looks scorched | Film may be receiving too much heat, or it may be unsuitable for that process | Stop the run; check film heat limits and the curing method |
| Adhesive specks appear outside the artwork | Excess powder remained, or ink/contamination extended beyond the design | Inspect the film before curing and remove excess as directed |
| Bare patches appear in the adhesive layer | Powder did not coat the wet ink evenly, or white ink coverage was incomplete | Inspect the print and powder distribution before changing cure settings |
| Cured film looks oily or blotchy | Ink load, retained moisture, contamination, or the curing process may be involved | Compare the wet print, cooled film, and pressed garment; record where the mark first appeared |
| Edges lift after heat pressing | Could be curing, but also press pressure, peel timing, fabric, or incompatible materials | Check the cure record, then the transfer supplier’s pressing and peel instructions |
| Print cracks or lifts after washing | Bond quality, fabric, ink/powder compatibility, or pressing may be involved | Test a small sample with the same supplies before accepting the order |
Free printable resource: Download the DTF Powder Curing Troubleshooting Chart (PDF). The two-page chart includes a one-variable test log for recording failures and fixes.
The simplest diagnostic question is: Did the defect exist before the transfer touched the shirt? If yes, inspect printing, powdering, and curing first. If it looked acceptable on the cured film but failed during application, check the press and peel process without assuming the powder was under-cured.
How to Tell If DTF Powder Is Under-Cured or Over-Cured
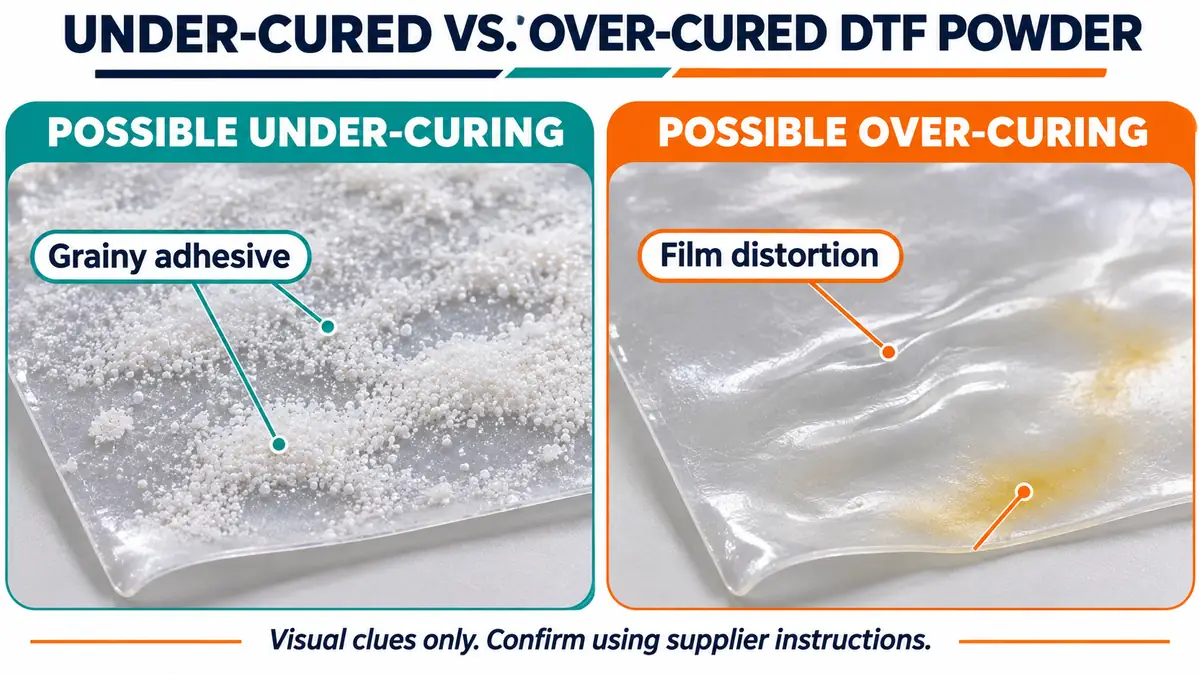
Under-curing means the adhesive did not receive the heat exposure needed for the intended process. Over-curing means the film or adhesive was exposed to more heat than the materials or workflow can tolerate. Appearance offers clues, but it does not prove wash durability.
Signs that point toward incomplete curing
- Dry or granular powder remains where a uniform melted coating is expected.
- Powder looks different at the center and edges of the same design.
- Some coated areas fail to bond in a controlled pressing test.
- Results change when the same materials run through different parts of a dryer.
Before increasing heat, confirm the right powder was used, the coating was even, and the equipment was operating according to its manual. In an automated shaker, belt speed and heating-zone behavior can matter as much as the displayed temperature.
Signs that point toward excessive heat
- The carrier film warps or shrinks noticeably.
- Parts of the transfer show scorching or abnormal discoloration.
- The adhesive or printed layer becomes damaged or unusually brittle compared with an approved sample.
- The problem is worse at one location in the dryer.
Color and shine are not universal pass/fail tests. Some transfer systems have a particular cured appearance or adhesive color by design. Compare against the material supplier’s samples or specifications instead of treating every yellow tint as proof of over-curing.
Do not re-cure a finished transfer simply because it looks imperfect. If the film is damaged, isolate the cause and make a fresh controlled test rather than risking the customer garment.
Why DTF Powder Does Not Stick Evenly to the Ink
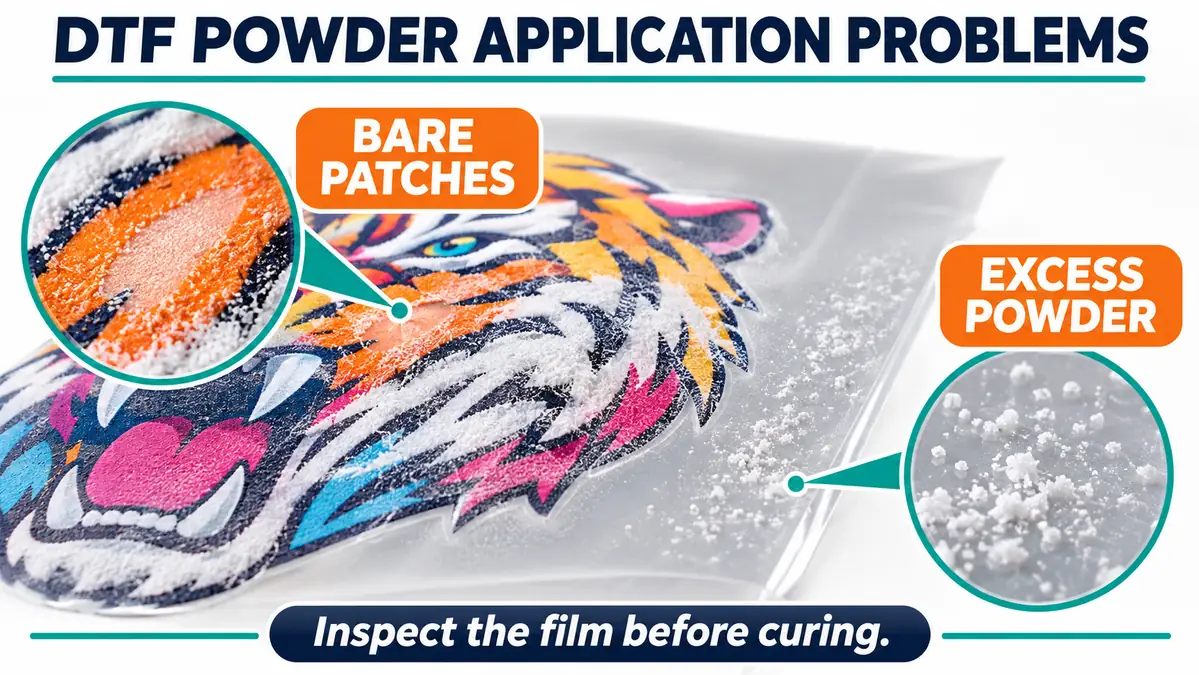
Adhesive powder is meant to attach to the intended wet printed area before heating. Missing or excess coverage must be corrected before curing can produce a consistent adhesive layer.
Bare spots or thin powder coverage
Inspect the printed film immediately after powder application. If a blank area matches a weak or missing white-ink region, investigate the print and RIP setup before changing the curing oven. A nozzle problem can look like a powder problem once the film has been heated.
If the wet print looks complete, examine how the powder was applied. A hand-coated sheet might have missed a corner; an automated shaker could have an uneven dispensing or shaking pattern. Follow the equipment instructions rather than adding extra powder to hide the gap.
Clumps, specks, and powder outside the design
Clumped powder can leave lumps in an otherwise smooth coating. Check the powder’s condition, storage instructions, and any contamination. Do not assume clumps are harmless just because they melt.
Epson’s DTF Film Printing Guide recommends even powder application using a sieve or shaker and removing excess from unprinted areas. Excess particles left on clear film can melt and transfer where no design was intended. Amaya’s DTF Xpress instructions likewise warn that powder pellets can affect uniformity.
If there are unwanted adhesive dots, compare the film before and after curing. Powder residue present before the dryer is an application problem. New spots appearing only after heating call for closer examination of the film, ink, and curing process.
How to Troubleshoot Powder That Will Not Melt
A powder that stays grainy does not automatically need a hotter oven. Check the full process in this order:
- Confirm the material combination. Read the powder and film technical instructions. Make sure the ink, adhesive, and carrier are intended to work together.
- Check coverage on the wet film. If the adhesive was not applied evenly, a temperature change will not repair the blank spots.
- Verify the correct curing method. An oven, a hovering heat press, and an inline shaker dryer may use different settings and heat delivery.
- Review actual equipment operation. Check warm-up, heater status, safe measurement methods, and belt speed or dwell time where applicable. Do not assume the setpoint describes the temperature at the film.
- Make one small test using the supplier’s approved range. Hold the other materials and settings constant. Let the transfer cool as instructed, then inspect it and perform the prescribed application test.
- Record the result before another adjustment. If the defect persists within the approved process, ask the supplier or equipment technician to help diagnose it.
The variation between supplier instructions is significant. Epson states that cure time and temperature depend on the film, powder, heat equipment, and ink amount. Amaya publishes different procedures for curing DTF Xpress adhesive in an oven versus hovering a heat press. Neither set of instructions should be copied to an unrelated machine or powder.
How to Recognize and Prevent Over-Curing
Excessive heating can affect the carrier film and the adhesive layer. Stop when you see film damage, abnormal scorching, or fumes that suggest the process is not operating normally.
First, review the exact film and powder limits. Then inspect whether the heating surface is behaving consistently. An uneven dryer can overheat one area while leaving another under-treated. For conveyor or shaker systems, verify the manufacturer-approved relationship between belt speed and heater settings.
If you suspect over-curing, do not simply shorten the cycle by guessing. Record the current process, check for an equipment fault, and make a controlled test within the supplier-approved range.
Some yellow or textured adhesive finishes may be normal for particular commercial transfers. If the material supplier says that appearance is acceptable, judge the sample by its specified application and durability criteria instead.
Oily Film, White Specks, and Uneven Adhesive
An oily-looking DTF transfer is especially frustrating because the film may look acceptable immediately after curing and develop blotches later. The appearance alone cannot tell you whether the issue is moisture, ink formulation, a heavy ink deposit, contamination, or heat exposure.
When the film looks oily before pressing
Save a sample at three points: after printing, after cooling from the cure, and before heat pressing. Record the ink and white-underbase settings, powder lot, film lot, and curing equipment. If the oily appearance starts before pressing, investigate those upstream variables with the supplier.
Do not immediately reduce or increase white-ink density. That could affect opacity and how powder attaches. Change ink settings only using the printer/RIP and ink supplier’s process guidance.
When blotches appear only after pressing
Compare the film before pressing with the garment afterward. Review press conditions, fabric finish, cover-sheet instructions, and whether the carrier was peeled hot, warm, or cold as required. A mark appearing at this stage is not proof that the curing oven caused it.
Print-shop discussions describe oily marks with several competing explanations. Treat them as symptom reports, not reliable evidence that one adjustment will fix every case. If you buy finished DTF transfers rather than produce them, document the issue and contact the transfer supplier before attempting extra curing.
When white specks remain around the design
Check for powder or ink outside the printed artwork before the film is heated. Once excess adhesive melts onto the carrier, the problem may not be repairable without reprinting. Avoid brushing loose powder around an operating printer.
Why a Cured Transfer Can Still Peel After Pressing
Curing adhesive onto film is not the same as bonding the transfer to fabric. A well-coated film can still fail if the heat press is set incorrectly, pressure is uneven, the carrier is peeled at the wrong time, or the fabric is incompatible with the transfer.
Follow this order instead of immediately making another cured sheet:
| Check | Why it matters |
|---|---|
| Transfer supplier’s press settings | The correct time and temperature belong to that film and adhesive system |
| Pressure across the design | Uneven contact can leave corners or seams poorly bonded |
| Garment fabric and finish | Coatings, seams, and some fabrics may complicate adhesion |
| Peel type and timing | Hot-peel and cold-peel films have different release instructions |
| Any required finishing press | Some systems call for one; others have different application rules |
| Prior curing notes | A repeat problem may have started before the press |
For a broader explanation of how time, temperature, pressure, and placement affect transfers, see heat press mistakes that ruin transfers.
If the transfer has already failed on a customer shirt, do not keep reheating it without a supplier-approved repair procedure. A fresh sample on matching fabric is a better way to isolate the fault.
Run a Repeatable DTF Cure Test Before Production
A simple test log prevents guesswork. It also helps when asking a powder, film, or equipment supplier for technical support.
Record these details before the first trial:
- Printer model, RIP print mode, and white-ink configuration
- Ink, film, and powder brand or product codes, plus lot numbers where available
- Curing method, machine, displayed setting, dwell time or belt speed
- Fabric, heat press, pressure method, and peel instructions
- The exact defect and the first stage where it appeared
Then run the test:
- Print the same small artwork using the same approved ink and film combination.
- Apply powder using the supplier’s instructions and document the coverage before curing.
- Cure one sample using an approved starting procedure. Record the actual machine operation where measurement is supported.
- Inspect the cooled sample without treating gloss alone as proof of success.
- Press it to the intended fabric using the transfer supplier’s specified process, then peel as instructed.
- If it fails, change one permitted variable at a time and label each new sample.
- Compare appearance, adhesion, and any supplier-recommended stretch or wash test before approving customer production.
For example, if two samples use identical film and powder but only one edge fails after pressing, first check contact and heat distribution across the press. Changing the powder recipe at the same time would make the result harder to interpret. This is an illustrative diagnostic example, not a claim about a tested machine.
Attach the results to the shop’s production checklist. If several operators share the equipment, a consistent print shop workflow also prevents unrecorded changes between shifts.
DTF Powder Handling and Curing Safety
DTF curing combines loose adhesive powder, heat, and printed film. The handling instructions for a specific powder matter as much as the finished transfer’s appearance.
- Read the product’s Safety Data Sheet (SDS) and the curing-equipment manual before handling loose powder or using heat.
- Use the specified extraction, ventilation, and personal protective equipment for powder handling and curing. Do not treat a small home room as automatically suitable for hot-melt adhesive processing.
- Keep loose powder away from the printer. Epson explicitly warns that powder entering the printer can cause damage.
- Avoid raising dust while cleaning and use the collection method recommended by the powder and equipment manufacturers.
- Keep hands and combustible materials clear of hot surfaces. Stop work if the unit smokes unexpectedly, overheats, or reports a fault.
- Do not use unknown or mixed powder batches and do not assume leftover contaminated powder is suitable for reuse.
A supplier’s DTF powder safety guidance and the Epson DTF Film Printing Guide explain why ventilation, appropriate protective measures, and powder containment matter. Follow your own materials’ SDS for exact precautions.
Frequently Asked Questions
Why is my DTF powder still grainy after curing?
The adhesive may have received insufficient or uneven heat, but it could also be the wrong powder for the film or an application problem. Check the supplier’s process and whether the powder was evenly applied before heating. Do not diagnose from the oven display alone.
Can I fix under-cured DTF powder by curing it again?
Do not assume a second cure is safe or effective. Some systems may have approved recovery procedures, but re-heating damaged or partially processed film can make defects worse. Ask the supplier and test a fresh sample if no recovery method is documented.
Why is DTF powder sticking outside my design?
Excess powder may remain on clear film, or stray ink and contamination may be capturing particles. Inspect the film before curing. The powdering process should coat the intended wet artwork while removing excess from unprinted areas according to the supplier’s instructions.
Does glossy DTF powder mean it is fully cured?
Not reliably. Gloss and color vary among adhesive products, films, and print methods. Use the appearance guidance for your exact system and confirm the finished transfer with the supplier’s application and durability checks.
Why does my DTF print peel even when the powder looked melted?
The fault may be in heat pressing rather than powder curing. Check pressure, fabric, application temperature and dwell time, peel timing, and any required finishing step. A melted-looking powder layer alone cannot guarantee a strong bond to fabric.
Should I use the same DTF curing temperature for every powder?
No. Different film, powder, ink, and curing equipment combinations have different requirements. Even one supplier may specify a different method for a hovering heat press and an oven. Use settings only from the materials and machine documentation for your workflow.
Find the Defect Before Changing the Heat
The most useful fix starts with the first stage that failed. Missing adhesive before the dryer calls for a powdering or printing check. Grainy powder after the dryer calls for a curing check. A clean-looking transfer that peels after application needs a separate heat-press diagnosis.
Keep a small labeled sample and a short log for each change. With your film and powder instructions beside the equipment, the DTF powder curing troubleshooting chart gives the next operator a practical place to start.
Manufacturer and supplier references
- Epson DTF Film Printing Guide (powder application, heat, transfer, and process cautions)
- Amaya UK DTF Xpress adhesive powder instructions (product-specific powdering and curing methods)
- Roland DTF printing workflow (inline DTF powder-shaker workflow)
- STAHLS heat printing mistakes (transfer application and pressing)