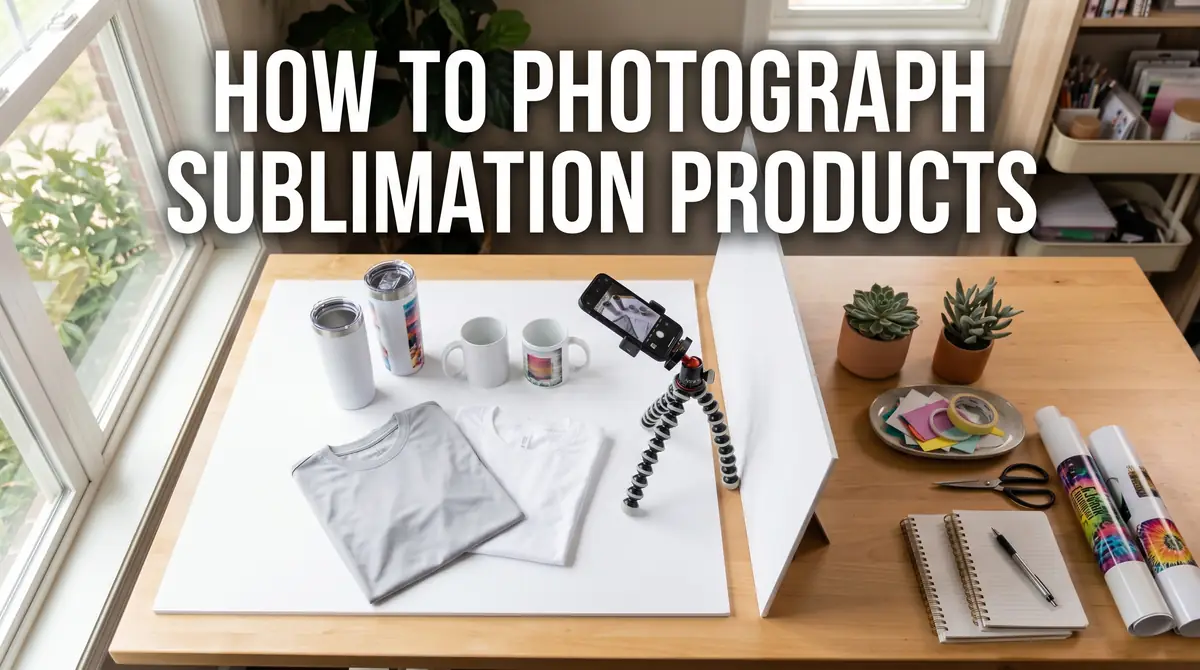
How to Photograph Sublimation Products for Etsy & Online Sales

Good sublimation product photography does not require a DSLR or a dedicated studio. A smartphone, soft light, a simple background, and a repeatable shooting routine are enough for most Etsy and online listings. For a compact product that photographs well, see our can cooler sublimation guide.
The harder part is photographing the things that make sublimation products different.
Glossy tumblers reflect your lights and phone, full-wrap designs cannot be shown in one angle, white products can turn yellow in poor lighting, and heavy editing can make the finished print look different from what the buyer actually receives.
The setup below works for tumblers, mugs, shirts, ornaments, keychains, coasters, and most other sublimated products.
If you are building more than a few listings, it also helps to treat photography as part of your regular sublimation business workflow instead of starting from scratch every time.
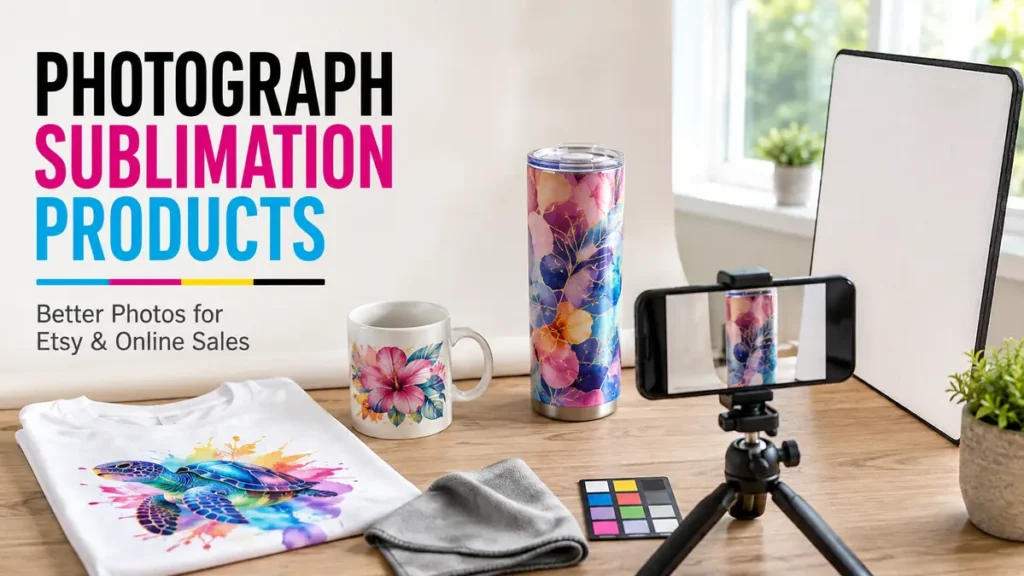
The Simple Sublimation Product Photography Setup
You can build a useful home product-photography setup with items you may already own. Spend money on lighting only after you have tested window light, a stable phone position, and a clean background.
| Item | Budget option | What it solves |
|---|---|---|
| Camera | Smartphone | Main product photos |
| Stability | Small phone tripod | Blur and inconsistent framing |
| Main light | Large window | Soft, natural-looking light |
| Diffuser | Sheer white curtain | Harsh highlights |
| Reflector | White foam board | Dark shadows |
| Background | White poster board | Distracting surroundings |
| Cleaning | Microfiber cloth | Fingerprints and cloudy images |
| Fabric prep | Lint roller or steamer | Wrinkles and visible lint |
Use a Simple One-Light Setup
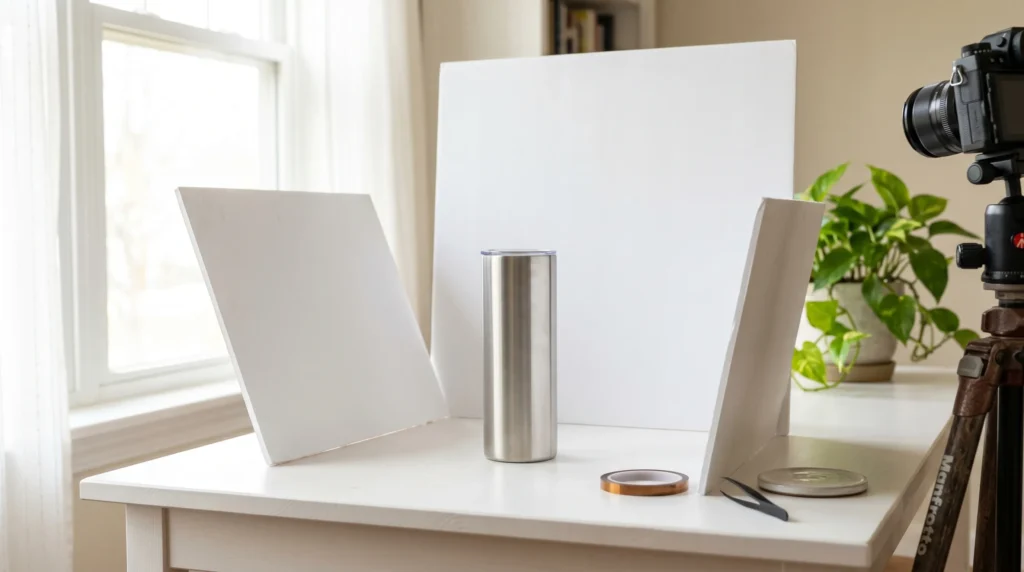
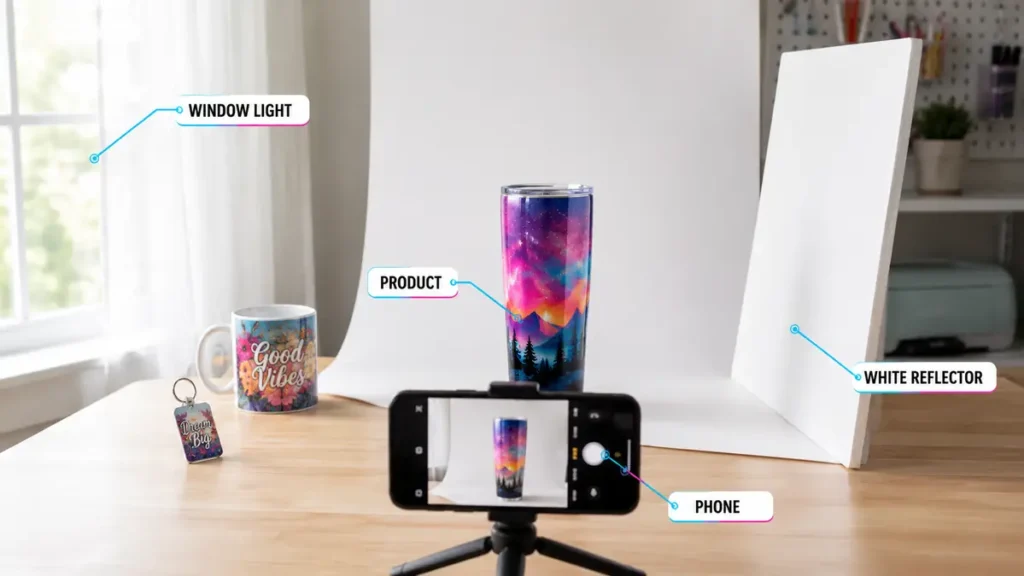
Start with a table beside a large window.
Place the product near the window, but not in direct sunlight. Put a white foam board on the opposite side to bounce some light back into the shadows.
A simple arrangement looks like this:
Window → Product ← White Foam Board
Place the phone in front of the product rather than directly beside the window.
This setup works especially well for mugs, shirts, ornaments, keychains, and matte tumblers.
When a Lightbox or Softbox Makes Sense
Artificial lighting becomes useful when you need to photograph products at night or want the same lighting every day.
A small light tent works well for:
- keychains
- ornaments
- jewelry-sized blanks
- small mugs
- metal tags
- acrylic products
A larger softbox is more practical for shirts, large tumblers, tote bags, and scenes that include props.
The important part is the size and softness of the light, not how expensive the light is.
Set Up Your Phone Before Taking the First Photo
Many weak product photos are caused by the phone setup rather than the phone itself.
Before changing backgrounds, buying lights, or editing the image, fix these simple problems first.
Clean the Camera Lens
Phone lenses collect fingerprints quickly. Those fingerprints can produce a cloudy, low-contrast appearance that looks surprisingly similar to poor focus.
Wipe the rear camera lens with a clean microfiber cloth before each shoot.
This takes seconds and is especially important when photographing glossy tumblers because dirty lenses can make bright reflections spread across the image.
Avoid Digital Zoom
Use your normal rear camera and physically reposition the phone when possible.
Digital zoom crops into the image and can reduce visible detail. That matters when the customer needs to inspect small text, personalization, fabric texture, or print quality.
If moving closer changes the perspective too much, take the photograph from farther away and crop it afterward.
Turn On the Camera Grid
Grid lines make it easier to keep:
- tumblers vertical
- mug handles level
- shirts centered
- flat lays straight
- background edges out of the frame
Small alignment errors become much more obvious when several product images appear beside each other in a shop.
Lock Focus and Exposure When Your Phone Allows It
Tap the product rather than the background so your phone exposes for the item you are selling.
If your camera app lets you lock focus or exposure, use it once the product looks correct. This prevents brightness from changing every time you rotate a tumbler or change the angle slightly.
Use a Tripod and Short Timer
A small tripod solves two problems at once.
It prevents movement, and it keeps your camera position consistent while you rotate the product.
A two-second shutter timer can also stop the phone from moving when you touch the screen.
Get the Lighting Right Before Fixing Anything Else
Lighting has a larger effect on product photography than most editing apps.
A well-lit phone photo normally needs only small corrections. A poorly lit image often needs so much editing that the finished product stops looking realistic.
Start With Soft Window Light
Large windows create broad, soft illumination that works well for most sublimation products.
Place the item near the window and look at the shadows.
If the shadow has a very hard edge, the light is probably too direct. Move the product farther from the window or soften the light with a sheer white curtain.
Use White Foam Board to Control Shadows
A white foam board does not create new light. It redirects some of the window light back toward the darker side of your product.
Move the board closer when shadows are too dark.
Move it farther away if the photograph starts looking flat.
This small adjustment is often enough to improve mugs, apparel flat lays, and small personalized blanks without adding another lamp.
Do Not Mix Window Light With Yellow Room Lights
Mixed lighting is one of the fastest ways to make sublimation colors look wrong.
Daylight may make one side of the product look neutral while a warm ceiling bulb makes the opposite side look yellow or orange.
When using window light, turn off nearby warm lamps unless you have intentionally matched their color temperature.
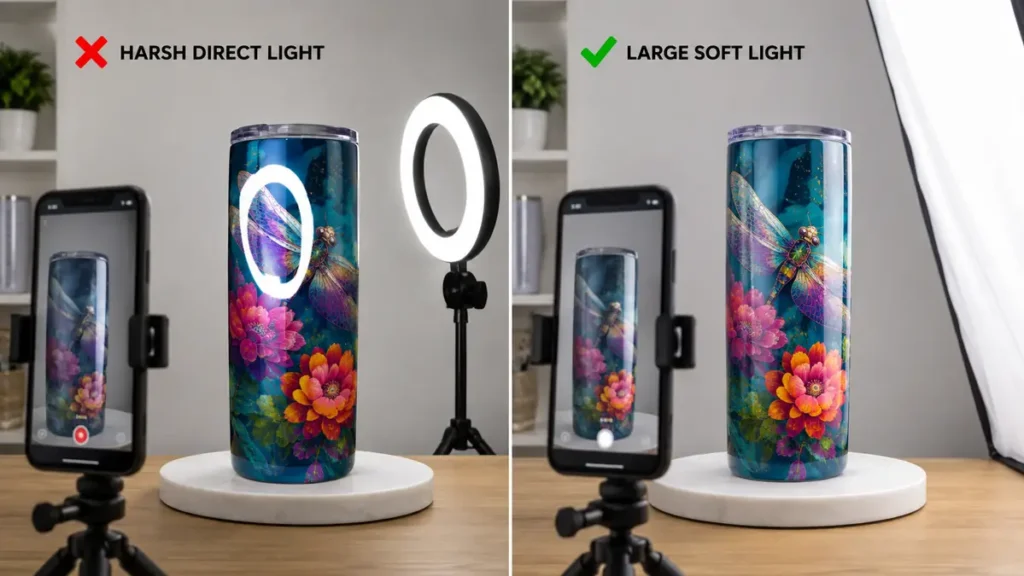
Ring Lights Are Not Ideal for Every Tumbler
Ring lights are convenient for videos and faces, but glossy cylindrical products can reflect the entire circular light.
That can create a bright ring directly across the design.
For reflective sublimation products, a larger diffused light source normally gives you more control than a small exposed ring light.
Make Sublimation Colors Look Accurate in Photos
The goal is not to make your sublimation product look as saturated as possible. The goal is to make the photograph look like the item the buyer will receive.
That difference matters when selling personalized products online.
Compare the Photo With the Product in Your Hand
Before editing, place the finished product beside your phone screen.
Check:
- whites
- skin tones in photo designs
- reds
- deep blues
- black areas
- pastel colors
If the photograph looks noticeably warmer, cooler, brighter, or more saturated than the physical product, fix the photography setup before reaching for filters.
Watch White Balance
White sublimation blanks make white-balance problems easy to see.
A white mug that looks cream, blue, green, or pink in the photograph usually indicates a lighting or white-balance issue.
Neutral products should remain visually neutral.
Avoid Heavy Saturation
Increasing saturation can make a listing look more impressive, but it may create the wrong expectation.
Use editing to correct the photograph, not redesign the print.
Safe adjustments usually include:
- exposure
- white balance
- crop
- straightening
- small contrast changes
- mild sharpening
Know When the Print Is Actually the Problem
Sometimes the photograph is accurate and the physical print itself is dull.
Common print-side causes include:
- incorrect ICC profile
- poor printer settings
- insufficient heat
- incorrect time
- unsuitable blank
- low polyester content
- inconsistent paper or ink
Use the sublimation color problems and fixes guide when the finished product itself looks wrong.
A printed sublimation color chart can also help you compare the colors you selected on screen with the colors your actual printer, ink, paper, press, and blank produce.
How to Photograph Sublimation Tumblers Without Glare
Tumblers need a different approach from shirts or flat products because their curved surfaces reflect nearly everything around them.
Your window, room, phone, light stand, and even your clothing can appear as reflections across a glossy tumbler.
Use a Large, Soft Light Source
For tumbler product photography, start with:
- indirect window light
- a large softbox
- a diffused LED panel
- a light tent for smaller products
Avoid direct flash.
Direct light creates small, intense hotspots that can cover part of the printed design.
Fix Reflections Before Moving the Camera
When you see a bright reflection across the artwork, try adjusting the setup in this order:
- Rotate the tumbler slightly.
- Move the light farther to one side.
- Raise the light.
- Add diffusion.
- Move bright objects away from the area behind the camera.
- Move the camera farther back and crop later if needed.
A few degrees of rotation can move glare completely away from important text or artwork.
Keep the Camera Still and Rotate the Tumbler
Put a small removable mark on your photography surface where the tumbler should stand.
Keep:
- tripod position
- background
- light position
- camera height
the same.
Then rotate only the tumbler.
Your listing images will look more consistent, and editing becomes faster.
Photograph Full-Wrap Designs in Sections
One image cannot show every part of a cylindrical wrap.
For a full-wrap tumbler, photograph:
| Shot | What it shows |
|---|---|
| Front | Main design |
| Quarter turn right | Right side |
| Back | Seam or rear artwork |
| Quarter turn left | Left side |
| Close-up | Print detail |
| Lifestyle | Size and use |
A short rotation video is also useful for full wraps, glitter finishes, and reflective effects.
Show the Seam
Do not hide the back of the tumbler from every listing photo.
If your product has a visible seam, show it in at least one image. This gives the buyer a more realistic idea of the finished item.
Before selling tumblers regularly, also calculate the actual material and production cost using your sublimation tumbler pricing guide.
How to Photograph Sublimation Mugs
A strong mug photo usually shows both the artwork and enough of the mug shape for the customer to understand the product immediately.
A slight angle often works better than photographing it completely straight-on.
Start With a 30 to 45 Degree Angle
Rotate the mug until the main artwork is visible while part of the handle remains in view.
That one angle communicates:
- design
- mug shape
- handle position
- depth
If the artwork wraps farther around the mug, take additional angles rather than forcing the entire design into one image.
Photograph Both Sides of Wraparound Designs
For a full or partial mug wrap, include:
- front design
- handle-left view
- handle-right view
- rear transition
- close-up
- scale photo
This is especially useful for designs with text on one side and artwork on the other.
Add One Scale Photo
A hand holding the mug or a simple desk scene helps communicate its physical size much faster than dimensions alone.
Keep the scale photo secondary. Your main listing image should still make the actual product easy to see.
How to Photograph Sublimation Shirts
Apparel needs preparation before lighting.
A good design can still look poorly made if the shirt is wrinkled, twisted, or covered with lint.
Prepare the Shirt First
Before taking a photograph:
- remove lint
- steam wrinkles
- straighten the collar
- align the side seams
- position the design evenly
- remove loose threads
Do these steps before placing props around the shirt.
Choose the Presentation That Matches the Question
| Photo style | Best use |
|---|---|
| Flat lay | Showing artwork clearly |
| Hanger | Showing shirt shape |
| Mannequin | Showing general fit |
| Real model | Showing fit and scale |
| Folded shot | Packaging or gift presentation |
A flat lay makes the print easy to inspect, but it does not show how the shirt fits. A model image helps with fit but may make the design smaller in the frame.
Use both when the product needs both kinds of information.
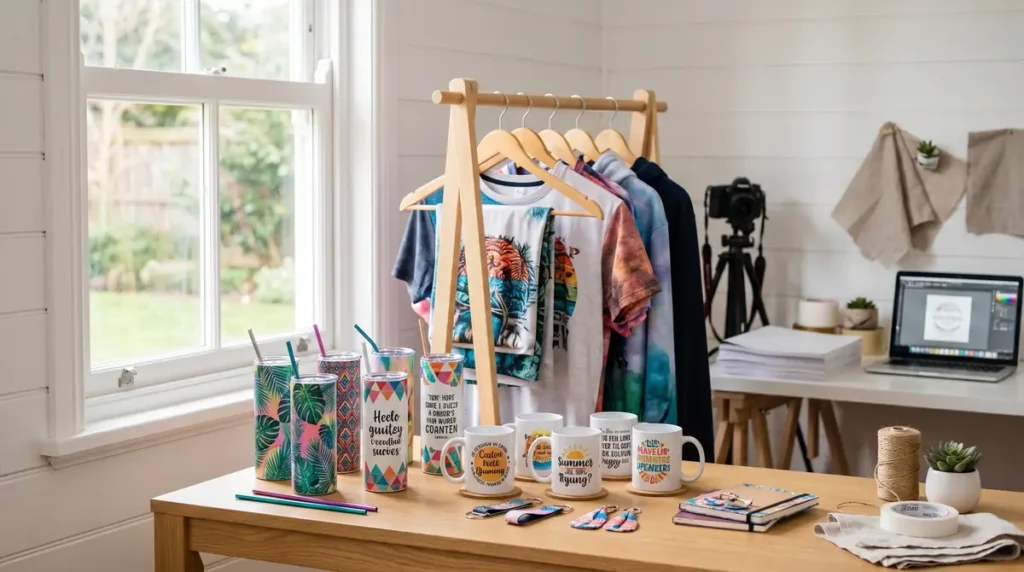
Take a Print Detail Shot
Move close enough to show:
- fabric weave
- edge sharpness
- print detail
- fine text
- color transitions
Do not use digital zoom to fake a close-up.
How to Photograph Small Sublimation Products
Small items often need more careful lighting than large products because scratches, fingerprints, reflections, and dust occupy a larger part of the frame.
This applies to:
- keychains
- ornaments
- coasters
- dog tags
- earrings
- magnets
- patches
- metal photo blanks
Use Close-Ups Without Losing Context
Take one tight detail image, but also include a photograph that establishes the item’s real size.
A close-up by itself can make a small keychain look much larger than it is.
Add a Scale Reference
Useful options include:
- a hand
- ruler
- common notebook
- keys
- gift box
Use a familiar object only when it helps explain scale.
Clean Glossy Products Between Shots
Metal, acrylic, and glossy coatings show fingerprints easily.
Keep a microfiber cloth beside your setup and check the product after each rotation.
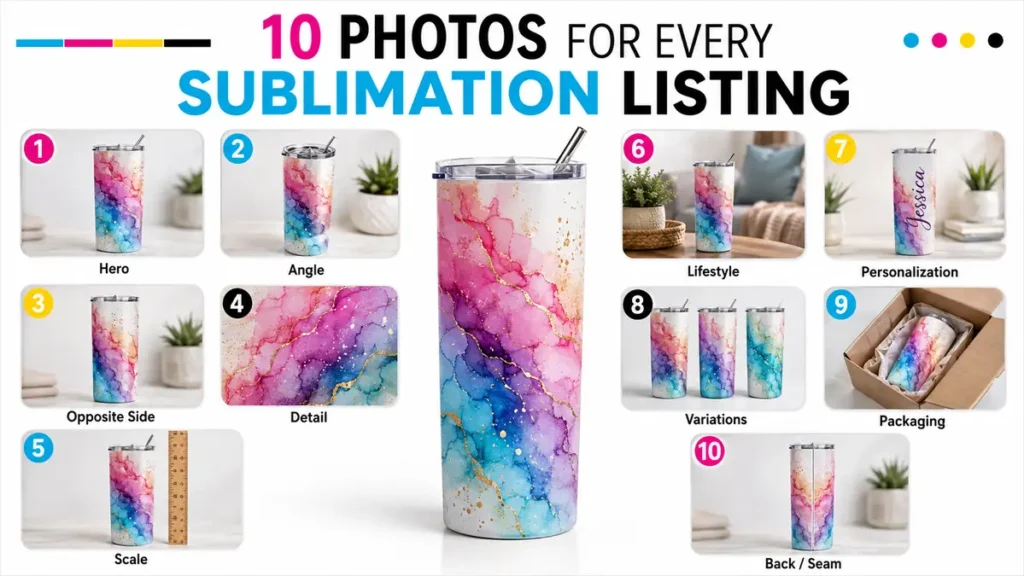
The 10 Photos to Take for Every Sublimation Listing
You do not need to improvise every new product shoot. Use the same basic sequence, then add extra photographs only when the product needs them.
- Main hero photo: Show exactly what the buyer is purchasing.
- Alternate angle: Reveal shape and depth.
- Opposite side: Important for mugs and tumblers.
- Close-up detail: Show print quality and personalization.
- Size or scale photo: Help buyers understand dimensions.
- Lifestyle photo: Show how the product is used.
- Personalization detail: Show names, monograms, dates, or custom options.
- Variation photo: Show available colors or versions when relevant.
- Packaging photo: Show how the finished order is presented.
- Back, seam, or wrap photo: Show areas not visible in the hero image.
For presentation ideas, see these sublimation packaging ideas for Etsy and small businesses.
Printable Sublimation Product Photography Shot List
Save or print this before your next shoot.
Before shooting
- Clean camera lens
- Clean product
- Remove lint and fingerprints
- Check artwork alignment
- Set background
- Set lighting
- Stabilize phone
- Check product color
Required images
- Hero
- Alternate angle
- Opposite side
- Detail
- Scale
- Lifestyle
- Personalization
- Variation
- Packaging
- Back or seam
Before uploading
- Product sharp
- Colors realistic
- Glare not covering artwork
- Background clean
- Product large enough in frame
- Important edges not cropped
- Photos visually consistent
This checklist is a good candidate for a one-page downloadable PDF because it can stay beside the photography setup and be reused for every new product.
Make Your First Etsy Photo Work as a Thumbnail
The hero image has a different job from your detail and lifestyle photos.
It should make the product immediately recognizable when displayed much smaller than the original image.
Fill More of the Frame
If a keychain occupies only a small part of a busy purse or desk scene, buyers have to work harder to identify what is for sale.
Move closer or crop tighter.
Props should support the product rather than compete with it.
Leave Some Crop-Safe Space
Do not place important features directly against the image edge.
Leave space around:
- mug handles
- tumbler rims
- shirt sleeves
- ornament hangers
- packaging edges
This gives you more flexibility when platforms display the photograph at different ratios.
Test the Thumbnail Before Uploading
Shrink the image on your screen.
Ask one simple question:
Can I immediately tell what the product is?
If not, simplify the background, enlarge the product, or select another photograph as the hero.
Real Product Photos vs Mockups
Mockups are useful, but they should not replace the real item when the finished product has details that matter to the buying decision.
When Mockups Are Useful
Mockups can help when:
- planning new designs
- showing several design variations
- testing concepts before production
- creating social-media previews
- displaying a large design catalog
When Real Photography Matters More
Photograph the finished product when buyers need to see:
- actual blank color
- print texture
- glitter
- holographic coating
- wrap seam
- personalization
- real placement
- physical scale
- actual color after pressing
A digital mockup cannot reliably show all of these details.
Do Not Let the Mockup Promise a Different Product
If the mockup shows a bright white shirt but the real blank is cream, or shows a seamless tumbler wrap when the actual product has an obvious seam, the customer receives a different visual result from what was presented.
Use real finished-item photos whenever the physical characteristics matter.
Choose Backgrounds and Props Without Hiding the Product
Backgrounds should support your product style, but the item itself must remain the strongest visual element.
You do not need a different scene for every design.
Reliable Background Options
Good starting points include:
- white
- warm cream
- soft gray
- subtle wood
- marble
- neutral fabric
White and light neutrals are especially useful when the sublimation design already contains many bright colors.
Use Props to Explain the Product
Props work best when they provide context.
For example:
Teacher tumbler
Notebook, pencils, small desk accessory.
Coffee mug
Book, spoon, coffee beans.
Gym tumbler
Towel, gym bag, water bottle area.
The buyer should never need to guess which object in the photograph is actually being sold.
Use Seasonal Props Sparingly
Holiday styling can help establish use, but it can also shorten the usable life of the photo.
Keep at least one clean evergreen hero image, then add seasonal lifestyle shots as secondary images.
Edit Sublimation Product Photos Without Misrepresenting Them
Editing should make the photograph cleaner and more accurate, not make the printed product look better than it does physically.
Start with correction rather than effects.
Safe Adjustments
Use small changes to:
- exposure
- white balance
- shadows
- contrast
- crop
- alignment
- sharpness
If a white background is slightly gray because of the lighting, correct it carefully without blowing out the edges of a white mug or shirt.
Avoid Heavy Filters
Strong filters can alter:
- red tones
- skin tones
- pastel colors
- black density
- blank color
Those differences matter when customers choose a personalized product based on the listing photos.
Edit One Reference Photo First
Before batch editing an entire product shoot, finish one representative photograph.
Compare it with the physical product.
Once the color and brightness look realistic, apply similar settings to the rest of the batch.
This is faster and produces more consistent listings.
Fix Common Sublimation Product Photography Problems
Use this table before reshooting everything.
| Problem | Likely cause | Practical fix |
|---|---|---|
| Photo looks dull | Too little light | Move closer to soft light |
| White product looks yellow | Warm indoor bulb | Turn off mixed lighting |
| Tumbler has bright stripe | Direct reflection | Diffuse or reposition light |
| Phone appears in tumbler | Curved reflection | Rotate tumbler or move camera |
| Image looks cloudy | Dirty phone lens | Clean lens |
| Product is blurry | Camera movement | Tripod and timer |
| One side is very dark | No reflected fill | Add white foam board |
| Product looks tiny | Too much background | Crop tighter |
| Scene looks confusing | Too many props | Remove nonessential objects |
| Shirt looks sloppy | Lint or wrinkles | Steam and lint-roll |
| Full design cannot be seen | One angle only | Shoot several rotations |
| Colors vary between listings | Different lighting/editing | Standardize the setup |
| Glossy item shows hotspots | Light source too small | Use a larger diffuser |
| Personalization is unreadable | Hero image too wide | Add close-up detail photo |
Fix the simplest cause first. Better lighting and a clean lens often solve problems that appear to require expensive equipment.
Build a Repeatable Product Photography Workflow
Consistency becomes much easier when every new product follows the same sequence.
A repeatable setup also saves time when you add new designs to the same blank.
Step 1: Prepare the Product
Clean the surface, check the print, remove lint, straighten apparel, and inspect personalization.
Step 2: Clean the Camera
Wipe the lens before mounting the phone.
Step 3: Put the Product in a Marked Position
A small removable tape mark can help you return tumblers and mugs to the same location.
Step 4: Set the Lighting
Use the same window, softbox, reflector position, and background whenever possible.
Step 5: Shoot the Standard 10 Images
Follow the shot list instead of deciding what to photograph as you go.
Step 6: Capture a Short Rotation Video
This is especially useful for:
- full-wrap tumblers
- glitter products
- holographic blanks
- reflective surfaces
- dimensional products
Step 7: Check Color Before Packing the Product Away
Compare the physical item to your hero image while the photography setup is still assembled.
If the photograph needs to be retaken, it is much easier to fix immediately.
Step 8: Batch Edit
Use one consistent reference image.
Step 9: Name the Files Clearly
A simple file structure makes large catalogs easier to manage.
For example:
teacher-tumbler-front.jpg
teacher-tumbler-side.jpg
teacher-tumbler-detail.jpg
teacher-tumbler-packaging.jpg
Step 10: Record the Setup
Note:
- background
- light position
- reflector position
- phone height
- tripod position
- time of day if using daylight
The next product shoot should start from an existing system instead of a blank table.
If Etsy is one of your main sales channels, the photography process should work alongside your Etsy SEO for sublimation sellers rather than being treated as a separate job.
Frequently Asked Questions
Can I photograph sublimation products with my phone?
Yes. A modern smartphone is suitable for most Etsy and small-business sublimation product photography when the product is well lit and the phone is stable. Clean the lens, avoid digital zoom, use the rear camera, and put more effort into lighting than filters.
What lighting is best for sublimation product photography?
Soft, diffused light is the easiest starting point. A large window with indirect daylight works well for most products. White foam board can fill shadows. For consistent artificial lighting, use a large softbox or diffused LED rather than a small harsh light aimed directly at the product.
How do I photograph a sublimation tumbler without glare?
Use a large diffused light source and rotate the tumbler until the reflection moves away from the important artwork. Avoid direct flash and exposed ring-light reflections. Keep the camera position fixed while changing the light or tumbler angle.
How do I photograph a full-wrap tumbler?
Take several images around the tumbler rather than trying to show the whole wrap in one photo. Photograph the front, right side, back or seam, left side, and a close-up. A short rotation video can show how the sections connect.
Why do sublimation colors look different in my photos?
Mixed lighting, incorrect white balance, camera processing, and heavy editing can all shift color. Compare the photograph with the physical product under neutral light before editing. If the physical product itself looks dull or shifted, troubleshoot the printing process rather than correcting it in the photo.
What background works best for sublimation products?
White, cream, gray, subtle wood, marble, and neutral fabrics work well for most products. Choose a background that provides enough contrast without competing with the design. Very colorful products normally benefit from simpler backgrounds.
Should I use real photos or mockups for Etsy listings?
Use real product photography whenever color, texture, scale, personalization, seams, coatings, or the actual blank matter. Mockups are useful for showing planned variations or design options, but they should not make the finished product look materially different.
How many photos should I take for each sublimation product?
A practical routine is to shoot about ten useful views: hero, alternate angle, opposite side, close-up, scale, lifestyle, personalization, variations, packaging, and back or seam. You may upload fewer or more depending on the product, but having a repeatable shot list prevents important details from being missed.
A Better Product Photo Starts Before You Open the Editing App
The easiest way to improve sublimation product photography is to standardize the parts that matter most: soft lighting, a clean lens, accurate color, a simple background, and a consistent set of angles.
For reflective products, spend extra time controlling glare. For full wraps, show several rotations. For apparel, show both the print and the fit. Most importantly, make sure your photographs represent the actual finished product rather than a brighter, cleaner, or more saturated version created during editing.
Once the setup works, save it. The same table, background, tripod position, and shot list can handle dozens of future products with far less work.