
How to Convert an HP Printer to Sublimation
You can convert certain HP inkjet printers to sublimation by replacing their standard cartridges with sublimation ink, purging old ink, and using transfer paper. Only HP models with thermal inkjet heads (like HP Envy 6055 or OfficeJet 250) are compatible.
| Model | Works for Sublimation? | Notes | Cost to Convert |
|---|---|---|---|
| HP Envy 6055 | ✅ Yes | Good for small batches | ~$80 |
| HP OfficeJet 250 | ✅ Yes | Portable, slower drying | ~$120 |
| HP LaserJet Series | ❌ No | Uses toner, not ink | N/A |
To convert an HP printer to sublimation:
- Use only compatible inkjet models (HP Envy 6055, OfficeJet 250).
- Purge original ink with cleaning cycles.
- Fill with sublimation ink (like Hiipoo or Cosmos).
- Install ICC profiles for accurate colors.
⚠️ Limitations:
- Prints only on transfer paper (not fabric directly).
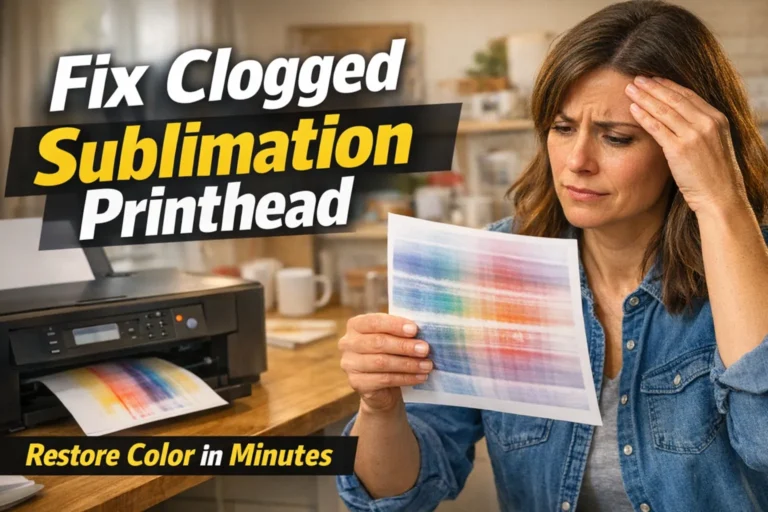
- Printhead clogs faster, requires weekly use.
- Voids HP warranty.
Best for small projects; for heavy use, buy a dedicated sublimation printer (like Epson F170).
How to Convert an HP Printer to Sublimation

Step-by-Step Short Conversion Process:
1. Purge Original Ink
- Run 3-5 cleaning cycles (from printer settings).
- Print color blocks on plain paper until ink runs dry.
2. Install Sublimation Ink
- Use third-party sublimation ink (e.g., Hiipoo, Cosmos, Printers Jacket).
- Never mix sublimation ink with original HP ink.
3. Replace Cartridges or Use CISS
- Option A: Refill original cartridges (cheaper, but messy).
- Option B: Install Continuous Ink Supply System (CISS) (~60−60−120).
4. Load ICC Profiles
- Download color profiles from ink manufacturer.
- Prevents color shifts in final prints.
Key Limitations & Risks
⚠️ Prints Only on Transfer Paper (not direct-to-fabric).
⚠️ Clogging Risk – Must print weekly to prevent dried ink.
⚠️ Voids Warranty – HP won’t cover repairs after conversion.
💰 Estimated Cost: Around $100 total to convert your HP printer to sublimation.
That covers:
- Sublimation ink set (Hiipoo, Cosmos, or Printers Jack) – about $30–$40
- Transfer paper pack – around $15–$20
- Continuous Ink Supply System (optional) – $60–$120 if you go that route
If you’re reusing your existing cartridges instead of buying a CISS, expect to stay closer to $100 or less overall.
Why Convert an HP Printer to Sublimation
A lot of crafters and small business owners look at converting an HP printer to sublimation because it’s cheaper than buying a dedicated sublimation printer. If you already own an inkjet HP printer, converting it means you can try sublimation printing without spending hundreds on new equipment. It’s great for testing out custom mugs, shirts, and keychains before you commit to a full setup.
DIY creators also like it for the learning curve. You get hands-on experience with how sublimation ink, paper, and heat transfer actually work together. For hobbyists or Etsy sellers who do light printing, it’s a fun, budget-friendly way to get started.
HP printers aren’t designed for sublimation ink, so long-term reliability can be hit or miss. Still, if you’re curious about sublimation and want to experiment without breaking the bank, converting your HP printer can be a smart first step.
Pros and Cons of Converting
If you print occasionally and just want to experiment, converting your HP printer makes sense. But if you plan to sell products or print daily, go with a real sublimation printer like the Epson F170 or Sawgrass SG500.
| Pros | Cons |
|---|---|
| Budget-friendly – A cheap way to test sublimation before investing in a dedicated printer. | Voids warranty – HP won’t cover any damage once converted. |
| Beginner-friendly – Great for DIY users or small projects like mugs and T-shirts. | Not built for sublimation ink – Can clog faster since HP printheads run hotter. |
| Easy setup – Just clean, refill, and install ICC profiles. | Limited media use – Only works with sublimation transfer paper, not direct-to-fabric. |
| Learn-by-doing – Helps you understand sublimation before scaling up. | Shorter lifespan – Converted printers typically last 6–12 months if used weekly. |
| Reuses existing printer – No need for a full new setup. | Inconsistent color accuracy – Even with ICC profiles, results can vary. |
What You Need ( A Details Process )
- Sublimation ink:
- Sublimation ink is specifically designed for sublimation printing. It is used to transfer images onto your product through heat and pressure.
- Transfer paper:
- Transfer paper is a specially coated paper used to transfer your designs from the printer to your product. It is essential to use high-quality transfer paper to ensure the best results.
- Heat press machine:
- A heat press machine is needed to apply heat and pressure to the transfer paper, transferring your design onto your product.
- Additional equipment and materials:
- Depending on your setup, you may need other equipment, such as a silicone mat or sublimation-friendly blank products to print onto.
Step 1: Installing the Sublimation Ink
Explanation of the process:
Installing sublimation ink in your HP printer is an easy method that can be done in just a few steps. The first stage is to remove the standard ink cartridges and replace them with sublimation ink cartridges.
Differences between sublimation ink and standard ink:
Sublimation ink is designed to be used in conjunction with heat and pressure to transfer your designs onto transfer paper and onto your final product. It is a specialized type of ink that is incompatible with standard printers. On the other hand, traditional ink is designed for regular printing and unsuitable for sublimation printing.
Importance of observing the instructions provided with the ink:
Following the instructions supplied with your sublimation ink cartridges is essential to ensure you install them correctly. Improper installation can result in poor print quality and damage to your printer. Additionally, use the correct type of ink for your printer model to ensure the best results.
Step 2: Printing Your Image on Transfer Paper
- Explanation of the printing process:
- Once your sublimation ink cartridges are installed, you can print your designs onto transfer paper. It is essential to use high-quality transfer paper specifically designed for sublimation printing.
- Importance of high-quality transfer paper:
- High-quality transfer paper is crucial for producing vibrant, long-lasting prints. The transfer paper must be mainly designed for sublimation printing to ensure that your designs transfer onto your final product correctly.
- Recommended settings for printing:
- Adjusting the printer settings to ensure your designs are printed correctly onto transfer paper is essential. The recommended settings may vary depending on your printer model, so consult the manufacturer’s guidelines or a professional to ensure that your designs are printed with the correct quality and color.
Step 3: Heat Pressing Your Design onto Your Product
Explanation of the heat pressing process:
Once your image is printed on transfer paper, it is time to transfer your design onto your final product. This is done using a heat press machine, which applies heat and pressure to the transfer paper.
Importance of using the correct heat press settings:
The settings ensure that your designs transfer onto your product correctly. The suggested settings may vary depending on the style of product you are using and the size of your project. Be sure to consult the manufacturer’s guidelines or a professional for guidance.
Additional considerations: Depending on your product, you may need to use a silicone mat or other materials to ensure your product does not move during heat-pressing. Further, you should follow any safety precautions your heat press machine manufacturer recommends.
❓ Is converting cheaper than a sublimation printer?
Short-term: Yes ($100-$200 vs. $400+). Long-term: No—dedicated sublimation printers last longer.
❓ How long will a converted HP printer last?
6-18 months with proper maintenance. Printheads degrade faster with sublimation ink.
❓ Can I switch back to normal ink later?
No. Sublimation ink residues will contaminate regular ink, causing clogs.
Maintenance Tips for a Converted HP Sublimation Printer
Keeping your converted HP printer running smoothly is all about routine care. Sublimation ink dries faster than normal ink, so a little upkeep goes a long way.
1. Print something every week
Even a small color block test page helps keep the nozzles clear and prevents dried ink. If you go weeks without printing, you’ll likely deal with clogs or streaky prints.
2. Run cleaning cycles regularly
Use your printer’s built-in cleaning mode every few weeks, especially if colors start fading or lines appear in your prints. Avoid over-cleaning though, it wastes a lot of ink.
3. Store it in a moderate environment
Keep the printer in a space with 30–50% humidity and stable temps. Too dry and the ink dries out faster, too humid and you’ll get fuzzy prints.
4. Use airtight ink bottles and sealed cartridges
Exposure to air makes sublimation ink thicken or crystallize. Always close your ink bottles tightly and avoid leaving cartridges open during refills.
5. Power off correctly
Let the printer complete its shutdown cycle so the printhead parks properly. This seals the nozzles and keeps air from drying them out.
6. Use a nozzle check before big prints
Before you print a full batch of transfers, do a quick nozzle test. Catching issues early saves ink, paper, and frustration.
7. Replace ink filters or CISS tubes if colors shift
If your colors suddenly look off, old tubing or filters may be the cause. Replace them instead of forcing extra cleaning cycles.
💡 Pro tip:
Most converted HP printers stay reliable for about 6–12 months with consistent weekly use. After that, print quality usually drops as the printhead wears out, so plan upgrades or replacements early if you’re running a small shop.
🚫 Common Mistakes to Avoid When Converting an HP Printer to Sublimation
Even though converting your HP printer to sublimation is pretty simple, a few small mistakes can mess up print quality or damage the printer. Here’s what to watch out for:
1. Mixing regular ink with sublimation ink
This is the biggest one. Never top off old HP ink with sublimation ink, they don’t mix and can cause thick clogs almost instantly. Always purge the original ink first.
2. Skipping ICC profiles
Without color profiles, your prints may look dull or completely off. Each sublimation ink brand (like Hiipoo or Cosmos) offers ICC files made to correct that.
3. Using the wrong paper type
Not all transfer papers are equal. Cheap paper can blur colors or peel under heat. Stick with sublimation-specific brands like A-SUB or TexPrint.
4. Letting the printer sit idle too long
Thermal HP printheads dry out fast. If you’re not printing weekly, expect clogged nozzles that even cleaning cycles might not fix.
5. Pressing at the wrong temperature or time
If your heat press runs too hot or too long, the colors will fade or ghost. Always match your press settings to the substrate, for example, mugs need around 400°F for 3–4 minutes, while shirts usually need 385°F for 60 seconds.
6. Ignoring printer model compatibility
Not every HP printer works with sublimation ink. Stick with models that have thermal inkjet printheads, like the Envy or OfficeJet series. Avoid LaserJet, Smart Tank, or PageWide printers entirely.
7. Forgetting warranty implications
Converting your printer voids HP’s warranty immediately. If you plan to print regularly or for business, consider a real sublimation printer instead.
💡 Quick reminder:
It’s always better to test small before scaling up. Once you know your printer and ink combo works, keep notes on your settings, paper, and press results. That’s how you get consistent quality over time.
Cost and Performance Comparison: Converted HP vs. True Sublimation Printers
If you’re wondering whether it’s smarter to convert your HP printer or just buy a real sublimation printer, here’s a quick breakdown.
| Category | Converted HP Inkjet | Dedicated Sublimation Printer (Epson F170 / Sawgrass SG500) |
|---|---|---|
| Startup Cost | $60–$150 (conversion kit, inks, paper) | $350–$600 (printer + starter ink) |
| Ink Type | Third-party sublimation ink (Hiipoo, Cosmos, Printers Jack) | OEM sublimation ink (Epson, Sawgrass) |
| Print Quality | Good for small projects, but color consistency varies | Professional-grade color and detail |
| Maintenance | High — frequent cleaning needed | Low — built for sublimation ink |
| Durability | 6–12 months average lifespan | 3–5 years with regular use |
| Warranty | Voided immediately | Full manufacturer warranty |
| Print Volume | Light (up to 20 transfers per week) | Heavy (hundreds per week) |
| Learning Curve | DIY-friendly, some trial and error | Plug-and-play setup with ICC built-in |
💡 Real-World Example:
A small Etsy seller converted an HP Envy 6055 using Hiipoo sublimation ink for under $100. It worked well for about six months of occasional mug printing but started clogging after longer idle periods. They later upgraded to an Epson F170, which cost more upfront but delivered sharper prints, faster drying times, and cut maintenance time by nearly 40%.
Real Case Example: for Small Business Use
Meet Sarah, a home crafter turned Etsy seller. She started with a basic HP Envy 6055 she already owned and wanted to test sublimation before spending big on new equipment.
Her setup:
- Printer: HP Envy 6055
- Ink: Hiipoo Sublimation Ink ($30)
- Paper: A-SUB 125g transfer paper ($15)
- Heat press: Cricut EasyPress 2
What happened:
At first, the results were surprisingly good. Sarah could print colorful mug and keychain designs and sell her first few custom orders. After running the printer weekly and doing regular nozzle checks, everything stayed consistent for about five months.
Eventually, she noticed fading reds and light banding in her prints, classic signs of printhead clogging. After trying multiple clean cycles, she realized the thermal HP printhead wasn’t handling sublimation ink well long-term.
So she decided to upgrade to an Epson F170. The difference was night and day, sharper images, richer blacks, and zero maintenance worries. Her average production time dropped from 10 minutes per item to around 6, and she doubled her weekly output.
Ready to Master Sublimation Printing?
Unlock the full potential of your printing projects with our expert resources and guides
Trusted by thousands of printing enthusiasts
FAQs
Bottom line:
If you’re experimenting or printing occasionally, converting your HP printer can be a fun, budget-friendly option. But if you’re serious about selling or doing high-volume sublimation, a dedicated printer pays off long-term, less downtime, better color accuracy, and way fewer headaches.


One Comment