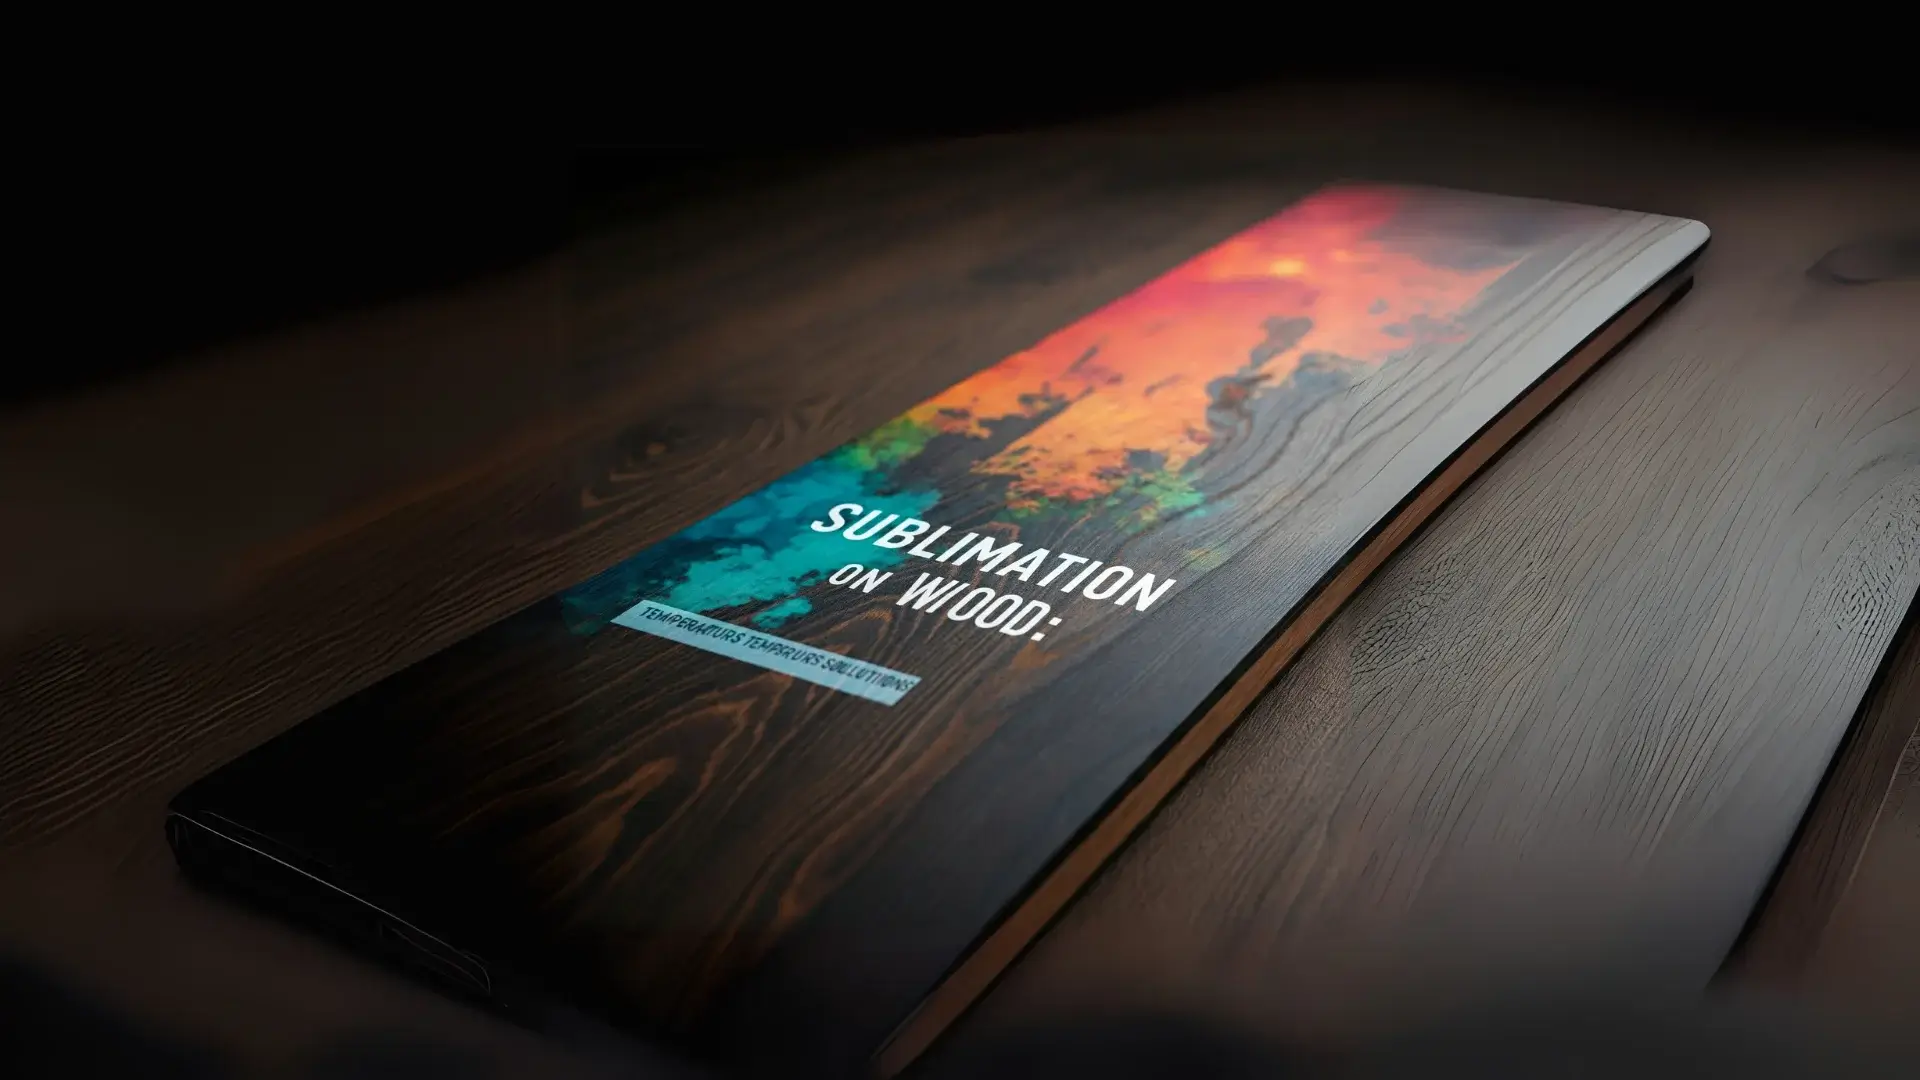
Sublimation on Wood:
Learn the ins and outs of sublimation on wood, whether it’s with or without laminate. Identify the ideal temperatures, times, and techniques for making uncoated wood, cutting boards, and furniture.
Expert tips on using polycrylic, sprays, and wood blanks to ensure perfect results every time are used to solve common issues.
Can You Sublimate on Wood?
Absolutely! While sublimation is often associated with fabric, wood is an excellent substrate for creating vibrant, long-lasting designs. However, wood presents unique challenges compared to textiles.


The porous surface of untreated wood cannot directly bond with sublimation ink, but with the right preparation, such as using laminating pouches, polycrylic coatings, or pre-treated wood blanks, you can achieve stunning results.
Benefits for Crafting and Projects
Sublimation on wood opens possibilities to creative outstanding ideas. It use for:

- Personalized Home Decor: Custom signs, coasters, or picture panels.
- Unique Gifts: Think custom wooden photo frames or ornaments.
- Enhanced Crafting Projects: Add colorful, high-definition designs to furniture, cutting boards, or MDF plaques. Sublimation on wood creates a polished, professional look with minimal effort once the technique is mastered. Plus, it’s more durable than traditional printing methods like vinyl decals.
Uncoated vs Laminated Wood Sublimation
The preparation process for sublimation on wood is highly dependent on the outcome. Your sublimation projects can be greatly improved by understanding the correct methods and materials, even if you use raw wood or pre-treated blanks.
| Uncoated Wood | Laminated/Treated Wood |
|---|---|
| Possible, but results are often muted. | Highly feasible with brighter and sharper results. |
| Natural grain and porous texture. | Smooth surface for better ink bonding. |
| Muted colors; white-painted wood enhances vibrancy but may warp under heat. | Brighter and more vibrant colors. |
| Prone to fading and ink absorption. | Better durability and resistance to fading. |
| Minimal preparation (can use raw or white-painted wood). | Requires laminating, HTV, or polycrylic coating. |
| Higher risk of warping, especially with painted wood. | Lower risk due to treated surface. |
| Rustic or natural-look projects. | High-quality, professional designs. |
For the best results, use laminated or treated wood, as it provides vibrant colors, better durability, and a professional finish for your sublimation projects.
Essential Supplies and Preparation
In order to successfully sublimate on wood, it is important to have the right tools and materials.
Here is an overview of what you need, along with tips for preparing to achieve the best results.
Supplies Needed for Sublimation on Wood
Supplies required for wood sublimation:
| Item | Purpose |
|---|---|
| Sublimation Printer | Prints designs using sublimation ink. Compatible options: Epson EcoTank. |
| Sublimation Paper | Transfers printed design to the wood surface. |
| Heat Press | Applies consistent heat and pressure for ink transfer. |
| Heat-Resistant Tape | Secures the sublimation paper in place during pressing. |
| Laminating Film or Polycrylic | Prepares wood for sublimation by creating a smooth, ink-compatible surface. |
| White Latex Paint (optional) | Enhances vibrancy by creating a white base layer. |
| Wood Blanks | The substrate for sublimation. Use uncoated, MDF, or poly-coated wood. |
| Sandpaper | Smooths the wood surface for even application. |
| Lint Roller | Removes dust or debris that could affect the final result. |
Choosing the Right Sublimation Printer and Accessories
- Printers: A sublimation-compatible printer like the Epson EcoTank series, fitted with sublimation ink, ensures precise designs with vivid colors.
- Sublimation Paper: Choose high-quality sublimation sheets to guarantee a seamless transfer.
- Heat Press: A flat heat press (Cricut Autopress or similar) is ideal for evenly distributing heat. Avoid using a household iron, as it lacks the necessary heat range (350°F+).
Preparing the Wood Surface
Proper surface preparation is essential to ensure your design transfers smoothly.
- Sanding and Cleaning:
- Start by sanding the wood blank to create a smooth surface. This minimizes imperfections that might disrupt ink transfer.
- Use a lint roller or clean cloth to remove sawdust or debris before applying any coating.
- Using Laminating Film vs. Polycrylic:
- Laminating Film: Provides a glossy finish, vibrant colors, and easy application. Trim excess laminate for clean edges after pressing.
- Polycrylic: Offers a matte finish but requires more effort, including precise application and drying time. It’s ideal for those seeking a natural look.
Choosing the right method depends on the project’s aesthetic and durability requirements. Laminating film is often preferred for its convenience and consistent results.
Methods for Sublimating on Wood
There are multiple methods, each suited to different needs and finishes. Below is a concise guide to 5 effective techniques.
Method 1: Bare Wood with No Coating
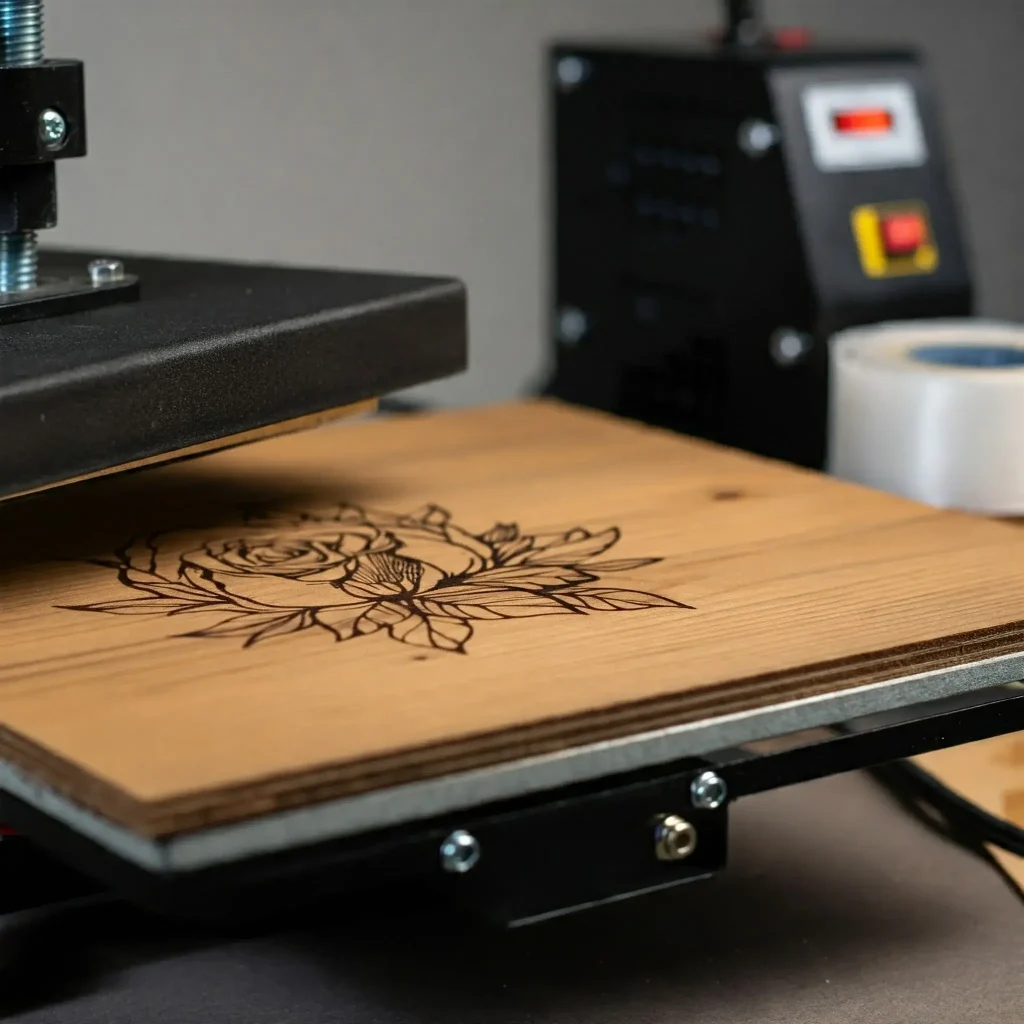
- Process: Sublimation is directly applied to untreated wood. Preheat the wood blank to remove moisture, secure the design with heat-resistant tape, and press at 375°F for 90 seconds.
- Pros: Preserves the natural wood grain, creating a rustic effect.
- Cons: Colors are muted, and details may appear less sharp. Wood may warp under heat.
Method 2: Applying Thermal Lamination Pouch
- Process:
- Preheat the wood at 380°F for 50 seconds to remove moisture.
- Cut a laminating pouch to fit the wood, place it shiny side up, and press at 375°F for 15 seconds.
- Trim excess laminate, place your sublimation design, and press again for 90 seconds.
- Pros: Produces vivid colors with a smooth, glossy finish.
- Cons: Requires precise trimming and application.
Method 3: Treating the Wood with Polycrylic

- Process:
- Sand and clean the wood blank.
- Apply a thin, even coat of polycrylic with a paintbrush and let it dry completely (about an hour).
- Secure the sublimation design and press at 375°F for 90 seconds.
- Pros: Creates a durable, matte finish.
- Cons: Paper often sticks to the polycrylic after pressing, requiring extra cleanup.
Method 4: Using Sanding Sealer

- Process:
- Prepare the wood by sanding and cleaning the surface.
- Apply a light coat of sanding sealer with a sponge or cloth and allow it to dry quickly (15–20 minutes).
- Sublimate at 375°F for 90 seconds.
- Pros: Faster drying time and fewer adhesion issues compared to polycrylic.
- Cons: Slightly less vibrant results than laminated wood.
Method 5: Sublimating on Pre-Coated Wood Blanks

- Process:
- Use a poly-coated wood blank, widely available in craft stores.
- Preheat the blank at 365°F for 10 seconds to remove moisture.
- Place the sublimation design and press at 365°F for 90 seconds.
- Pros: Fast, easy, and reliable with vibrant, professional-looking results.
- Cons: Slightly more expensive due to pre-coating.
Comparison Table of Methods
The method you choose will depend on your desired finish, budget, and time constraints.
The use of laminate pouches and pre-coated blanks is a way to achieve vibrant results with minimal effort, while bare wood and polycrylic provide a more natural aesthetic.
| Method | Finish | Preparation Time | Color Vibrancy | Durability | Ease of Use |
|---|---|---|---|---|---|
| Bare Wood with No Coating | Rustic, natural | Minimal | Low | Moderate | Easy |
| Thermal Lamination Pouch | Glossy, smooth | Moderate | High | High | Moderate |
| Polycrylic | Matte, natural | High | Moderate | High | Difficult |
| Sanding Sealer | Smooth, subtle | Low | Moderate | Moderate | Easy |
| Pre-Coated Wood Blanks | Glossy or matte | Minimal | High | High | Easiest |
Wood Sublimation Safety Checklist
Work Area
- ✅ Well-ventilated room or open windows
- ✅ Clean, clutter-free workspace
Hand Protection
- ✅ Heat-resistant gloves for hot blanks
- ✅ Disposable gloves when applying coatings
Respiratory Protection
- ✅ Mask or respirator when spraying/painting coatings
- ✅ Avoid inhaling sanding dust
Eye Protection
- ✅ Safety glasses or goggles
Equipment Safety
- ✅ Never leave hot press unattended
- ✅ Use protective paper (butcher paper/parchment) under blanks
Material Handling
- ✅ Read labels on polycrylic, epoxy, or laminates
- ✅ Preheat wood properly to avoid warping or bubbling
Tip: Hang or print this checklist near your workspace to follow every time you sublimate on wood.
Step-by-Step Guide to Sublimate on Wood
To achieve vibrant and durable results, follow these steps when sublimating on wood.
Printing Your Design: Tips for Success

Step 1: Prepare Your Design
- Use design software to create or customize your artwork.
- Mirror the image before printing so it transfers correctly.
Step 2: Set Up Your Printer
- Use a sublimation printer like the Epson EcoTank series.
- Choose high-quality sublimation paper for crisp, vibrant designs.
- Make sure your printer uses sublimation ink for proper transfer.
Step 3: Dry Your Print
- Allow the print to dry completely before handling to prevent smudging.
Tip: Always test your design on scrap wood before using your final blank to avoid wasting materials.
Laminating the Wood Surface: Dos and Don’ts
Dos:
Don’ts:
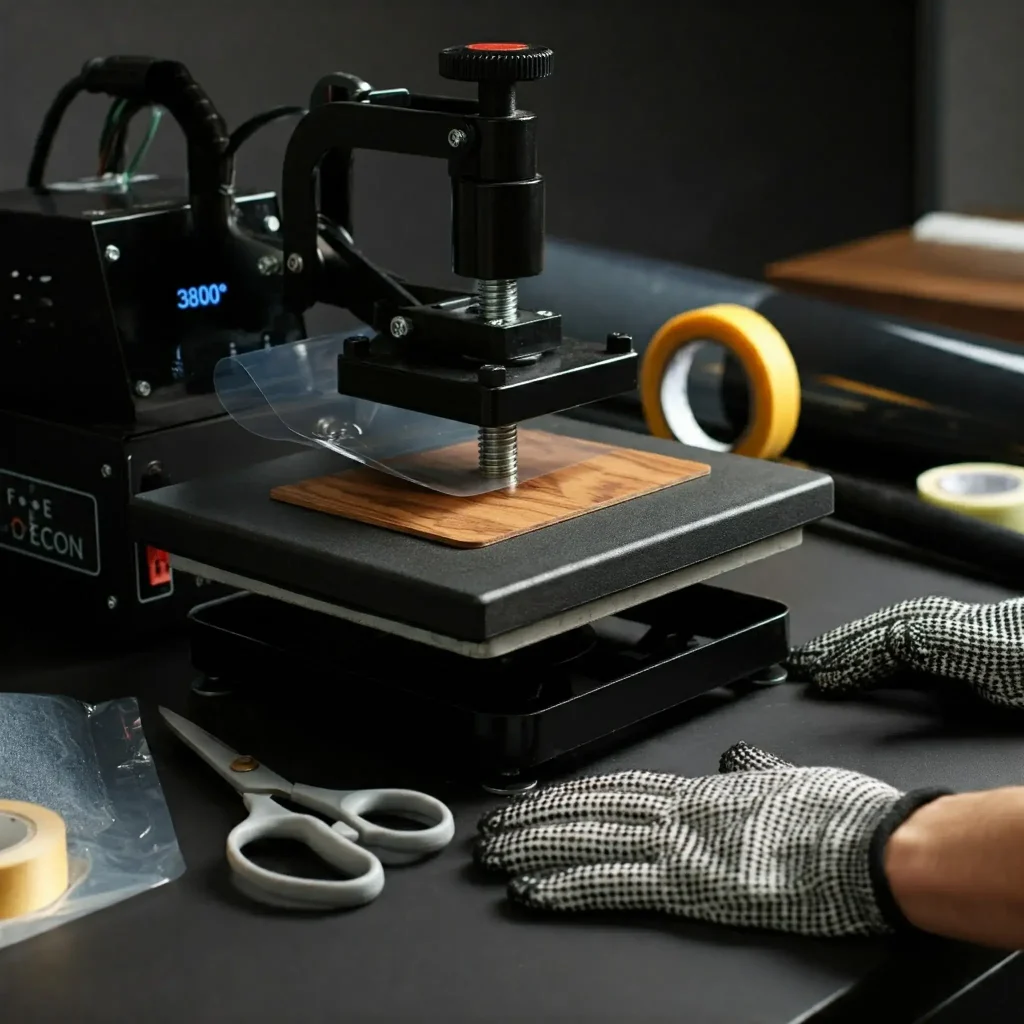
Pressing the Design onto Wood: Temperature and Time Settings

🔴 Sublimation on Wood: Pressing Guide
📌 Step-by-Step Process
- Align the Design: Place print face down on wood and secure with heat-resistant tape
- Protect the Setup: Cover with butcher paper to prevent ink bleed
- Press Settings: See chart for temperature/time by method
- Pressing: Apply firm, even pressure without movement
- Cooling: Let cool completely before removing paper
⚙️ Press Settings by Method
Tip: If you notice fading or incomplete transfer, adjust the pressure or ensure your sublimation paper is fully aligned.
Testing Methods: Ensuring Quality Results
- Trial Pieces: Use scrap wood or test small areas to perfect your technique.
- Inspect the Transfer: Check for vibrant colors and even coverage. Any faded areas may indicate insufficient pressure or heat.
- Durability Check: Rub a damp cloth over the design to ensure the ink has bonded properly.
- Adjustments: If the wood warps, lightly dampen the unprinted side and weigh it down with heavy books until flat.
Tips and Tricks for Perfect Sublimation
To achieve flawless sublimation on wood, there are a few insider tips that will help you elevate your projects. These techniques include choosing the right wood surface and improving durability.
Comparing Painted vs. Unpainted Wood Results
- Painted Wood:
- Pros: Applying a coat of white latex paint creates a bright base that enhances color vibrancy and detail. It also helps prevent warping during pressing by sealing the wood.
- Cons: Adds extra preparation time and may not suit projects with a natural aesthetic.
- Unpainted Wood:
- Pros: Showcases the natural grain for a rustic look. Works well for vintage or earthy designs.
- Cons: Colors appear muted, and details may lack sharpness. Warping is more likely, especially with thinner blanks.
Tip: If you prefer unpainted wood but want sharper colors, opt for a thicker blank or use a laminating film to bridge the gap between aesthetics and vibrancy.
Creative Ideas: Sublimating on Furniture, Tables, and Cutting Boards

Expand your sublimation projects to include functional and decorative pieces:
- Furniture: Add custom designs to wooden tabletops or chairs for unique home decor. Use pre-coated wood surfaces or laminating pouches for durability.
- Tables: Sublimate seasonal patterns or personalized designs on table accents like coasters, trivets, or lazy Susans.
- Cutting Boards: Create personalized cutting boards by sublimating names, patterns, or inspirational quotes. Always use the decorative side for sublimation, leaving the reverse side for food preparation.
Tip: For functional items like cutting boards, consider sealing the sublimation with a food-safe finish to ensure durability.
Enhancing Durability: Sealants and Protective Coatings

To preserve your sublimation designs and protect against wear and tear:
- Polycrylic:
- Apply a thin coat over sublimated designs to seal and protect against scratches and fading.
- Allow the polycrylic to cure for at least 24 hours before use.
- Epoxy Resin:
- For a high-gloss, durable finish, pour clear epoxy over your design. This is ideal for items like coasters or tabletops.
- Follow safety precautions when working with resin, including proper ventilation.
- Food-Safe Coatings:
- For kitchen items, use food-safe mineral oil or beeswax to protect the sublimated surface while maintaining functionality.
Tip: Always test your sealant on a sample piece before applying it to your finished project, as some coatings may alter the appearance of your design.
Best Types of Wood for Sublimation
| Wood Type | Surface / Grain | Ease of Preparation | Color Vibrancy | Durability | Best Uses |
|---|---|---|---|---|---|
| MDF | Smooth, minimal grain | Easy | High | Moderate | Signs, coasters, furniture accents |
| Birch Plywood | Fine, even grain | Moderate | High | High | Picture frames, decorative panels |
| Maple | Hard, light-colored | Moderate | Very High | Very High | High-quality gifts, cutting boards |
| Pine | Soft, rustic with knots | Moderate | Medium | Moderate | Rustic signs, wall décor, seasonal items |
| Bamboo | Smooth, light-colored | Moderate | High | High | Eco-friendly coasters, cutting boards |
Tackling Temperature and Pressure Problems
Uneven or faded designs
If your design looks patchy or faint in spots, you’re probably dealing with uneven heat or pressure.
- Make sure your heat press is hitting the sweet spot (usually 375°F–380°F) and holding steady.
- Crank up the pressure a bit for thicker materials like wood or MDF.
- Toss in a heat-resistant mat to ensure even contact, especially on wonky surfaces.
Scorched wood or designs that are too dark
Burnt vibes? Your press is likely too hot or on for too long.
- Check the recommended settings for your material and stick to them.
- Try dialing down the heat a touch and extending the press time to avoid that crispy look.
Fixing Blurry or Faded Designs
Blurry or smudged prints
If your design looks like it’s been dragged through a puddle, the sublimation paper probably shifted.
- Lock that paper down tight with heat-resistant tape to keep it from budging.
- Don’t jostle the heat press while it’s doing its thing.
Faded or washed-out colors
When colors look weak, the ink isn’t transferring properly.
- Preheat your wood or MDF to zap any moisture before pressing.
- Double-check you’re printing on the right side of the sublimation paper and that the ink is fully dry.
- If it’s still looking pale, add a few extra seconds to the press time.
Smoothing Out Issues with MDF and Chipboard
Uneven ink absorption on MDF or chipboard
If some spots soak up ink differently, the surface might be inconsistent.
- Sand the surface smooth to get rid of any bumps or imperfections.
- Slap on a laminating pouch or a coat of white paint for a clean, even base.
Chipboard layers splitting or edges fraying
Heat can mess with chipboard’s glue, causing it to come apart or get ragged.
- Drop the temp to around 365°F and press for a bit longer (try 100 seconds).
- Go for high-quality chipboard or switch to MDF for cleaner results.
Quick Tips to Stay Trouble-Free
- Preheat your blank: Always warm up wood or MDF first to get rid of moisture, it’s a sneaky cause of ghosting or warping.
- Ventilation is key: Keep the air moving to cut down on fumes and prevent heat buildup.
- Test it out: Run a quick test press on a scrap piece to dial in your settings before going all-in on the final design.
Durability & Care for Sublimation on Wood
How long does sublimation on wood last indoors vs outdoors?
- Indoors: With proper prep (laminate, polycrylic, or pre-coated blanks), sublimation on wood can stay vibrant for 5–10 years or more. Indoor decor like signs, ornaments, or photo panels usually holds up really well.
- Outdoors: Direct sunlight, rain, and humidity take a toll. Colors may start fading within 6–12 months without UV protection. A UV spray, epoxy resin, or sealant can stretch that lifespan but it won’t last as long as indoor projects. For outdoor use, always add UV and weather protection.
Cleaning Methods
- Wipe with a soft, damp cloth — no harsh scrubbing.
- Skip abrasive cleaners or bleach, which can damage coatings.
- For food-related items like cutting boards, only clean the reverse side that isn’t sublimated. Keep the decorated side as “display only.”
Maintenance Tips
- Apply a protective topcoat (polycrylic or epoxy) if the item gets frequent handling.
- Store decor away from direct sunlight to reduce fading.
- For seasonal items (holiday signs, ornaments), pack them in a cool, dry place when not in use.
- If edges start to chip or peel (common on laminated blanks), lightly sand and reapply a protective layer.
Common Mistakes to Avoid
Even small slip-ups can ruin a wood sublimation project. Here are the big ones to watch out for:
- Skipping preheating the wood
Moisture trapped inside can cause bubbling, fading, or uneven transfers. Always preheat for a few seconds. - Pressing too long or too hot
Extra time or heat doesn’t mean brighter colors, it usually means scorch marks or a yellow tint. - Uneven sanding or prep
If the surface isn’t smooth, the print won’t bond evenly. Dust or rough spots can show up under the design. - Forgetting to mirror the design
A classic mistake. Always flip your artwork before printing so it transfers correctly. - Using untreated wood
Raw or unfinished wood won’t hold sublimation ink. Make sure you’re working with coated blanks or add a polyester coating yourself. - Not securing the transfer sheet
If the paper shifts even slightly, you’ll get ghosting or blurry edges. - Skipping protective paper
Dye gas can stain your press if you don’t use butcher paper or parchment between the wood and the platen.
Comparison to Alternatives
Sublimation isn’t the only way to decorate wood. Other methods can work too, but each has its trade-offs.
Vinyl Decals
- Pros: Easy to apply, cheap, no heat press needed.
- Cons: Sits on top of the wood instead of bonding with it, so it can peel or fade over time.
- Pros: Bold colors, good for bulk runs.
- Cons: Requires stencils, messy setup, and doesn’t stick well to textured or unfinished wood.
Laser Engraving
- Pros: Permanent results, clean and precise, works on dark wood.
- Cons: Only produces a burned look (no color), and machines are pricey.
Infusible Ink on Wood
- Pros: Similar to sublimation, Cricut-friendly, works for small projects.
- Cons: Limited to pre-made Infusible Ink sheets and patterns, not as customizable as sublimation prints.
Why Choose Sublimation?
- Full-color designs with photo-quality detail.
- Ink bonds into the surface (when coated or laminated), so it lasts longer than vinyl or paint.
- Works well for both one-off crafts and small business projects.
The trade-off is that sublimation needs special prep (laminate, coatings, or pre-treated blanks) and higher heat compared to vinyl or decals. But if you want vibrant colors that won’t peel or scratch easily, sublimation usually wins.
Creative Project Ideas for Sublimation on Wood
Here are some ideas to inspire your next project, from home decor to personalized gifts, where you can create unique and eye-catching designs.
Sublimation on Wood Signs

Personalized Cutting Boards
Add a personal touch to kitchen essentials by sublimating names, monograms, or artistic designs on wooden cutting boards.

- Ideas:
- Gift sets featuring family recipes or illustrations.
- Themed designs for special occasions, such as weddings or housewarmings.
- Tips:
- Sublimate only on the decorative side, leaving the reverse for food preparation.
- Seal with a food-safe coating to enhance durability.
Custom Sublimation Furniture and Home Decor
Elevate furniture and home accents with customized sublimation designs.
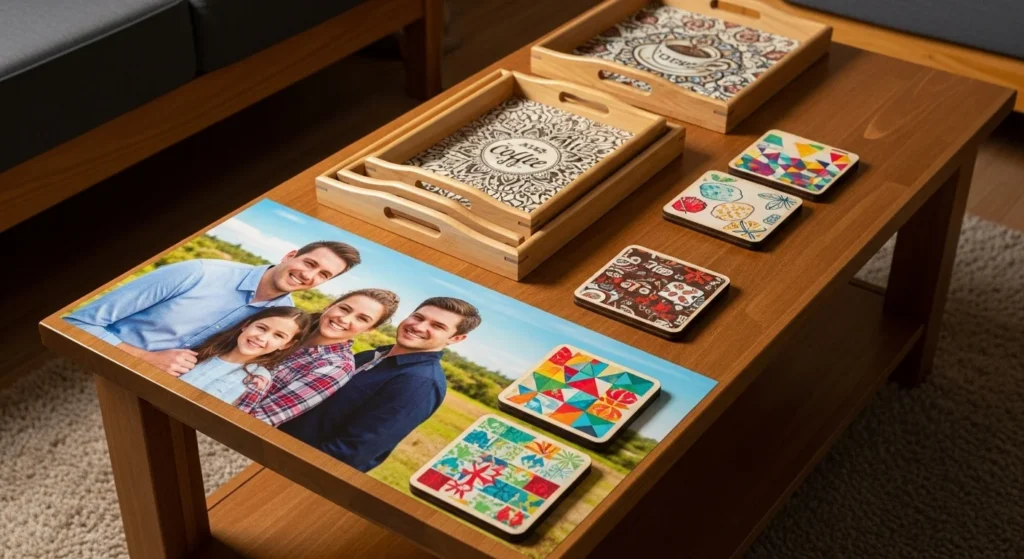
- Ideas:
- Tabletops with intricate patterns or family photos.
- Wooden trays with floral designs or coffee-inspired quotes.
- Coasters or trivets featuring geometric prints or seasonal themes.
- Tips:
- For larger furniture pieces, use heat-resistant adhesives and larger laminating sheets.
- Consider using MDF for furniture accents, as it handles sublimation well.
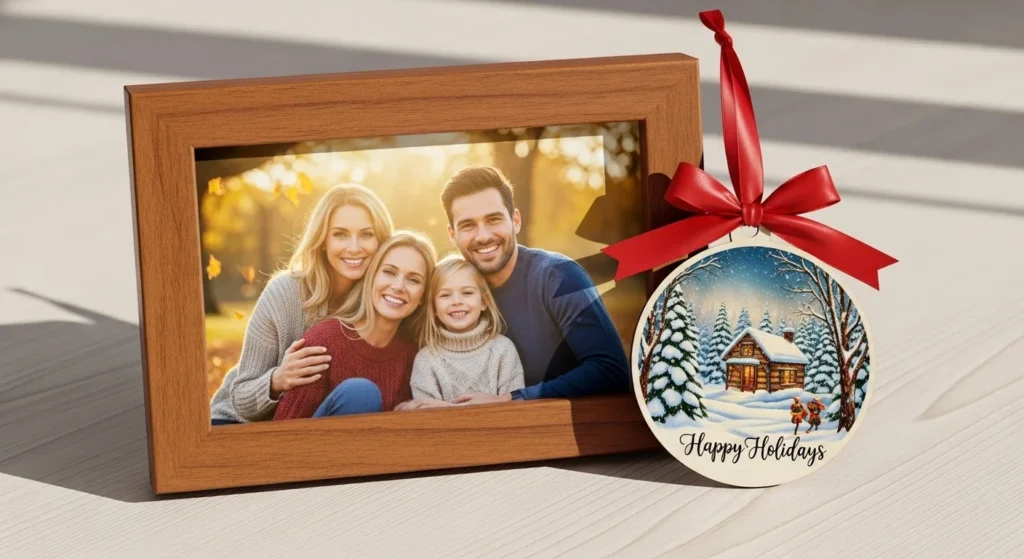
Unique Gift Ideas Using Wood Sublimation
Sublimated wood gifts are perfect for personal and professional occasions, combining functionality and artistry.

- Ideas:
- Custom ornaments for Christmas or special events.
- Picture frames with personalized text or designs.
- Wooden bookmarks or keychains for literary-themed gifts.
- Tips:
- Create themed sets for holidays, birthdays, or corporate giveaways.
- Experiment with different wood shapes and sizes for creative variety.
FAQs
Resources
The process of sublimation on wood enables you to transfer vibrant designs onto wooden surfaces, resulting in personalized and durable items. Through this guide, you will learn about the essential supplies, preparation steps, different methods, and tips to achieve the best results.
Jennifer Maker – Applying Sublimation to Wooden Surfaces: 5 Methods That Work, Crafters looking to expand their projects with unique, custom wooden designs can use this comprehensive guide to successfully apply sublimation to wood.