
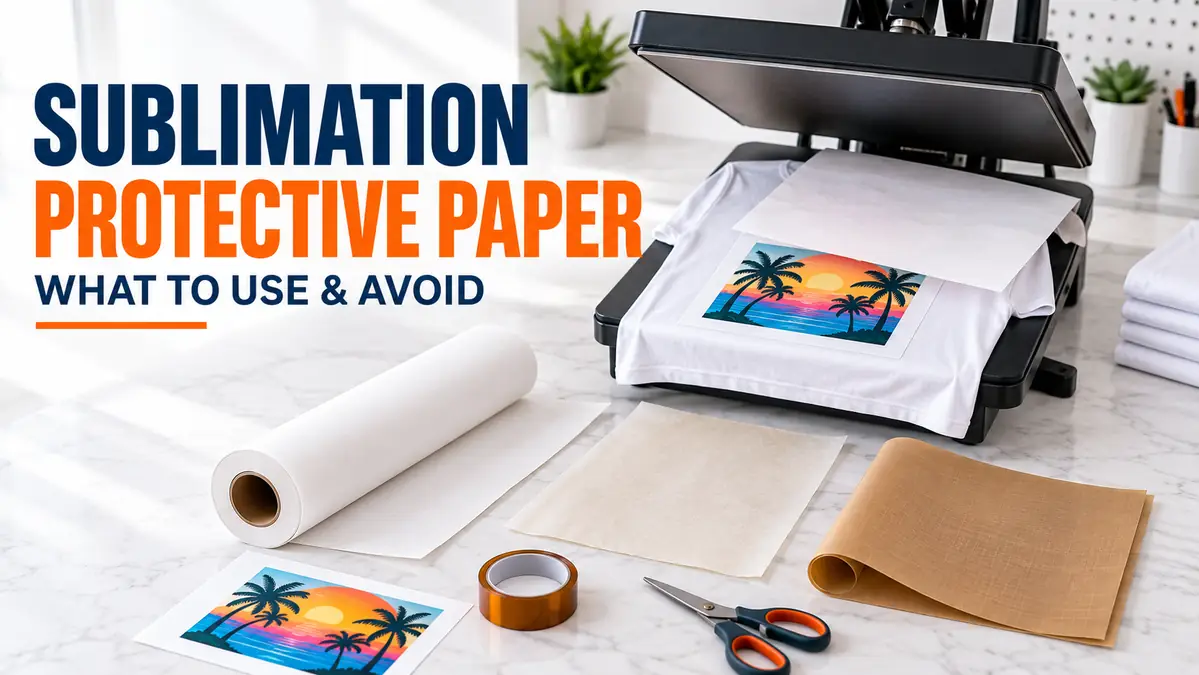
Sublimation Protective Paper: What to Use, What to Avoid, and Where It Goes

Sublimation protective paper, often called blowout paper, catches stray sublimation dye before it reaches your heat press, pressing mat, or another part of the blank.
For most projects, clean, white, uncoated butcher paper is the simplest choice. Purpose-made sublimation protective paper also works well. Plain copy paper can work for smaller projects when butcher paper is unavailable.
Protective paper is not the same as sublimation transfer paper. You print your design on transfer paper. Protective paper stays blank and acts as a disposable barrier during pressing.
A fresh barrier matters because sublimation dye caught during one press can reactivate when reheated and stain the next project. Cricut’s current sublimation instructions specifically warn against reusing contaminated butcher paper for this reason.
What Is Sublimation Protective Paper?
Sublimation protective paper is a clean barrier placed around a sublimation transfer to catch dye that escapes beyond the intended transfer area.
During pressing, heat activates the sublimation dye. Most of that dye should transfer into the polyester fibers or polymer coating of your blank. Small amounts can still escape around the design or pass through fabric.
Protective paper catches that stray dye before it reaches:
- the upper heat platen
- pressing mats and pads
- the back of a shirt
- another layer of fabric
- mug or tumbler heating elements
- the next blank placed in the press
This is why you may also hear it called blowout paper, barrier paper, butcher paper, or protective paper.
Sublimation Protective Paper vs Sublimation Transfer Paper
These two papers have completely different jobs.
| Paper | What It Does | Do You Print On It? | Used During Pressing? |
|---|---|---|---|
| Sublimation transfer paper | Carries the printed design to the blank | Yes | Yes |
| Sublimation protective paper | Catches stray dye and protects equipment | No | Yes |
| Butcher paper | Common protective barrier | No | Yes |
| Copy paper | Backup protective barrier for smaller areas | No | Yes |
Never replace sublimation transfer paper with butcher paper.
Your design still needs to be printed on proper sublimation paper using sublimation ink.
Best Protective Paper for Sublimation
For most home and small-shop sublimation work, start with white, uncoated butcher paper or paper specifically sold as sublimation protective paper.
The main requirement is not a particular brand. The paper needs to protect the press without adding wax, plastic, adhesive, or another coating that could interfere with heat transfer.
| Material | Use for Sublimation? | Absorbs Stray Dye? | Reuse? | Main Consideration |
|---|---|---|---|---|
| Sublimation blowout paper | Yes | Yes | Follow manufacturer guidance | Designed for the job |
| White uncoated butcher paper | Yes | Yes | Fresh sheet safest | Best general-purpose choice |
| Plain copy paper | Yes, for small jobs | Yes | No | Small sheet size |
| Purpose-made heat-press parchment | Sometimes | Varies | Product dependent | Check manufacturer specifications |
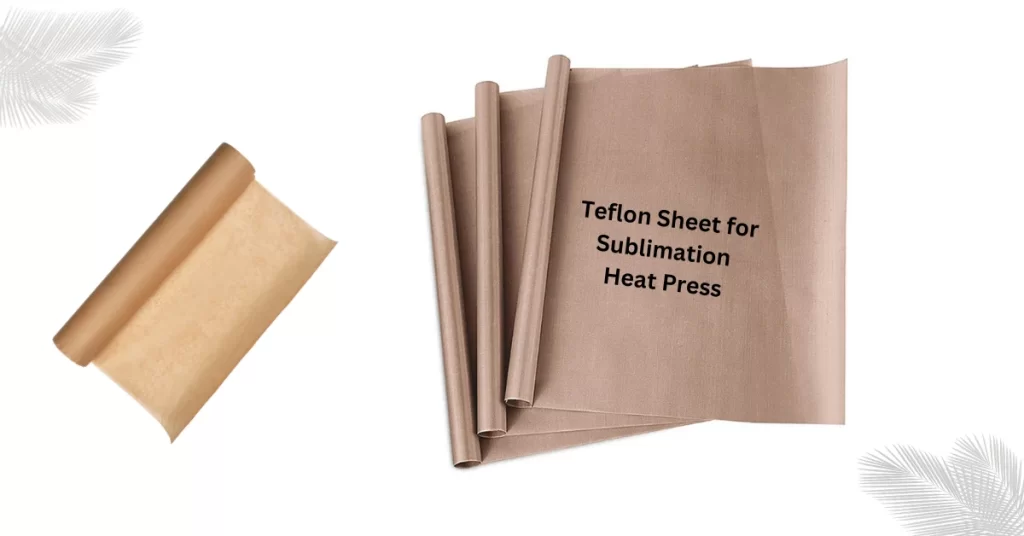
| PTFE/Teflon sheet | Not my first choice for blowout protection | No | Reusable | Dye contamination risk |
| Wax paper | No | No | No | Contains wax |
| Freezer paper | Avoid unless specifically rated | Varies | No | Often has a coating |
| Unknown coated paper | Avoid | Unknown | No | Coating may react under heat |
My simple rule
For ordinary sublimation:
Use fresh, uncoated butcher paper unless your blank, transfer system, or press manufacturer specifies something else.
It is inexpensive, absorbent, easy to cut, and disposable after contamination.
Butcher Paper vs Parchment vs Teflon for Sublimation
These three materials are often treated as interchangeable. They are not.
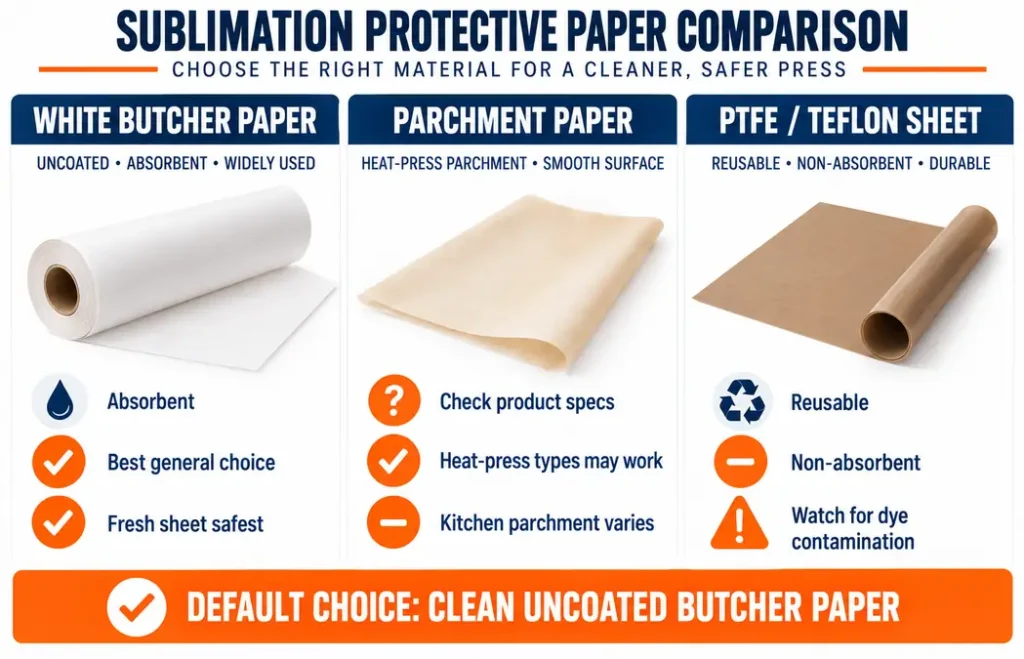
Butcher Paper
Uncoated butcher paper is my preferred general protective barrier for sublimation.
It absorbs stray dye instead of allowing that dye to remain on a reusable surface.
Look for paper that is:
- uncoated
- unwaxed
- clean
- large enough for the pressing area
- intended to tolerate the heat required by your project
White butcher paper also makes accidental dye marks easier to see before the sheet reaches another blank.
Cricut recommends white butcher paper for its Infusible Ink and sublimation workflows and advises using a fresh sheet rather than reusing one that may have captured dye.
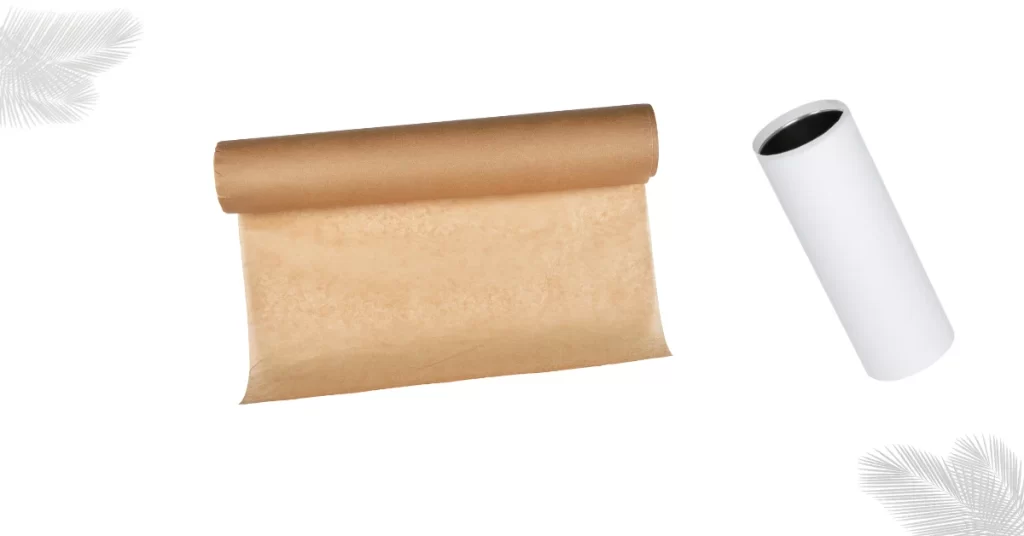
Parchment Paper
Parchment is more complicated.
Ordinary kitchen parchment usually contains or is treated with silicone to create a non-stick surface. That means it does not behave exactly like absorbent butcher paper.
For that reason, I would not automatically replace butcher paper with whatever parchment happens to be in your kitchen.
Purpose-made heat-press parchment is different. Some professional heat-press suppliers sell parchment specifically for sublimation and state that it can be used similarly to butcher paper.
The practical rule is:
Use parchment only when the product manufacturer specifically identifies it as suitable for your sublimation or heat-transfer application.
If you are unsure what coating is on the paper, use uncoated butcher paper instead.
PTFE or Teflon Sheets
Reusable PTFE sheets are useful for several heat-transfer processes, especially when a non-stick cover is needed.
They are not my preferred blowout barrier for sublimation.
The issue is absorption.
Butcher paper captures stray dye. A PTFE sheet does not absorb it in the same way. If sublimation dye reaches that reusable surface and remains there, reheating it can create an unwanted transfer on a later project.
Cricut specifically says its reusable heat-resistant pressing sheets are not recommended for sublimation or Infusible Ink because staining or unwanted transfer effects can occur.
Use the right protective material for the transfer process rather than treating every heat-resistant sheet as interchangeable.
Where Does Protective Paper Go When Sublimating?
Protective paper needs to sit wherever escaped dye could reach something you do not want printed.
The exact arrangement changes between shirts, metal blanks, mugs, tumblers, and specialty products.
Shirts and Fabric
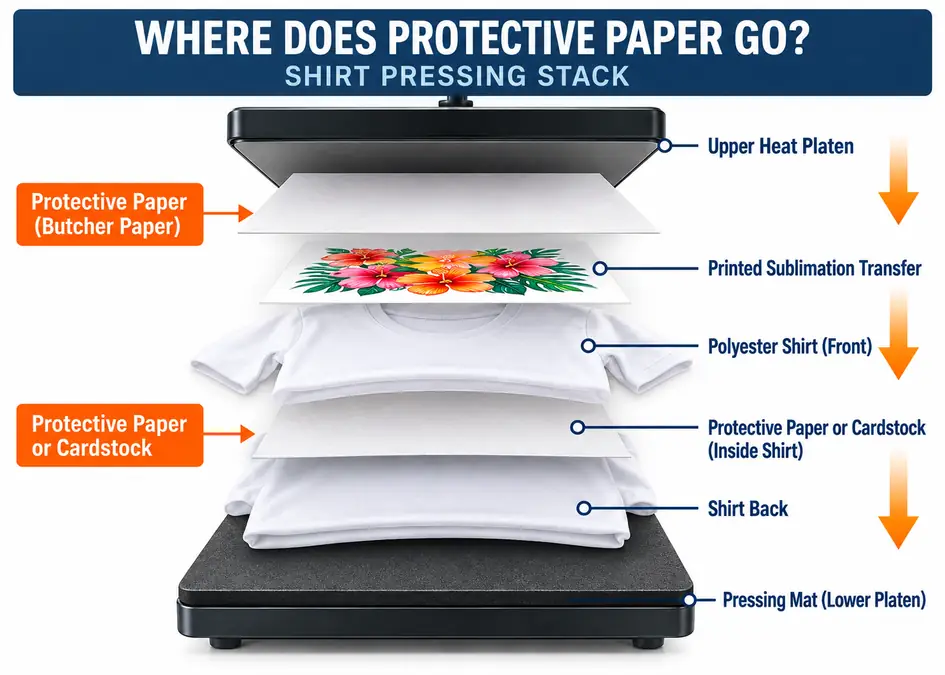
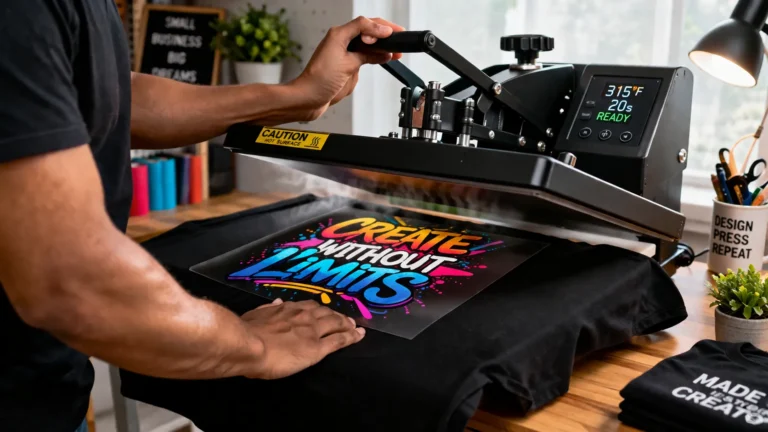
A shirt normally needs protection both above the transfer and inside the garment.
A practical stack looks like this:
| From Top to Bottom | Layer |
|---|---|
| 1 | Heat platen |
| 2 | Fresh protective butcher paper |
| 3 | Sublimation transfer |
| 4 | Shirt front |
| 5 | Protective paper or clean cardstock inside shirt |
| 6 | Shirt back |
| 7 | Pressing mat or lower platen |
The inside barrier matters because sublimation dye can pass through polyester fabric and stain the back of the shirt or pressing mat.
Before pressing:
- Place a clean barrier inside the shirt.
- Position the printed transfer with the printed side facing the shirt.
- Secure the transfer with heat-resistant tape when movement is possible.
- Cover the transfer area with fresh butcher paper.
- Press using the blank and transfer manufacturer’s recommended settings.
- Open the press carefully so the transfer does not slide.
Movement during or immediately after pressing is a common cause of ghosting.
If transfers keep moving, review your heat tape for sublimation rather than trying to solve the problem with thicker protective paper.
Flat Hard Blanks
Metal panels, coasters, ornaments, hardboard, and other flat blanks often need protection above and below the pressing stack.
The exact direction of the blank and transfer varies by product.
For example, one blank may be pressed transfer-side up while another manufacturer’s instructions call for transfer-side down.
The safer approach is:
- follow the blank manufacturer’s pressing orientation
- protect the upper platen from exposed dye
- protect the lower platen or pressing mat from dye escaping underneath
- make the protective sheet larger than the printed transfer area
Avoid memorizing one universal stack for every hard substrate.
Mugs and Tumblers
Protective paper serves the same purpose on drinkware: keeping stray dye away from the heating surface.
After taping the sublimation transfer tightly to the mug or tumbler, a clean protective sheet may be wrapped around the transfer when your pressing method calls for it.
The important details are:
- keep the printed transfer tight against the coating
- cover areas where dye could escape
- do not create folds that change pressure
- do not allow old dye contamination to contact a new tumbler
- follow the mug press, tumbler press, or blank manufacturer’s instructions
Drinkware presses vary in heater design and pressure, so protective-paper placement should not interfere with proper contact between the heater and blank.
Coasters, Metal, and Small Blanks
Small blanks usually need only a modest amount of protective paper, but the sheet should still extend beyond the printed design.
If dye can escape from any edge of the transfer, that area should have clean protection.
For repeat production, precutting several common protective-paper sizes can make setup much faster.
How Big Should Sublimation Protective Paper Be?
Protective paper should extend beyond the entire printed area and cover anywhere stray dye could reach.
Do not cut the protective sheet to exactly the same dimensions as your design.
A slightly larger barrier gives escaping dye somewhere safe to go.
For some heat-press systems, the manufacturer recommends protection larger than the entire heat plate. Cricut, for example, tells users in several sublimation workflows to use butcher paper larger than the press’s heat plate.
Practical sizing guide
| Project | Protective Paper Size |
|---|---|
| Small coaster | Larger than transfer and blank |
| Shirt chest design | Larger than the complete heated area |
| Full shirt front | Cover full pressing area |
| Metal panel | Extend beyond all printed edges |
| Mug/tumbler | Cover exposed transfer area as required by press method |
When in doubt, more clean coverage is safer than leaving part of the platen exposed to dye.
Can You Reuse Sublimation Protective Paper?
For the lowest contamination risk, use a fresh sheet for each sublimation press.
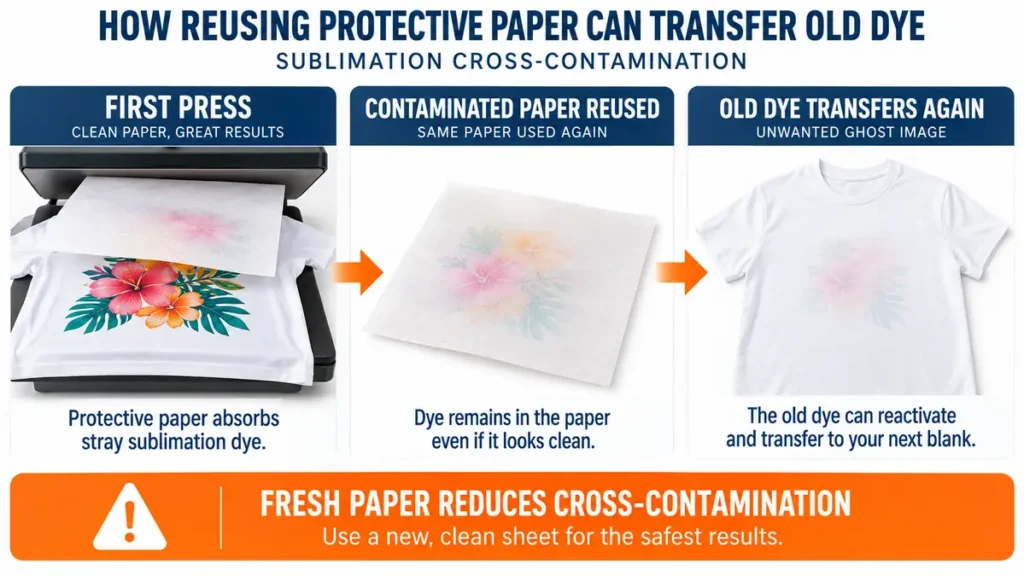
A piece of butcher paper can look nearly clean while still holding small amounts of sublimation dye.
When that sheet is heated again, the trapped dye can reactivate and transfer onto:
- another shirt
- a different design
- your heat platen
- your pressing mat
- another blank
That is how makers sometimes discover a faint piece of yesterday’s design on today’s project.
Cricut explicitly recommends against reusing butcher paper after a sublimation or Infusible Ink press because captured pigment can transfer during the next heating cycle.
What about purpose-made reusable protective paper?
Follow the manufacturer’s instructions.
Some protective products are specifically designed and sold for limited reuse when uncontaminated. That does not mean ordinary butcher paper or a visibly stained sheet should be reused.
My production rule is simple:
If dye reached the sheet, retire it from sublimation pressing.
Clean used paper can still be saved for packaging, protecting craft tables, templates, or other non-heated uses.
Can You Use Copy Paper Instead of Butcher Paper?
Yes. Plain white copy paper can work as a temporary blowout barrier for small sublimation projects.
It is especially useful when:
- you run out of butcher paper
- the design is small
- you only need to protect a small pressing area
The biggest limitation is size.
A letter-size sheet may not cover a large shirt design or heat platen, forcing you to overlap several sheets.
For regular production, a roll of uncoated butcher paper is usually easier and more economical.
Do not confuse this with printing your sublimation design on ordinary copy paper. Copy paper here is being used only as the protective barrier, not as the transfer sheet.
White vs Brown Butcher Paper for Sublimation
White uncoated butcher paper is the easiest default choice.
That does not mean every brown sheet is automatically unsuitable.
The more important questions are:
- Is the paper uncoated?
- Is it unwaxed?
- Is it free from plastic or freezer-paper backing?
- Is it clean?
- Is the manufacturer comfortable with its intended heat exposure?
White paper has a practical advantage because stray dye contamination is easier to see.
It also reduces uncertainty about dyes, pigments, or treatments that may be present in some colored papers.
If you already have brown butcher or kraft paper, verify the exact product rather than assuming all brown paper behaves the same way.
Protective Paper Mistakes That Ruin Sublimation Projects
Protective paper is simple, but several mistakes can create expensive reprints.
1. Reusing Dye-Contaminated Paper
This is the biggest avoidable mistake.
A small amount of old dye can reactivate during the next press and leave a shadow, stain, letter, or part of an earlier design on a new blank.
Fix: Use fresh paper for each production press.
2. Cutting the Paper Too Small
A barrier that only covers the artwork may leave the edge of the heat platen exposed to dye.
Fix: Extend the protective paper beyond the entire transfer and heated area.
3. Forgetting Protection Inside a Shirt
Dye can pass through the front layer of polyester and stain the shirt back.
Fix: Place clean butcher paper, cardstock, or another approved barrier between garment layers before pressing.
4. Using Wax Paper
Wax paper is designed for food preparation, not high-temperature sublimation pressing.
Fix: Keep waxed products away from the press.
5. Using Freezer Paper Without Checking the Coating
Freezer paper commonly has a coated side. That is not the same product as plain uncoated butcher paper.
Fix: Use known uncoated paper instead of guessing.
6. Treating Teflon as Disposable Blowout Paper
A reusable non-stick sheet does not absorb sublimation dye like butcher paper.
Fix: Use absorbent protective paper when the goal is catching dye blowout.
7. Confusing Protective Paper With Transfer Paper
Butcher paper should not replace the coated sublimation sheet that carries your printed design.
Fix: Print on actual sublimation transfer paper, then use separate blank protective paper during pressing.
8. Letting the Transfer Move
Protective paper cannot fix a transfer that slides when you close or open the press.
Movement can create a second faint image around the original, commonly called ghosting.
Fix: Secure the design when needed and lift the press without dragging the transfer.
9. Using Unknown Coated Paper
Cheap packing paper, baking paper, freezer paper, and craft sheets may have coatings that are not obvious.
Fix: Use a material with known specifications.
Troubleshooting Sublimation Protective Paper Problems
Protective paper problems usually show up as contamination, stains, press marks, or unexpected transfer patterns.
They are less likely to be the main reason a design is simply faded.
| Problem | Likely Cause | What to Do |
|---|---|---|
| Old design appears on new blank | Reused contaminated paper or sheet | Replace with fresh protective paper |
| Ink stain on upper platen | Paper too small or missing | Increase protective coverage and clean platen |
| Ink appears on back of shirt | No internal barrier | Put clean protection between shirt layers |
| Random colored marks | Contaminated barrier | Replace paper and inspect press surface |
| Transfer looks doubled | Transfer moved | Improve taping and opening technique |
| Paper leaves residue | Wrong or coated material | Switch to known uncoated protective paper |
| Paper scorches heavily | Unsuitable material or excessive heat exposure | Verify paper and pressing settings |
| Paper sticks unexpectedly | Coating, contamination, moisture, or incorrect workflow | Stop and verify the paper type |
| Print is faded everywhere | Usually not protective paper | Check heat, time, pressure, blank, ink, and color workflow |
If the Print Is Faded
Do not immediately blame the protective paper.
Faded sublimation is more commonly connected to:
- insufficient heat
- incorrect pressing time
- uneven or incorrect pressure
- incompatible blank
- low polyester content
- printer or color-management problems
- inaccurate heat press temperature
Use the sublimation heat guide to check your starting settings.
If your heat press itself may be the problem, review how to set up a heat press for sublimation.
If the Print Is Blurry or Ghosted
Check movement before changing paper.
A transfer can shift when:
- the press closes
- pressure is applied
- the press opens
- the hot transfer is removed
Secure the transfer and keep the pressing stack stable.
If Old Ink Keeps Appearing
Stop production and inspect everything that contacted the previous project:
- protective paper
- reusable sheets
- pressing mat
- upper platen
- lower platen
- silicone pads
- mug heaters
- wraps
Replacing only the butcher paper will not solve the problem if dye is already baked onto another surface.
For broader troubleshooting, see these common sublimation printing mistakes.
Download the Sublimation Protective Paper Placement Chart
Keep this printable quick reference near your heat press. It shows which protective papers to use, where the barrier goes for shirts, flat blanks, mugs, and tumblers, plus reuse rules and common contamination problems.
- Butcher paper, parchment, copy paper, and PTFE comparison
- Protective paper placement for shirts and fabric
- Flat blank, mug, and tumbler placement guidance
- Paper sizing and reuse rules
- Contamination troubleshooting checklist
- 30-second pre-press checklist
Free printable PDF from Subli Genius Print
Sublimation Protective Paper Quick Reference
Use this table as a simple press-side reference.
| Question | Best Starting Answer |
|---|---|
| What is the best general protective paper? | White uncoated butcher paper |
| What is blowout paper? | Protective paper that catches stray sublimation dye |
| Do I print on protective paper? | No |
| Can I use copy paper? | Yes, for smaller areas |
| Can I use kitchen parchment? | Not automatically; check product specifications |
| Can I use purpose-made heat-press parchment? | Yes, when manufacturer approves sublimation use |
| Can I use Teflon? | Not my first choice as a sublimation blowout barrier |
| Can I reuse butcher paper? | Fresh sheet is safest |
| Should paper go inside a shirt? | Yes, protect the back layer |
| How large should it be? | Larger than the dye exposure area |
| Can I use wax paper? | No |
| Can I use freezer paper? | Avoid unless the product is specifically suitable |
| What if the print is faded? | Check heat, time, pressure, blank, and print setup first |
The easiest routine is also the safest:
- Start with a clean blank.
- Use the correct sublimation transfer paper.
- Secure the transfer.
- Add fresh uncoated protective paper.
- Protect every surface that stray dye could reach.
- Press using the settings for your blank.
- Lift without shifting the transfer.
- Discard dye-contaminated protective paper.
- Inspect the press before starting the next blank.
That small routine prevents many stains and accidental reprints without adding much time to production.
Frequently Asked Questions
Do You Need Protective Paper for Sublimation?
Protective paper is strongly recommended anywhere sublimation dye could escape onto your heat platen, pressing mat, garment back, or heating element. It is inexpensive protection against cross-contamination and usually takes only a few seconds to add to the pressing stack.
Is Butcher Paper the Same as Sublimation Paper?
No. Sublimation transfer paper is printed with your design and carries sublimation ink to the blank. Butcher paper stays blank and protects the heat press and surrounding surfaces from stray dye.
Can You Use Parchment Paper for Sublimation?
Some purpose-made heat-press parchment products are specifically designed for sublimation, but ordinary kitchen parchment should not automatically be treated as the same material. If the product does not state that it is appropriate for your heat-transfer process, use uncoated butcher paper instead.
Can You Use Teflon Instead of Butcher Paper for Sublimation?
A reusable PTFE or Teflon sheet can tolerate heat, but it does not absorb stray sublimation dye like butcher paper. Any dye left on the sheet can become a contamination risk when reheated. Fresh absorbent protective paper is the safer general choice for catching sublimation blowout.
Can You Use Printer Paper Instead of Butcher Paper?
Plain white copy paper can work as protective paper for small jobs. Its main drawback is size. Large transfers may require several sheets, making butcher paper more convenient for routine production.
Can You Reuse Butcher Paper for Sublimation?
Using a fresh sheet is the safest approach. Paper can capture sublimation dye during the first press, and that dye may reactivate when the paper is reheated. Reusing contaminated paper can put part of an old design onto a new blank.
Does Butcher Paper Go Above or Below Sublimation Paper?
For apparel, butcher paper usually goes above the sublimation transfer to protect the heat plate, with another clean barrier inside the garment to protect the back layer. Other blanks may require protection above, below, or both, depending on pressing orientation.
Can I Use Brown Butcher Paper for Sublimation?
Possibly, if it is clean, uncoated, unwaxed, and suitable for the required heat. White uncoated butcher paper remains the easier default because contamination is easier to see and its composition is generally simpler to verify.
Why Did an Old Design Transfer Onto My New Blank?
The most likely cause is sublimation dye remaining on reused protective paper, a reusable pressing sheet, the press platen, or another contaminated surface. Heat can reactivate that dye during the next press. Replace contaminated barriers and inspect the press before pressing another blank.
How Big Should Protective Paper Be for Sublimation?
Make it larger than the complete area where dye could escape. For shirts and larger transfers, covering the entire heated area gives better protection than cutting the paper exactly to the design size.
Use Fresh Protection Before Every Important Press
Protective paper does not make a bad sublimation transfer good, but it prevents a clean transfer from being ruined by dye left behind from another project.
For most setups, the simplest routine is fresh white uncoated butcher paper, enough coverage around the design, and a second barrier wherever dye could reach another layer or pressing surface.
If you are troubleshooting more than protective-paper contamination, work through the common sublimation printing problems before changing several parts of your setup at once.




One Comment