Home Sublimation Workspace Setup: Layout, Power, Ventilation & Storage

A good sublimation workspace is not just a table with a printer beside a heat press. The room needs enough clearance to operate each machine, a sensible production path, suitable electrical power, organized storage, and somewhere for hot products to cool before inspection or packing.
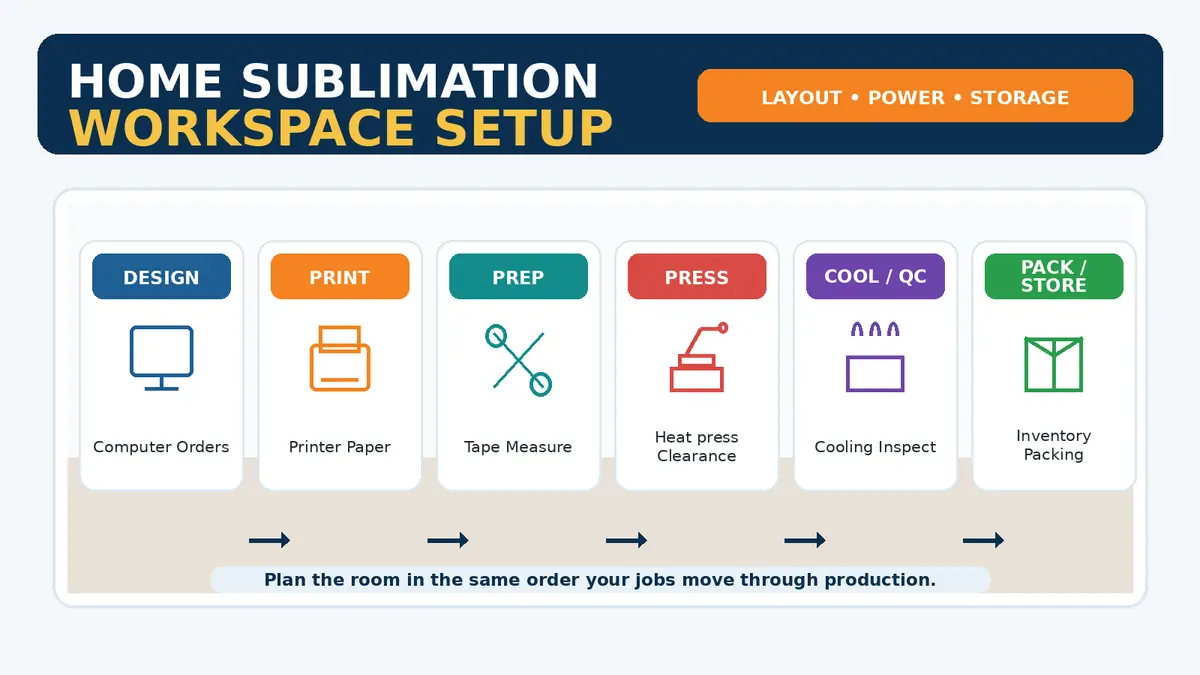
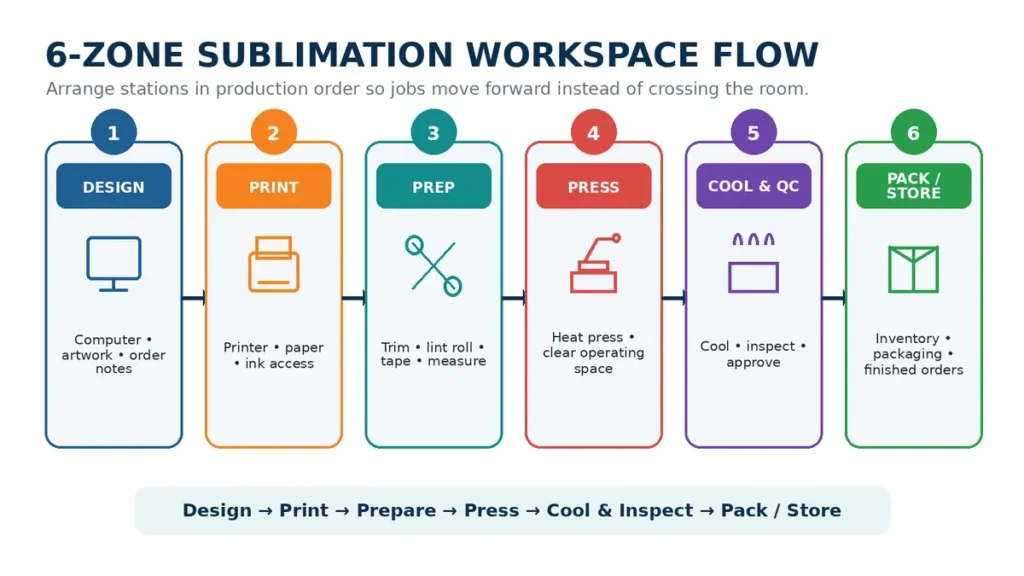
A practical workflow usually follows this order: Design → Print → Prepare → Press → Cool and Inspect → Pack or Store.
Plan the room around that movement first. Equipment can change later. A layout that reduces crossing, reaching, moving hot blanks, and searching for supplies will continue to work as production grows.
How Much Space Do You Need for a Sublimation Setup?
There is no single minimum room size for sublimation. The useful measurement is the working footprint of your equipment, not just the floor area of the room.
| Equipment or area | What to measure |
|---|---|
| Sublimation printer | Width, depth, paper loading and output clearance |
| Heat press | Closed footprint plus fully open operating space |
| Computer | Desk, monitor and input-device space |
| Prep area | Room for blanks, rulers, tape and printed transfers |
| Cooling area | Flat heat-resistant space for finished products |
| Storage | Blanks, paper, ink, tools and packaging |
| Walkways | Clear movement between working zones |
A printer that is 14 inches deep may need more space once paper loading and access are considered. A swing-away press can require substantially more side clearance when open than its closed dimensions suggest.
Measure equipment in its working position, not only its storage position. If you have not selected a press yet, the heat press buying guide can help you compare press types before designing a workspace around one that does not fit.
Build the Room Around Six Working Zones
Dividing a sublimation room into zones is usually more useful than organizing it by individual products.
1. Design Station
Keep the computer, monitor, customer notes and design tools together. This station does not need to sit directly beside the heat press, and moving it away from the hottest part of the room can reduce clutter around production equipment.
- Computer and monitor
- Graphics tablet or mouse
- Order information
- Design templates
- Printer connection or network access
2. Print Station
The printer should have its own stable surface with enough room for loading paper, collecting output and performing routine maintenance. Store high-use printing supplies nearby without blocking paper paths, vents or service access.
- Sublimation paper
- Approved ink
- Test sheets
- Printer maintenance records
If you are still selecting equipment, compare models in the best sublimation printers guide before deciding how much table space to reserve.
3. Preparation Station
Printed transfers and blanks meet here before pressing. The surface should be large enough to lay the biggest product you normally make flat.
- Trim paper
- Position designs
- Lint roll apparel
- Measure placement
- Apply heat tape
- Wrap mugs or tumblers
- Add protective paper
4. Heat Station
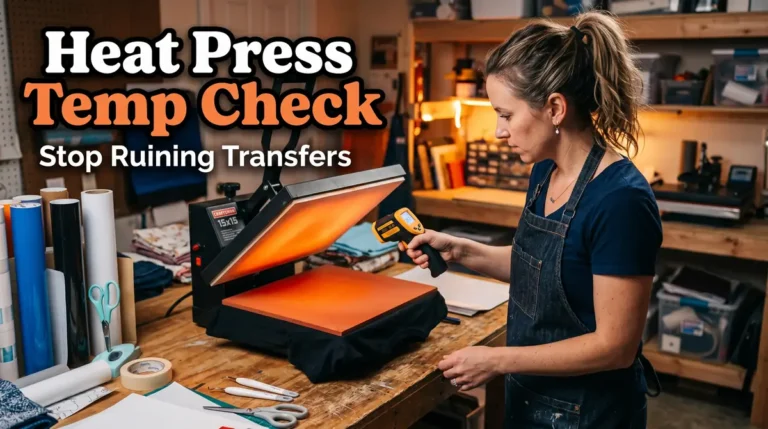
The press should sit on a stable surface with the operating clearance required by its manufacturer. Leave room for handles, drawers, swing movement, large garments and safe removal of hot blanks.
5. Cooling and Quality-Control Station
A product should not move straight from a hot press into a shipping box. Set aside a nearby location where finished items can cool and be checked for alignment, transfer coverage, color problems, ghosting, surface damage and packaging readiness.
6. Inventory and Packing Station
Bulk blanks and shipping materials do not need to occupy the production table. Separate storage works better for shirts, mugs, tumblers, photo panels, packaging, boxes, labels and completed orders.
The site’s print shop workflow guide explains how to extend this room layout into a repeatable order-to-production system.
Where Should You Put the Sublimation Printer?
Place the printer on a flat, stable surface with access for paper, ink and maintenance. Manufacturer requirements take priority over generic workspace advice.
Epson, for example, instructs SureColor F170 owners to use a flat, stable surface and operate the printer within its stated environmental range. See the official Epson F170 user documentation for model-specific requirements.
- Operating dimensions
- Paper input direction
- Output direction
- Ventilation openings
- Maintenance access
- Power-cord location
- USB, Ethernet or wireless needs
- Manufacturer temperature and humidity limits
Leave Room for Paper Handling
The printer may physically fit against a wall, but loading larger sheets, clearing a jam or collecting a long print can require extra front or rear space. Check the manual before building permanent shelving around it.
Where Should the Heat Press Go?
The heat press needs one of the strongest and clearest work surfaces in the room.
- Stable table or stand
- Full operating clearance
- Unobstructed power cord
- Space for large garments or transfers
- Nearby place for hot products
- Clear path for the operator
Check the Press While Fully Open
Clamshell, drawer and swing-away presses use space differently. A swing-away unit may require substantial side clearance, a drawer press needs front clearance, and a large clamshell can require room behind and above the machine.
Mark the movement on the floor or table with painter’s tape before buying furniture. This simple check is more useful than comparing closed product dimensions.
Keep the Press Near the Prep and Cooling Areas
A practical order is Prep table → Heat press → Cooling/QC surface. This prevents the operator from carrying taped transfers or freshly pressed products across the entire room.
Plan Electrical Power Before Running the Press
Heat presses can draw far more power than a computer or desktop printer, so electrical planning should happen before regular production begins. Do not assume every press requires the same circuit.
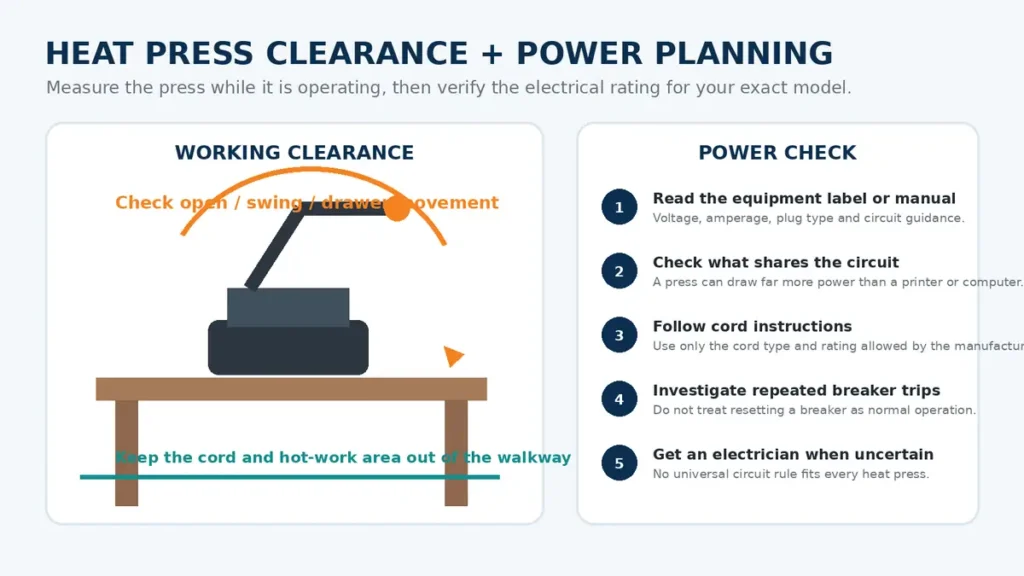
- Find the voltage and amperage rating for the exact press.
- Identify what other equipment shares the circuit.
- Follow the manufacturer’s extension-cord instructions.
- Do not ignore repeated breaker trips, hot plugs or damaged cords.
- Have a qualified electrician assess the circuit when the available power is uncertain.
For example, Hotronix documentation warns against operating other high-voltage equipment on the same circuit for the presses covered by that manual and gives model-specific extension-cord guidance. Those instructions apply to the equipment in that manual, not automatically to every press. See the Hotronix operator manual.
Do not build a workflow around repeatedly resetting a breaker. Stop and check the equipment rating, other devices on the circuit, plugs, cords and manufacturer instructions. Avoid makeshift adapters or DIY wiring changes to force equipment onto an unsuitable circuit.
Ventilation and Heat Management
A home sublimation room should follow the equipment, ink and material manufacturers’ safety instructions rather than a generic statement that every sublimation process requires the same ventilation setup.
- Check printer documentation.
- Review the ink Safety Data Sheet when provided.
- Follow blank or coating manufacturer instructions.
Epson’s F170 support area, for example, provides manuals and Safety Data Sheets alongside printer-specific support information. Use the official Epson F170 support page when you need model-specific information.
Control Room Heat
- Provide reasonable airflow.
- Keep paper and ink away from unnecessary heat.
- Avoid blocking HVAC vents.
- Leave equipment vents unobstructed.
- Maintain any temperature and humidity ranges specified for the printer.
Do not place a printer directly against a heat-producing machine simply because both fit on the same table.
Organize Sublimation Supplies by How Often You Use Them
The fastest storage system is not always the one with the most bins. It is the one that puts frequent-use items closest to the work that needs them.
Keep Daily Supplies Within Reach
- Heat tape
- Scissors
- Rulers
- Lint rollers
- Protective paper
- Gloves when required for the job
- Commonly used transfer paper
- Cleaning or maintenance items approved for your equipment
Move Bulk Inventory Away From the Worktable
- Boxed mugs
- Tumbler cases
- Apparel
- Bulk paper
- Shipping boxes
- Seasonal blanks
A heat press table should not double as overflow inventory storage.
Label Inventory for Production Decisions
“Craft supplies” is not a useful business label. A stronger system organizes stock by Product → Size → Color or Coating → Supplier or Batch.
For apparel, that could mean T-shirt → Large → White → Supplier A. For metal blanks, it might be Photo Panel → 8 × 10 → Gloss White → Supplier B.
Store Ink, Paper and Blanks Under Suitable Conditions
Different supplies fail in different ways, so avoid one universal storage rule.
Ink
Follow the ink manufacturer’s storage instructions and date tracking. Do not store bottles beside a press simply because the printer is nearby.
Sublimation Paper
Keep paper clean, flat and protected from conditions that can affect handling or printing. Closed packaging or dedicated paper storage also helps prevent dust, fingerprints and accidental damage.
Blanks
- Protect printable surfaces from dust.
- Avoid grease and fingerprints.
- Prevent scratches.
- Control moisture where relevant.
- Separate damaged or questionable blanks from sellable inventory.
Small Corner, Spare Bedroom or Garage: Which Layout Works?
The same six-zone workflow can work in very different spaces.
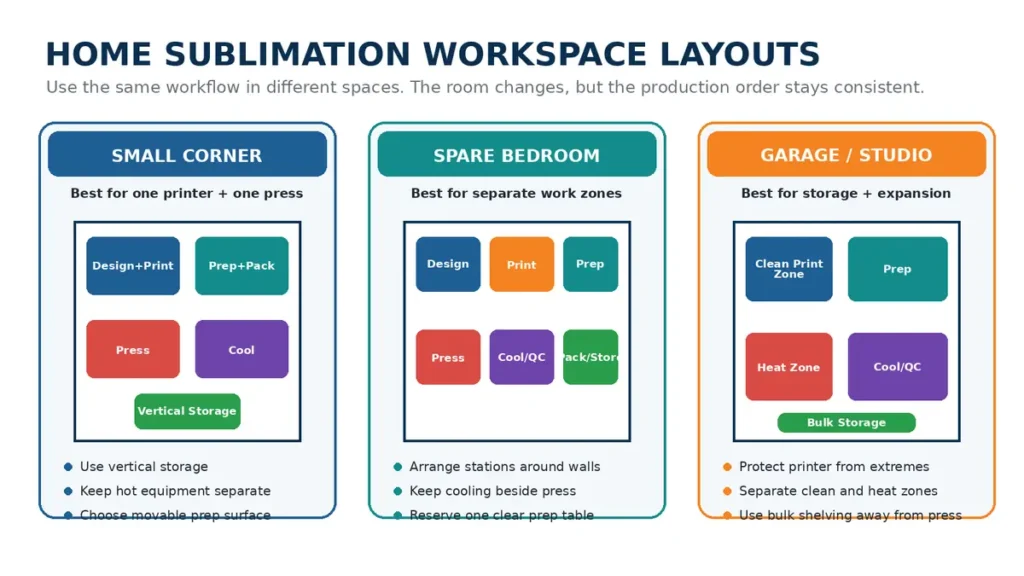
| Workspace | Main advantage | Main limitation | Practical approach |
|---|---|---|---|
| Desk or craft corner | Low space requirement | Limited pressing and storage room | Use vertical storage and a separate movable prep surface |
| Spare bedroom | Easy to create separate zones | Heat and electrical planning still matter | Arrange stations around the walls in production order |
| Garage | More equipment and storage room | Environmental conditions can vary | Separate clean printer and paper storage from heat and bulk storage |
| Dedicated studio | Best room for defined stations | Higher space or overhead requirement | Build a complete linear production path |
Small-Space Setup
Do not try to shrink every station into one desk. Combine compatible jobs instead: design with printing, prep with packing, a separate heat station, and vertical inventory storage.
Garage Setup
Extra floor space is useful, but the printer and supplies still need to stay within the environmental conditions specified for them. Check seasonal temperature and humidity before treating a garage as automatic printer storage.
Beginner Workspace vs Growing Business Workspace
Beginner Setup
- One printer station
- One heat press
- One prep surface
- Limited blank inventory
- Small cooling area
- Mobile or vertical storage
Avoid filling the room with specialty equipment before production demand exists. For equipment budgeting, use the sublimation startup cost guide rather than treating workspace planning as another shopping list.
Growing Business Setup
- Separate printing and preparation surfaces
- Larger cooling and quality-control space
- Dedicated packing station
- Order staging
- Organized bulk inventory
- Room for a second printer or press
- Fewer shared work surfaces
Before buying equipment simply because space is available, use the Sublimation Equipment ROI Calculator to compare the purchase with the sales needed to recover it.
10 Sublimation Workspace Mistakes That Create Problems Later
- Measuring equipment only while closed. Check doors, drawers, handles and swing movement.
- Putting the printer and press on one crowded surface. Separate heat from the clean printing area when possible.
- Blocking printer paper paths. Leave room for loading, output and maintenance.
- Ignoring the press’s electrical rating. Check the actual equipment specifications before regular use.
- Running cords across walkways. Position equipment so cords stay away from foot traffic and hot surfaces.
- Skipping a cooling area. Give finished items a predictable place to rest before inspection.
- Using the prep table as permanent storage. Production surfaces should be easy to clear.
- Mixing every blank into unlabeled bins. Organize stock by the information needed to fulfill an order.
- Buying equipment before checking room clearance. Tape the operating footprint onto the floor or table first.
- Planning around machines instead of product flow. Arrange the room in the same order that jobs move through production.
Home Sublimation Workspace Setup Checklist
Use the checklist below before committing furniture or equipment to a permanent location. The printable planner adds a room-layout grid, equipment-dimension worksheet and a two-page setup checklist.
Room
- Main production area selected
- Lighting adequate for alignment and inspection
- Walkways remain clear
- Room heat and airflow considered
- Printer environmental requirements checked
- Wi-Fi, Ethernet or USB access planned
Printer Station
- Printer working dimensions measured
- Paper loading clearance checked
- Output path clear
- Maintenance access available
- Stable surface selected
- Ink and paper storage nearby
Heat Station
- Press working footprint measured
- Full operating movement checked
- Stable surface selected
- Power requirements verified from manual or equipment label
- Cord kept away from hot surfaces and walkways
- Nearby cooling area available
Preparation and Production
- Clear prep surface
- Tape and measuring tools organized
- Protective paper available
- Cooling area assigned
- Quality-control location assigned
- Finished-order area assigned
Storage
- Ink storage location
- Paper storage location
- Blank inventory labeled
- Packaging stored separately
- Damaged or test blanks separated from sale inventory
- Frequently used tools within easy reach
A Simple Layout to Start With
For many home setups, the easiest arrangement is a short production line: Computer and Printer → Prep Table → Heat Press → Cooling/QC → Packing and Storage.
The room does not need to be large for this to work. It needs enough clearance for each machine and a layout that prevents every order from moving backward and forward across the same space.
Business planning, pricing and equipment costs belong in separate decisions. Readers who still need to plan the business side can use the guide to starting a sublimation printing business.
A well-planned sublimation workspace setup should make each job easier to follow, keep heat and clutter away from the clean print area, and leave enough flexibility to add equipment only when production justifies it.