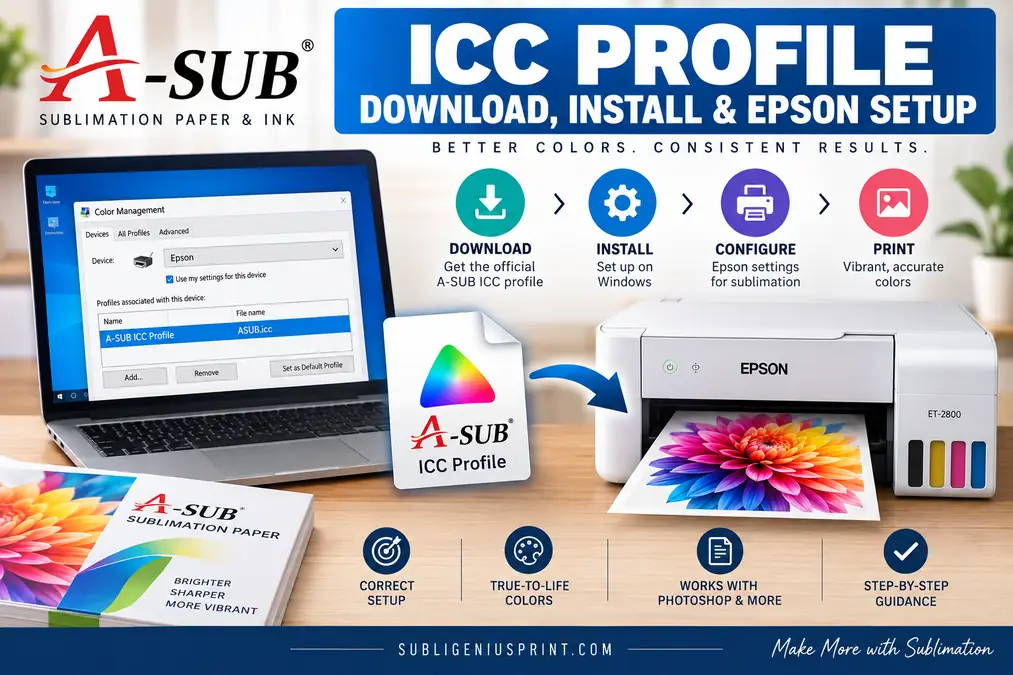
A-SUB ICC Profile: Download, Install & Epson Setup

The A-SUB ICC profile is available directly from A-SUB for people using its sublimation ink and paper on Windows. A-SUB provides a standard profile, a separate profile for European printer models, and a Windows installation guide from the same support page.
The important part is choosing one color-management method and setting it up correctly. A-SUB currently documents a Photoshop-managed workflow and a separate Windows ICM workflow. Mixing settings from the two can make color correction harder rather than better.
If you need more background before changing printer settings, our sublimation ICC profile guide explains where ICC profiles fit into the full color workflow.
A-SUB ICC Profile Download and Compatibility
A-SUB’s official profile page is the safest starting point. It currently provides the ICC file itself, a separate European-printer profile, and a downloadable Windows ICM installation guide. A-SUB states that its ICC profile is designed specifically for A-SUB sublimation paper and A-SUB ink and is compatible with Windows.
Official A-SUB ICC Profile Download Page
| Resource | What A-SUB provides |
|---|---|
| Standard ICC profile | Main profile download |
| European printer profile | Separate profile download |
| Installation instructions | Windows ICM PDF |
| Supported operating system stated by A-SUB | Windows |
| Intended consumables | A-SUB sublimation ink + A-SUB sublimation paper |
Do not download a random A-SUB profile from a forum simply because the printer model looks similar. Start with the manufacturer file and verify that your ink, paper, and printer setup matches the instructions you intend to follow.
A-SUB also currently lists an Epson EcoTank ink product specifically labeled ICC-Free. If that is the ink version in your printer, check its product instructions before adding the general A-SUB profile. The existence of an ICC profile on A-SUB’s support page does not mean every A-SUB ink product requires it.
Which A-SUB ICC Profile Should You Use?
The safest match is the combination A-SUB names on its profile page: A-SUB sublimation ink and A-SUB sublimation paper on Windows. The printer still matters because its driver controls how the profile is applied.
Changing one part of the printing combination can change the result.
| Your setup | Should you assume the A-SUB profile matches? |
|---|---|
| A-SUB ink + A-SUB paper | This is the combination A-SUB specifies for its profile |
| A-SUB paper + another ink brand | No. A-SUB does not describe the profile as being built for that ink |
| A-SUB ink + another paper brand | Do not assume the profile is optimized for that paper |
| Mac computer | A-SUB currently states that its published profile is Windows compatible |
| A-SUB product labeled ICC-Free | Follow the instructions for that ink before adding a profile |
| European printer model | Check A-SUB’s separate European profile download |
One common mistake is treating an ICC profile like a universal color upgrade. It is better understood as part of a specific printing combination.
A profile built around one ink and paper combination cannot automatically know how another brand of ink behaves.
The same principle applies when changing color modes. Our RGB vs CMYK and ICC profile guide explains how design color space and printer color management interact.
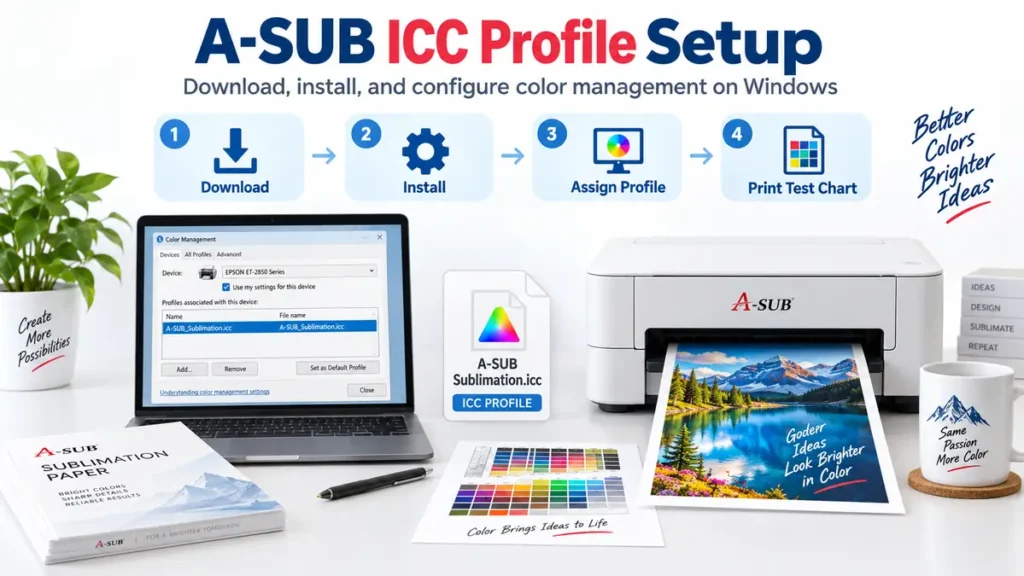
How to Install the A-SUB ICC Profile on Windows
A-SUB’s downloadable ICM instructions place the profile in Windows Color Management and associate it with the printer. Its PDF notes that Epson driver layouts vary, so your exact buttons can look different.
- Download the ICC or ICM file from A-SUB’s official profile page.
- Install the profile in Windows. A-SUB’s website says you can right-click the profile file and choose Install Profile. Its instructions also identify
C:\Windows\System32\Spool\Drivers\Color\as the profile folder for the Windows versions covered by the PDF. - Open Control Panel > Color Management.
- Under Devices, select the Epson printer you use for sublimation.
- Check Use my settings for this device.
- Add the downloaded A-SUB profile and set it as the default profile when following A-SUB’s ICM method.
- Configure your Epson printing preferences using the color-management workflow you plan to use before printing a test chart.
Do not start changing heat settings at the same time as the ICC setup. Test one major variable at a time. That makes it much easier to identify what actually changed the final pressed color.
Two Ways to Use the A-SUB ICC Profile
A-SUB currently publishes two distinct workflows, and their instructions are not identical. This is the point most likely to cause confusion.
| Setting | Photoshop-managed workflow | Windows ICM workflow |
|---|---|---|
| Color management | Photoshop | Windows/Epson driver |
| Printer color correction | No Color Adjustment | ICM |
| Profile selection | Inside Photoshop | Installed/selected through Windows or Epson driver |
| Media guidance shown by A-SUB | EPSON Matte | Plain Paper in A-SUB’s ICM PDF |
| Quality guidance shown by A-SUB | Standard | Highest/Quality, depending on driver layout |
| Best fit | Photoshop or another properly color-managed workflow | Programs using Windows printer color management |
These differences come directly from A-SUB’s separate instruction sets. The settings should not be combined into one hybrid preset.
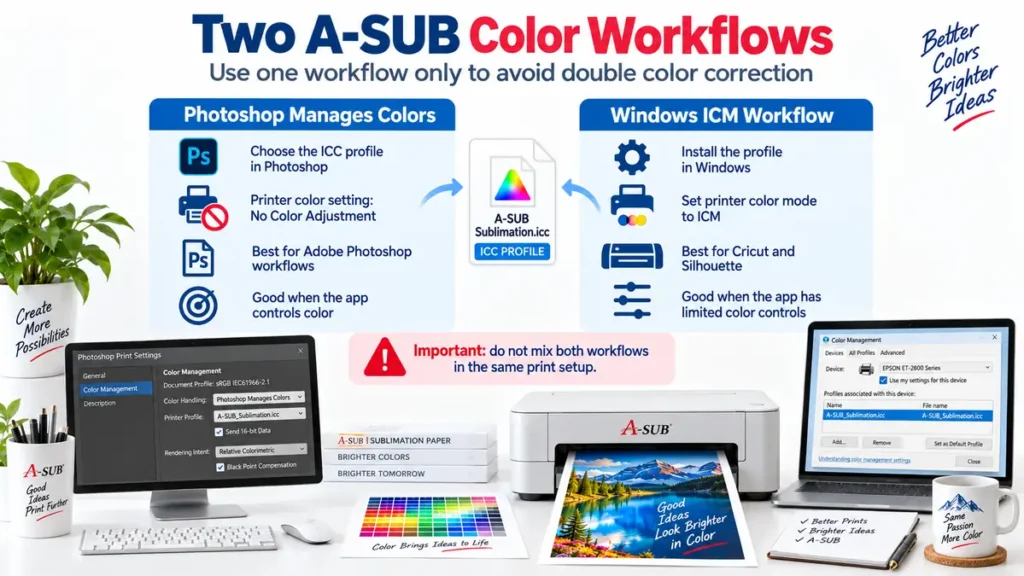
Photoshop Manages Colors
A-SUB’s website shows a Photoshop workflow where Photoshop performs the profile conversion.
A-SUB instructs users to choose the printer, open Print Settings, select EPSON Matte with Standard quality, and then open the printer driver’s advanced color controls. Color Correction is changed to Custom, followed by No Color Adjustment.
Back in Photoshop, Color Handling is set to Photoshop Manages Colors, and the installed A-SUB ICC profile is selected as the printer profile.
The logic is important: Photoshop handles the ICC conversion, so Epson’s normal automatic color adjustment is disabled.
Running another correction layer on top of the ICC conversion can change the colors a second time.
Our manual color correction and ICC profiles guide explains why stacking different correction methods can produce unpredictable results.
Windows ICM Manages the Profile
A-SUB’s separate PDF provides an ICM method intended to work through Windows and the printer driver.
The PDF tells users to install the profile, select their printer in Windows Color Management, add the profile, and set it as the default profile. Printing instructions then depend on which Epson driver interface appears.
For one common Epson driver layout, A-SUB recommends Plain Paper, the highest quality setting, and mirrored output for sublimation. Under More Options, Color Correction is changed to Custom, followed by Advanced and ICM. A-SUB also recommends saving the finished combination as a preset.
Other Epson driver layouts shown in the same document use Driver ICM (Basic) and allow the installed profile to be selected directly. One version also specifies Relative Colorimetric as the rendering intent.
This is why copying a screenshot from somebody using a different Epson model can create confusion. The name or location of the control can change even when the color-management goal is similar.
A-SUB ICC Settings for Cricut Design Space and Silhouette Studio
A-SUB specifically created its Windows ICM instructions to address software that does not provide the same print color-management controls as Photoshop.
Its PDF names Cricut Design Space, Silhouette Studio, and GIMP among the programs for which the Windows ICM approach can be used.
The profile is handled through Windows and the Epson driver rather than selected from a Photoshop-style printer-profile menu.
For the Epson driver layout demonstrated in A-SUB’s instructions, the workflow uses ICM color correction and recommends saving the final settings as a preset. The document also reminds sublimation users that images will usually need to be mirrored.
A saved preset is especially useful when the same printer also handles non-sublimation jobs. A clearly named preset reduces the chance of accidentally printing a sublimation transfer with ordinary automatic color correction.
For the rest of the driver setup, see our sublimation printer settings guide.
Why A-SUB Colors Can Still Look Wrong After Installing the Profile
An ICC profile cannot correct every cause of a bad sublimation print. It only deals with the color-management part of the workflow.
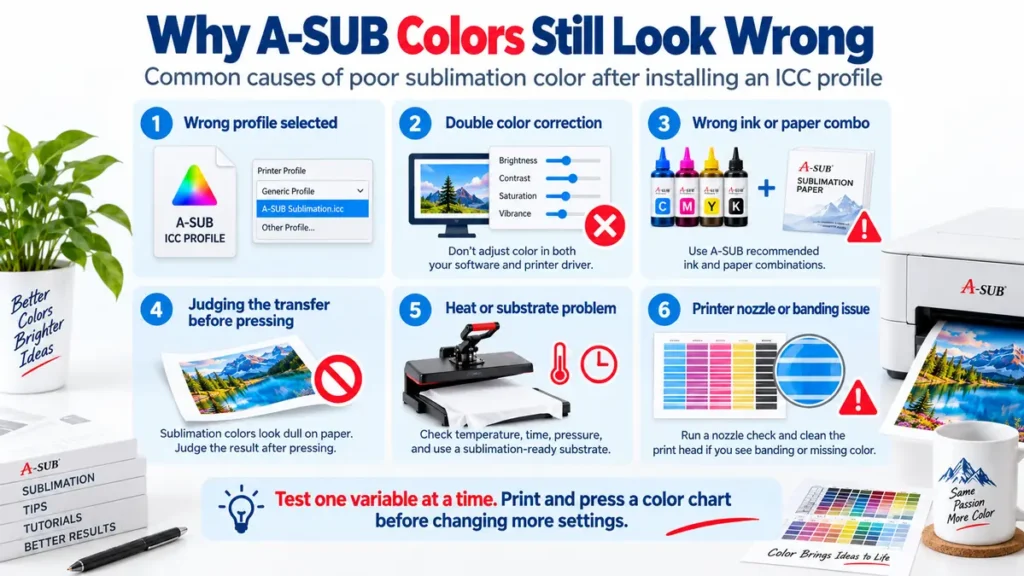
| Problem | What to check first |
|---|---|
| Colors became worse after adding the profile | Check for two color-correction systems running at once |
| Profile is installed but seems to do nothing | Confirm the correct printer and profile are selected in the active workflow |
| Colors look dull on transfer paper | Evaluate the pressed result before changing the profile |
| One color has a strong cast after pressing | Confirm ink, paper, profile, and driver settings match |
| Results changed after switching ink | Recheck profile compatibility with the new ink |
| Results changed after switching paper | Test the new paper rather than assuming the existing profile still matches |
| Entire print is weak or uneven | Check heat, pressure, substrate compatibility, moisture, and printer condition |
| Photoshop result differs from another program | Confirm both programs are not using different color-management methods |
The unpressed transfer is a poor place to judge the finished sublimation color. Sublimation dye develops after heat activates it and transfers it into polyester or a polymer-coated surface.
If your pressed colors remain dull, shifted, or inconsistent after checking the ICC workflow, use the sublimation color problems and fixes guide to separate printer-side problems from heat-press and substrate problems.
Do Not Change Five Settings at Once
Color troubleshooting gets difficult when the ICC profile, media type, print quality, heat temperature, press time, and artwork are all changed together.
A better test keeps the printer, ink, paper, artwork, substrate, and pressing process consistent while changing only the color-management method being evaluated.
A printed and pressed color chart is especially useful here. It gives you a repeatable reference instead of judging one photograph or design with an unknown color balance.
Quick A-SUB ICC Setup Checklist
Use this table before printing a production job.
| Check | Ready when |
|---|---|
| ICC source | Profile came from A-SUB’s official support page |
| Ink | You confirmed which A-SUB ink product is installed |
| Paper | The paper matches the workflow you are testing |
| Operating system | You are using the Windows workflow A-SUB documents |
| Printer | Correct sublimation printer selected |
| Profile | A-SUB profile installed and available |
| Color manager | One method chosen: Photoshop-managed or Windows ICM |
| Driver correction | Matches the chosen workflow |
| Mirror image | Enabled where required for the transfer |
| Test | Color chart printed and pressed before a large production run |
| Preset | Working settings saved with a clear name |
For A-SUB paper loading, printable side, and related setup details, use the A-SUB sublimation paper instructions.
Does A-SUB Have an ICC Profile?
Yes. A-SUB currently provides an ICC profile from its official support page along with a separate European-printer profile and a Windows installation PDF. A-SUB says its main profile is designed for A-SUB sublimation paper and ink.
Is the A-SUB ICC Profile Free to Download?
A-SUB currently provides the profile as a direct download from its public ICC support page. The page does not show a purchase requirement for the profile download.
Use the manufacturer’s download rather than a copied profile from an unknown file-sharing source.
Does the A-SUB ICC Profile Work on Mac?
A-SUB’s current ICC profile page states that the published profile is compatible only with Windows.
You may find unofficial Mac workarounds online, but they are not the workflow A-SUB currently documents. For production work, use a profile and process explicitly supported for your operating system rather than assuming a Windows profile conversion will behave the same way.
Does the A-SUB ICC Profile Work With Epson EcoTank Printers?
A-SUB sells sublimation ink for Epson EcoTank printers and names models such as the ET-2720, ET-2760, and ET-2800 on its current ink page. That confirms ink compatibility, not automatic ICC-profile compatibility for every EcoTank model.
Check the profile instructions for your setup instead of treating the EcoTank name alone as confirmation.
Can I Use the A-SUB ICC Profile With Another Ink Brand?
A-SUB describes its profile as being designed specifically for A-SUB sublimation paper and ink. It does not claim that the same profile is optimized for unrelated ink brands.
If you change ink brands, use the profile recommended for the new printer, ink, and paper combination or test color output carefully before production.
Why Doesn’t the A-SUB Profile Appear in Photoshop?
First confirm that the profile was installed in Windows and that you are working with the intended printer. A-SUB’s Windows instructions show the profile being added through Color Management before it is used for printing.
If Photoshop was already open during installation, close and reopen it before checking the printer-profile list again.
Do You Always Need an A-SUB ICC Profile?
Not necessarily. A-SUB currently sells an Epson EcoTank sublimation ink product that it labels ICC-Free, while it separately provides an ICC profile for its sublimation paper-and-ink workflow.
Check the exact ink product in your printer first. If your current setup already produces accurate pressed colors using the manufacturer’s recommended settings, adding another color-management layer without a reason can make troubleshooting more complicated.
A good A-SUB color workflow is not about applying every available correction. Match the profile to the setup, choose either Photoshop-managed color or Windows ICM, press a controlled test, and save the settings once you have a repeatable result. That gives you a useful baseline for future designs instead of starting from different printer settings each time.