How to Sublimate Tumblers Without Seams: Full-Wrap Steps

Learning how to sublimate tumblers is easier when the blank, template, wrap, and heat settings work together. This beginner-friendly guide explains how to make a clean full-wrap tumbler with an even transfer and a less visible seam. For related planning, see Can You Sublimate on Silicone Watch Bands? What Actually Works.
What You Need
- White polymer-coated sublimation tumbler For related planning, see White Sublimation Printer Explained.
- Sublimation printer, ink, and paper For related planning, see Invisible Sublimation Ink.
- Tumbler wrap template sized for your blank For related planning, see 7 Reasons Why You Should Buy a White Ink Sublimation Printer in.
- Heat-resistant tape and shrink wrap or a silicone wrap For related planning, see Genuine vs Compatible Ink Cartridges For Sublimation.
- Convection oven or a tumbler press
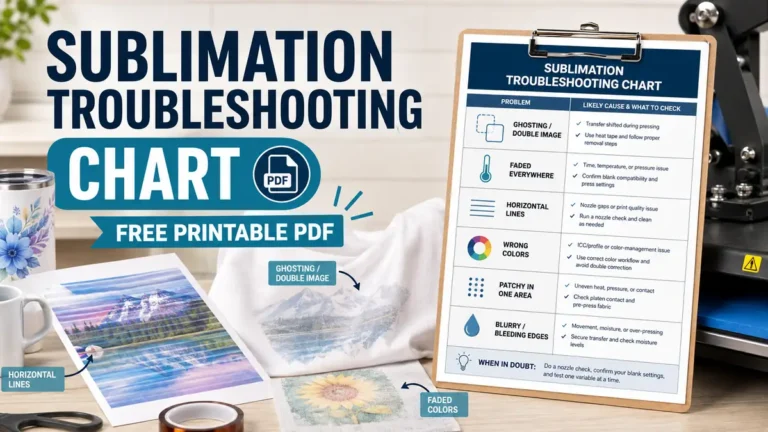
- Heat-resistant gloves, lint-free cloth, and a heat-safe surface For related planning, see Sublimation Troubleshooting Chart.
1. Choose and Prepare the Tumbler
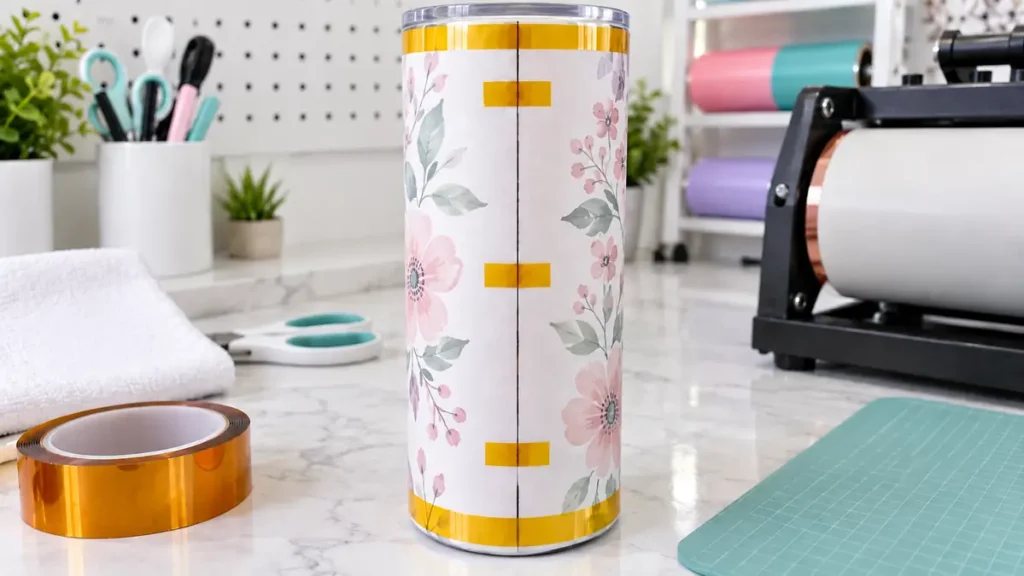
Use a tumbler specifically labeled for sublimation. Confirm its height, circumference, shape, and coating before designing. Remove the lid and hardware, wipe the surface clean, and make sure the blank is dry and free of fingerprints. For related planning, see How to Structure a Viral Income Reveal Video That Converts.
2. Build the Full-Wrap Design
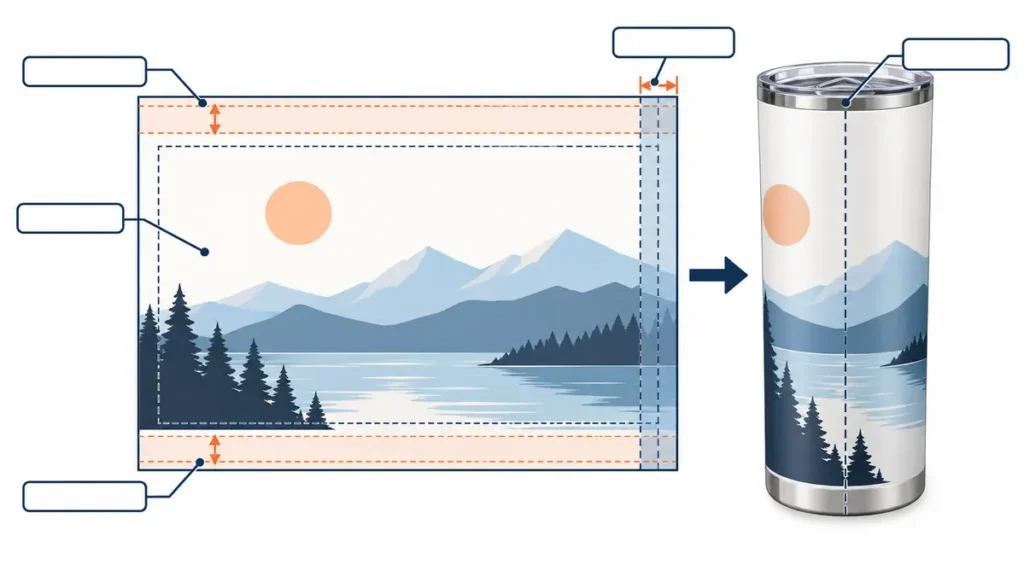
For color planning, compare your artwork with our sublimation color chart before you start. Start with a template made for your tumbler using our tumbler wrap size calculator. Keep important text and faces away from the top and bottom edges. Extend the background slightly past the seam area so tiny alignment differences do not create a white gap. Mirror the design before printing.
3. Print and Wrap It Tightly
Print on the recommended side of your sublimation paper using sublimation ink. Trim the transfer neatly, align the straight edge, and press the paper firmly against the tumbler. Tape the seam and both ends securely. The paper must stay flat with no bubbles, folds, or loose corners.
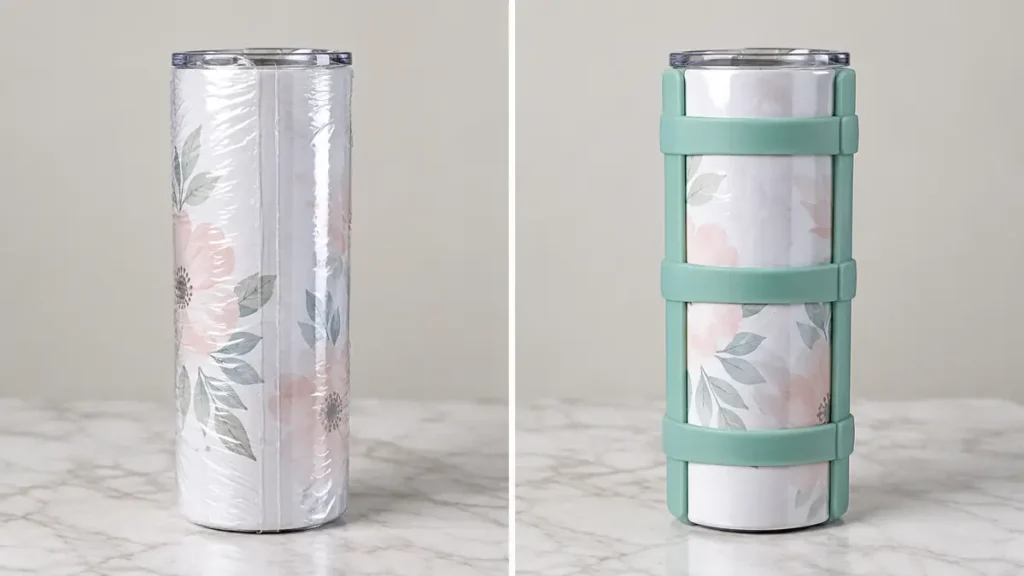
4. Add Shrink Wrap or a Silicone Wrap
A tight outer wrap helps maintain contact while the ink transfers. Smooth it from the center outward and check that the seam is fully covered. If using shrink wrap, follow the wrap manufacturer’s directions and avoid overheating the blank while shrinking it.
5. Press or Oven-Heat the Tumbler
Use the time and temperature supplied with your tumbler blank and equipment. A common starting range for many coated tumblers is about 350–400°F for several minutes, but settings vary by coating, diameter, oven, and press. Make one test tumbler before producing a batch, and rotate it if your equipment instructions call for rotation.
6. Cool and Inspect
Wear heat-resistant gloves, remove the hot tumbler carefully, and place it on a heat-safe surface. Remove the wrap and transfer as directed by the blank manufacturer. Inspect the seam, edges, and the entire background after cooling.
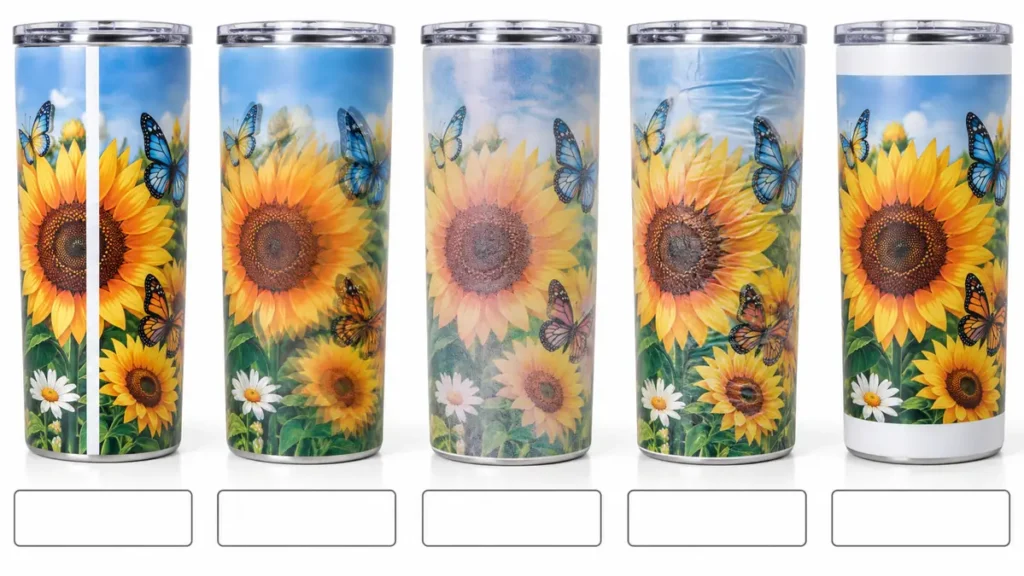
Fix Common Tumbler Problems
- Visible white seam: measure the circumference again and extend the background beyond the join.
- Ghosting: tighten the wrap and tape so the paper cannot move during heating.
- Faded or uneven areas: check contact, pressure, coating, and the manufacturer’s settings.
- Blurry edges: remove wrinkles and keep the transfer flat from end to end.
- Top or bottom gaps: use the correct template and account for the tapered shape.
Watch: How to Sublimate Tumblers Without a White Seam
If your full-wrap tumbler keeps showing a white seam, faded edges, ghosting, or uneven color, the problem may start with the template or wrap rather than the temperature.
In this short video, I show the key steps that help create a tighter transfer, better seam alignment, and a cleaner full-wrap result.
Watch for these details: correct template sizing, a small background overlap at the seam, tight transfer-paper contact, secure taping, and even heat around the tumbler.
If the finished tumbler still has a problem, use the troubleshooting guide below to match the symptom with the most likely cause.
Frequently Asked Questions
Can you sublimate any tumbler?
No. The tumbler needs a compatible polymer coating and a shape that matches your template.
Do sublimation tumblers need shrink wrap?
Not always, but a tight wrap can improve contact and reduce movement. Follow the instructions for your specific blank and equipment.
Why is my tumbler seam visible?
The design may be too short, the template may not match the circumference, or the paper may have shifted. Recheck measurements and secure the join tightly.
What temperature should you use for a sublimation tumbler?
Use the time and temperature supplied with your specific tumbler blank and equipment. Many coated blanks use a range around 350–400°F, but test one blank before producing a batch.
Do you need to seal a sublimation tumbler?
Usually no. Sublimation ink is transferred into the compatible polymer coating, so an extra sealer is not normally required. Follow the blank manufacturer’s care and finishing instructions. For related planning, see How to Sublimate Tumblers for Summer.
Record the blank brand, template size, paper, wrap method, temperature, time, and equipment. That test record becomes your repeatable tumbler recipe.