Sublimation Tumbler Wrap Size Calculator & Template Generator

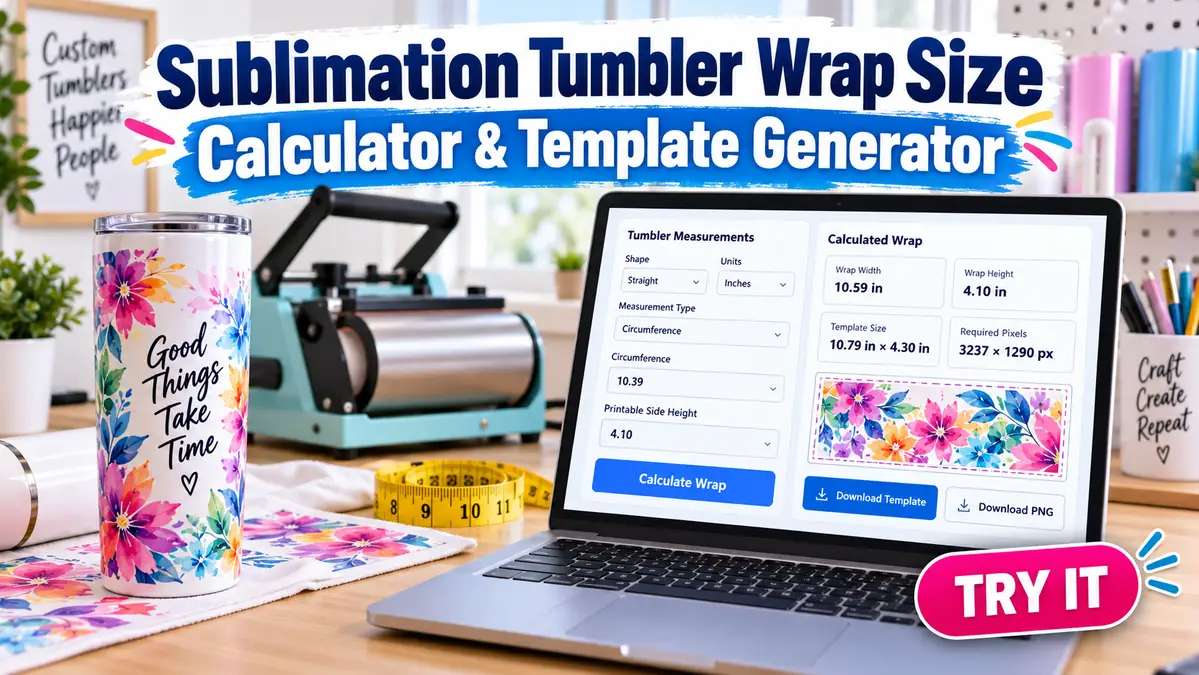
A tumbler wrap should be sized from the blank you are holding, not from the ounce label on the listing. Enter the actual top and bottom measurements, printable side height, overlap, bleed, paper size, and target resolution below. The calculator creates a straight or tapered wrap, checks whether it fits your paper, shows the required pixel dimensions, and lets you download an SVG, PNG preview, or print-test PDF.
Tumbler measurements
Paper fit check
Calculated wrap
Guides: red trim, purple bleed, blue seam, green safe zone, gray center. SVG and PDF are the physical-size reference outputs. PNG is a pixel preview based on your selected PPI.
Optional artwork preview
Upload a PNG, JPG, or WebP to check visual fit. The file stays in your browser and is not uploaded by this calculator.
How to Measure Your Tumbler for a Wrap
Measure the blank before you build the design. Two tumblers sold under the same capacity can use different shapes, rim profiles, tapers, and printable heights.
Use a flexible measuring tape or a strip of paper that can wrap tightly around the cup.
Measure the top circumference
Wrap the tape around the upper edge of the area you want to decorate. Keep the tape level and record the circumference where the ends meet.
If you prefer to measure diameter, the calculator can convert diameter to circumference automatically.
Measure the bottom circumference
For a tapered blank, repeat the measurement around the lower edge of the printable area.
If the top and bottom circumferences are effectively the same, the blank behaves like a straight cylinder and its flat wrap is rectangular.
If they differ, use Tapered mode.
Measure the printable side height
Measure only the area you plan to cover.
For a tapered tumbler, measure along the side wall from the upper printable edge to the lower printable edge. Do not measure straight through the air from one level to the other. The calculator uses this side-wall distance when it builds the curved template.
Choose your seam overlap
Overlap is extra wrap area at the join. Enter the amount that matches your own blank, artwork, and production method.
The calculator does not force one universal overlap because different blanks and workflows can need different allowances.
Straight vs Tapered Tumbler Templates
The fastest way to choose a template shape is to compare the top and bottom measurements.
| Blank shape | Top vs bottom | Flat template |
|---|---|---|
| Straight-sided | Same or nearly the same | Rectangle |
| Tapered | Different circumferences | Curved sector |
A straight cylinder unwraps into a rectangle. A tapered tumbler behaves like part of a cone, so its surface flattens into a curved band.
Trying to force a rectangular full wrap onto a tapered cup can make the seam twist, leave a gap, or cause the design to shift near one edge.
The calculator handles the geometry after you enter the measurements. If your top and bottom values are effectively equal, it will tell you to use Straight mode.
How to Use the Tumbler Wrap Size Calculator
The calculation takes less than a minute once the blank is measured.
- Choose Straight or Tapered.
- Select inches or millimeters.
- Choose circumference or diameter as your measurement type.
- Enter the top measurement.
- For a tapered blank, enter the bottom measurement too.
- Enter the printable side height.
- Add your seam overlap and bleed.
- Choose a target PPI.
- Select the paper size and enter the printer margin you want the fit check to use.
- Select Calculate wrap.
- Review the template dimensions, required pixels, and paper-fit result.
- Download the SVG or print-test PDF before production.
The PNG download is useful for a pixel preview. Use the SVG or print-test PDF when exact physical size matters.
How to Print the Template at the Correct Size
A correct template can still print at the wrong physical size if the print dialog scales it.
Use these settings for the paper test:
- Print at 100% or Actual Size
- Turn off Fit to Page
- Use the paper orientation shown by the calculator
- Check the printer margin setting against the printer you are actually using
- Verify the calibration square on the print-test PDF
- Test on ordinary paper before using sublimation paper
The sublimation paper size guide can help when you are choosing between Letter, Legal, Tabloid, 13 × 19, A4, or A3 sheets.
After printing, cut the test template and wrap it around the blank. Check the top edge, bottom edge, seam, and any area near a handle or shape change before you print the final transfer.
How Many Pixels Does a Tumbler Design Need?
The required pixel dimensions depend on the physical template size and the resolution target you choose.
The basic calculation is:
physical size in inches × PPI = required pixels
For example, a 10-inch-wide canvas at 300 PPI needs 3,000 pixels across.
That does not mean every tumbler file must be 300 PPI. The calculator lets you choose 150, 200, or 300 PPI so you can see the pixel requirement for your own workflow.
If you upload artwork, the tool compares its pixel dimensions with the calculated template canvas and estimates the effective PPI at that size. A warning means the file has fewer pixels than the selected target. It does not automatically mean the print will fail, but it gives you a useful reason to inspect the artwork before production.
For design placement that is not a full wrap, use the Sublimation Placement Calculator as a separate sizing check.
Why a Tapered Wrap Is Curved
A tapered tumbler can be modeled as a truncated cone. When the side surface of that shape is flattened, it becomes part of a circular ring rather than a rectangle.
The calculator uses:
- top circumference
- bottom circumference
- measured side height
to determine the inner radius, outer radius, and angle of the sector.
For a tapered blank with a larger top circumference than bottom circumference:
Outer radius = side height × top circumference ÷ (top circumference - bottom circumference)
Inner radius = side height × bottom circumference ÷ (top circumference - bottom circumference)
Sector angle in radians = (top circumference - bottom circumference) ÷ side height
The tool performs the same calculation when the bottom is the larger edge. You only need to supply accurate measurements.
What Seam Overlap and Bleed Do
Overlap, bleed, and safe area solve different problems.
| Setting | What it controls |
|---|---|
| Seam overlap | Extra wrap area where the two ends meet |
| Bleed | Extra artwork beyond the trim edge |
| Safe zone | Visual inset for keeping important design elements away from an edge |
| Center guide | Helps position artwork around the middle of the wrap |
The safe-zone line in the calculator is a visual guide, not a manufacturer specification. Enter the inset that fits your design and blank.
For tapered templates, the calculator adds the overlap to both edge circumferences before creating the sector. That keeps the radial height unchanged while providing additional wrap length at the seam.
Check Whether the Wrap Fits Your Sublimation Paper
A wrap that is mathematically correct still has to fit inside the printable area of your sheet.
The built-in paper checker supports:
- US Letter
- US Legal
- Tabloid
- 13 × 19 in
- A4
- A3
- custom paper dimensions
It also subtracts the printer margin you enter before deciding whether the template fits.
The result checks both portrait and landscape orientation.
If the template does not fit, do not shrink it just to force it onto the page. That changes the physical wrap dimensions. Choose a larger sheet, use a printer that supports the required size, or use a carefully verified tiling workflow.
Measuring first tells you this before the transfer is printed.
Test the Wrap Before Sublimating
A paper test is one of the cheapest checks in the entire tumbler workflow.
- Calculate the measured template.
- Download the print-test PDF.
- Print it on ordinary paper at 100% or Actual Size.
- Confirm the calibration square measures correctly.
- Cut around the template.
- Wrap it tightly around the actual tumbler.
- Check whether the top and bottom edges sit where expected.
- Check the seam overlap.
- Adjust the measurements if the paper test exposes a mismatch.
- Print the final artwork only after the paper version fits.
The template can verify geometry, but it cannot compensate for an incorrect measurement or an area of the blank that should not be pressed.
When the wrap is ready, follow the full tumbler sublimation workflow for taping, pressing, cooling, and seam control.
Preview Your Artwork Inside the Wrap
The calculator can load a PNG, JPG, or WebP image directly in the browser.
The image is used only for the local preview. It is not uploaded by the calculator.
You can:
- fit the artwork inside the template
- fill the template
- scale it
- rotate it
- mirror it
- compare its pixel dimensions with the selected PPI target
The preview is especially helpful on a tapered sector because a rectangular image can look very different once it is clipped to the curved wrap shape.
Treat the preview as a design check, not a substitute for the paper test.
Common Tumbler Template Problems
The wrap leaves a white gap at the seam
Recheck the actual circumference and seam allowance. A wrap sized from a generic capacity label may not match the blank you received.
The template twists around the cup
The blank may be tapered while the artwork is being printed as a straight rectangle. Compare the top and bottom circumference.
The top fits but the bottom does not
The two edges probably have different circumferences. Use Tapered mode and enter both measurements.
The printed template is smaller than the calculator result
Check the print dialog for Fit to Page, Scale to Fit, or another automatic scaling option. Print the test file at 100% or Actual Size.
The artwork looks soft in the preview
Check the uploaded pixel dimensions against the required pixel result. Enlarging a small source file lowers its effective resolution.
The template will not fit the selected sheet
Use the paper-fit result before printing. A larger sheet may be necessary. Do not reduce the wrap scale unless you intentionally want a physically smaller template.
The tapered calculator says the blank looks straight
Your top and bottom values are effectively equal. Switch to Straight mode instead of forcing a curved template.
What to Do After the Template Fits
Once the paper test fits the blank, the remaining job is production setup.
Use the Sublimation Tumbler Temperature: Press vs Oven Settings page for heat-method guidance, then check the tumbler sublimation guide for the full pressing workflow.
For other sizing and production tools, the Sublimation Calculator Hub keeps the site’s calculators in one place.
Tumbler Wrap Size Questions
What size should a 20 oz tumbler wrap be?
There is no single measurement that fits every 20 oz blank. Capacity tells you how much the tumbler holds, not the exact outside shape. Measure the top circumference, bottom circumference, and printable height of the specific blank, then build the wrap from those measurements.
How do I make a template for a tapered tumbler?
Measure the top circumference, bottom circumference, and side height of the printable area. Enter those values in Tapered mode. The calculator converts the truncated-cone surface into a curved sector and creates a downloadable SVG or paper-test PDF.
How do I calculate tumbler circumference from diameter?
Multiply diameter by pi:
circumference = diameter × π
You can also choose Diameter in the calculator and let the tool perform the conversion.
Do I need bleed on a sublimation tumbler wrap?
Bleed is useful when artwork needs to extend past the intended trim edge, but the amount depends on your production method and design. Enter the bleed you want rather than relying on a universal value.
How much overlap should a tumbler design have?
The correct seam overlap depends on the blank, artwork, and wrapping method. Measure and paper-test the template. The calculator accepts your own overlap value instead of forcing one fixed recommendation.
Should I print the template at 100%?
Yes, when testing the calculated physical size. Use 100% or Actual Size and turn off Fit to Page. Verify the calibration square before trusting the paper test.
Why does my wrap fit at the top but not at the bottom?
The blank is likely tapered. If the top and bottom circumferences differ, a rectangular wrap cannot follow both edges accurately. Use a tapered sector generated from both measurements.
Can I download the calculated wrap as an SVG?
Yes. The calculator generates a true-size SVG with trim, bleed, seam, safe-zone, and center guides based on the measurements you enter.