Sublimation Image Resolution & Print Size Checker

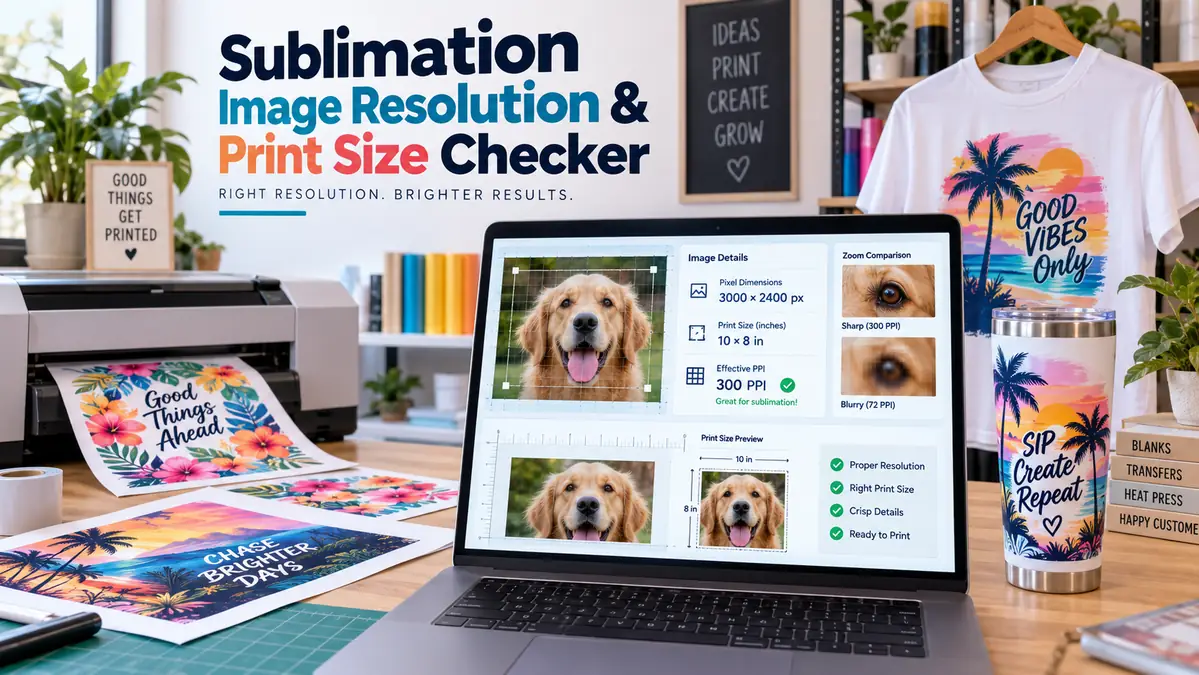
A design can look sharp on a screen and still become soft or pixelated when printed too large. The Sublimation Image Resolution & Print Size Checker helps you compare your artwork’s real pixel dimensions with the physical size you plan to print. For related planning, see Halloween Treat Bags with Sublimation HTV. If you create artwork with prompts, pair the checker with our AI tools for sublimation design.
Upload a PNG, JPG, or WebP file, choose your intended print size, and check the effective PPI before you use sublimation paper or press a blank. You can also calculate the maximum print size from an image or find the pixel dimensions needed for a new design.
Free browser-based tool
Sublimation Image Resolution & Print Size Checker
Check effective PPI, maximum print size, required pixels, aspect ratio, bleed, and enlargement risk before you print.
1. Upload your artwork
2. Image preview
Mirror is a preview only. Check your printer/software workflow before deciding whether to mirror.
Resolution check
Maximum print size from this image
| Target | Maximum print size |
|---|
Pixels → Maximum Print Size
Maximum physical size
| Target PPI | Maximum print size |
|---|
Print Size → Required Pixels
Check Whether Your Sublimation Image Is Large Enough
The important number is not just the image’s width and height in pixels. What matters is how many of those pixels are available for each inch of the final print.
The basic calculation is:
Pixel width ÷ print width in inches = effective PPI
For example, a 3000-pixel-wide image printed 10 inches wide provides:
3000 ÷ 10 = 300 PPI
Print the same file 15 inches wide and the effective resolution becomes:
3000 ÷ 15 = 200 PPI
The file has not changed. You are simply spreading the same number of pixels across a larger physical area.
That is why a file can look fine at one print size and too soft at another.
How to Use the Sublimation Resolution Calculator
The calculator gives you three ways to work depending on what information you already have.
Upload an image and check it
Use this when you already have the artwork.
- Upload your PNG, JPG, or WebP file.
- Enter the physical size you plan to print.
- Choose inches, millimeters, or centimeters.
- Select your target PPI.
- Check the effective PPI.
- Review the aspect ratio.
- Test a smaller or larger print size if needed.
Your artwork stays in your browser when using the calculator. The file does not need to be uploaded to the website server for the resolution check.
Calculate maximum print size from pixels
Use this when you know the image dimensions but have not chosen the final print size.
Enter:
- pixel width
- pixel height
- target PPI
The calculator divides the pixel dimensions by your target PPI and returns the corresponding physical print size.
Calculate required pixels from print size
Use this before creating new artwork.
Enter:
- intended print width
- intended print height
- target PPI
The calculator tells you the minimum pixel dimensions required to meet that selected target.
PPI vs DPI for Sublimation Printing
PPI and DPI are often used interchangeably in casual printing discussions, but they describe different things.
| Term | What it describes |
|---|---|
| PPI | Pixels in the digital artwork relative to physical print size |
| DPI | Dots produced by the printer or output device |
For artwork sizing, PPI is the more useful measurement.
A 3000-pixel-wide raster image printed 10 inches wide has an effective resolution of 300 PPI regardless of whether the printer itself advertises a much higher hardware DPI.
Adobe also distinguishes pixels per inch from printer dots per inch when explaining print resolution.
The printer’s DPI specification cannot replace source-image detail that does not exist in the artwork.
How Many Pixels Does a Sublimation Design Need?
Required pixel dimensions depend on two things:
- the final physical print size
- the PPI target you choose
Use:
Print width in inches × target PPI = required pixel width
Print height in inches × target PPI = required pixel height
Example pixel requirements
These are math examples, not universal sublimation requirements.
| Print size | At 150 PPI | At 200 PPI | At 300 PPI |
|---|---|---|---|
| 4 × 6 in | 600 × 900 px | 800 × 1200 px | 1200 × 1800 px |
| 8 × 10 in | 1200 × 1500 px | 1600 × 2000 px | 2400 × 3000 px |
| 10 × 10 in | 1500 × 1500 px | 2000 × 2000 px | 3000 × 3000 px |
| 12 × 12 in | 1800 × 1800 px | 2400 × 2400 px | 3600 × 3600 px |
The calculator lets you choose the target instead of assuming every sublimation project must use the same value.
Is 300 PPI Required for Sublimation?
No single PPI number guarantees a sharp sublimation result.
A higher-resolution source gives you more image detail to work with, but perceived sharpness also depends on factors such as:
- substrate surface
- artwork type
- viewing distance
- print workflow
- transfer movement
- heat and pressure
- ink spread
- source-image quality
A detailed photograph viewed close up can need more source resolution than a simple logo with large flat shapes.
Use 300 PPI as a selectable planning target when appropriate, not as a rule that automatically makes every print good.
The calculator therefore compares your artwork with the target you choose.
How Large Can You Print an Image?
To estimate maximum print size at a selected resolution:
Pixel width ÷ target PPI = print width
Pixel height ÷ target PPI = print height
Suppose an image is 3000 × 2400 pixels.
At different targets, the maximum size changes:
| Target PPI | Maximum size |
|---|---|
| 150 PPI | 20 × 16 in |
| 200 PPI | 15 × 12 in |
| 240 PPI | 12.5 × 10 in |
| 300 PPI | 10 × 8 in |
Nothing happens to the original image when you compare these sizes. The table only shows how densely its existing pixels would be distributed.
This makes it much easier to decide whether to reduce the design size before printing.
Why Changing DPI Does Not Automatically Improve Image Quality
Changing a file from “72 DPI” to “300 DPI” does not automatically create more image detail.
The first number to check is the actual pixel count.
For example:
- File A: 1200 × 1200 px
- File B: 1200 × 1200 px
If both files contain the same raster pixels, changing only the resolution metadata does not turn one into a higher-detail image.
The physical-size interpretation can change, but the source still contains 1200 pixels across.
Resampling is different
Resampling actually changes the number of pixels in the file.
Software can create extra pixels when an image is enlarged. Modern resampling and AI upscaling can sometimes produce a more usable result, but generated pixels are not the same as detail captured or created in the original artwork.
For an important order, start with the strongest source file you can get rather than relying on an extreme enlargement later.
Check the Aspect Ratio Before Printing
Resolution is only part of correct artwork sizing. The aspect ratio must also match the physical print area if you want the full image to fit without distortion or cropping.
Aspect ratio describes the relationship between width and height.
For example:
3000 × 2400 px = 5:4
A 10 × 8-inch print is also:
10:8 = 5:4
Those proportions match.
What happens when the ratios do not match?
You normally have three choices.
| Method | Result |
|---|---|
| Fit | Entire artwork stays visible, but unused space may remain |
| Fill | Print area is filled, but some artwork may be cropped |
| Stretch | Artwork is distorted to force a different shape |
Stretching is usually the weakest option because circles become ovals, faces become wider or narrower, and design proportions change.
Use Fit or Fill instead.
The calculator’s preview should make the mismatch visible before you print.
Effective PPI Changes When You Resize the Artwork
The same source image can have many different effective resolutions.
Suppose the file is 3600 pixels wide:
- at 6 inches wide: 600 PPI
- at 9 inches wide: 400 PPI
- at 12 inches wide: 300 PPI
- at 18 inches wide: 200 PPI
This is why checking only the pixel dimensions without considering final print size is incomplete.
A useful workflow is to upload the image and slowly increase the intended print width while watching the effective PPI result.
When the print reaches a size where the effective resolution falls below your chosen target, you know the trade-off you are making.
Use the Print Size Slider Before Enlarging Artwork
The print-size slider makes this relationship easier to see.
Start with your intended size, then compare a few alternatives:
- slightly smaller
- exact planned size
- slightly larger
Watch how effective PPI changes.
If a small reduction in physical size takes the image from well below your selected target to comfortably above it, resizing the print may be a better option than aggressive image upscaling.
This is especially useful for customer-supplied artwork where a higher-resolution original may not be available.
Add Bleed Before Calculating Required Pixels
Bleed extends artwork beyond the final visible or trimmed area.
If your workflow requires bleed, calculate the artwork dimensions from the full canvas including bleed, not only the finished design size.
For example, if the finished print is:
10 × 8 in
and your workflow adds bleed around the outside, the artwork canvas becomes slightly larger than 10 × 8.
Required pixels should then be calculated from that larger canvas.
The calculator includes bleed as an optional setting because not every sublimation blank or production workflow uses the same amount.
Do not add arbitrary bleed simply because another product uses it.
Why a High-Resolution Image Can Still Print Soft
Enough pixels remove one possible cause of a soft print. They do not eliminate every other cause.
If your calculator result shows enough source resolution but the finished transfer still lacks detail, inspect the rest of the workflow.
Possible causes include:
- low-quality original artwork that was already blurred
- heavy JPEG compression
- excessive sharpening artifacts
- transfer movement
- incorrect heat or pressure
- unsuitable substrate coating
- moisture
- printer-side quality problems
- excessive enlargement earlier in the design process
Use the sublimation troubleshooting guide if the artwork passes the resolution check but the physical result still looks wrong.
For help with the actual printing workflow, see how to print a sublimation image without messing it up.
Check Print Size Against Your Sublimation Paper
An image can have enough pixels and still be too large for your printer or paper.
Those are separate checks.
For example:
- artwork resolution may support a 13-inch-wide print
- your printer may only support narrower media
- your selected sublimation paper may also have printable-margin limits
Confirm the physical sheet size after checking resolution.
The sublimation paper sizes guide covers common paper formats including Letter, A4, 11 × 17, and 13 × 19.
If you regularly move between sizing, cost, placement, and production tools, the Sublimation Calculator Hub keeps the site’s calculators in one place.
PNG vs JPG for Sublimation Resolution
File format alone does not determine whether an image has enough resolution.
A 3000 × 3000 PNG and a 3000 × 3000 JPG have the same pixel dimensions.
The important differences are elsewhere.
PNG
PNG can be useful for:
- transparent backgrounds
- logos
- typography
- graphics with sharp edges
JPG
JPG is commonly used for:
- photographs
- complex raster images
- files where smaller storage size matters
Repeated or aggressive JPEG compression can introduce visible artifacts, especially around text and hard edges.
Do not assume a PNG is automatically high resolution simply because it is a PNG. Check its actual pixel dimensions.
You can find existing design resources in the Sublimation and DTF Ready PNG library, then use the calculator to compare any raster file with your intended physical print size.
Common Image Resolution Mistakes
Checking only the file’s DPI label
Pixel dimensions and final print size are more useful than a metadata value by itself.
Enlarging a small image and assuming the problem is solved
Increasing physical dimensions without adding meaningful source detail lowers effective resolution.
Changing 72 to 300 without checking pixels
A metadata change alone does not recreate missing detail.
Stretching to match the blank
Incorrect aspect-ratio stretching can distort the design even when resolution is sufficient.
Assuming printer DPI equals artwork PPI
They describe different parts of the workflow.
Ignoring paper and printer size limits
Enough resolution does not mean the artwork physically fits the available media.
Checking resolution after printing
Run the calculation before using sublimation ink, paper, or a blank.
Sublimation Image Resolution Questions
Is 300 DPI required for sublimation?
Not universally. For raster artwork, 300 PPI is a useful selectable target for many detailed prints, but the appropriate source resolution depends on print size, artwork type, viewing distance, substrate, and workflow. The calculator lets you compare several PPI targets instead of treating one value as mandatory.
How many pixels do I need for an 8 × 10 sublimation print?
At a selected target of 300 PPI, an 8 × 10-inch image requires 2400 × 3000 pixels. At 200 PPI, it requires 1600 × 2000 pixels. Choose the target that matches your workflow rather than assuming one setting applies to every project.
Can I make a 72 DPI image into 300 DPI?
Changing only the resolution metadata does not add real image detail. Check the actual pixel dimensions and intended physical print size. Resampling can generate additional pixels, but it is different from starting with a higher-detail source.
Why does my 300 DPI image still look blurry?
The file may have enough nominal resolution but still contain blurry source content, compression artifacts, previous enlargement, or other quality problems. Printing and transfer issues can also soften a result. Check both the source artwork and the sublimation workflow.
What is the difference between DPI and PPI?
PPI describes digital image pixels relative to physical print size. DPI generally describes printer dots or output resolution. For deciding whether raster artwork has enough detail at a particular size, PPI is the more useful calculation.
How large can I print a 3000 × 3000 image?
At 300 PPI, the mathematical print size is 10 × 10 inches. At 200 PPI, it is 15 × 15 inches. At 150 PPI, it is 20 × 20 inches. These are resolution calculations, not guarantees of perceived print quality.
Does PNG have better resolution than JPG?
Not automatically. Resolution depends on pixel dimensions. A PNG and JPG can have identical dimensions. PNG supports transparency and lossless compression, while JPG uses lossy compression and can show artifacts if heavily compressed.
Does resizing an image reduce quality?
Making a raster image physically larger without adding useful source detail lowers its effective PPI. Making it smaller increases effective PPI. Resampling changes the pixel count, but enlargement cannot reliably reconstruct every detail missing from the original.
Can I safely upload artwork to the calculator?
The planned calculator reads supported image files locally in the browser for the resolution check. The artwork does not need to be sent to the website server. This privacy behavior should also be stated visibly next to the upload field.
Check Resolution Before You Print
A sublimation image resolution calculator is most useful before ink reaches the paper.
Check three things:
- Does the file contain enough pixels for the intended physical size?
- Does the artwork aspect ratio match the print area?
- Will the finished size fit your printer and paper?
If those checks pass, you have removed several common sizing problems before production starts.
For other sizing, pricing, material, and workflow tools, use the Sublimation Calculator Hub.