Sublimation Paper: Brand, Issues & Master Quirky Projects (Even Toilet Paper)
I didn’t realize how much sublimation paper affected color and durability until the same design failed on one sheet and looked perfect on another. That sent me down a rabbit hole of testing brands, settings, and even odd materials most people never try.
Choosing the wrong sublimation paper can ruin colors, cause curling, leave residue, or waste ink fast.
In this guide, you’ll learn how sublimation paper actually works, which brands perform best, how to fix common issues, and when specialty paper makes sense, even for unusual projects most guides never cover.
Sublimation Paper Quick Picks
Best Sublimation Paper by Use Case
| Use Case | Recommended Choice | Why It Works |
|---|---|---|
| Best overall | TexPrint R | Strong color transfer, minimal residue, reliable for apparel and tumblers |
| Best budget option | A-Sub | Affordable, easy to source, beginner-friendly performance |
| Best for Cricut cutting | Koala or Hippo | Feeds smoothly, cuts cleanly, handles detailed designs |
| Best for high humidity | 110–120gsm paper | Stays stiff, resists softening and warping |
| Best for heavy ink designs | 120gsm paper | Prevents curling and ink overload issues |
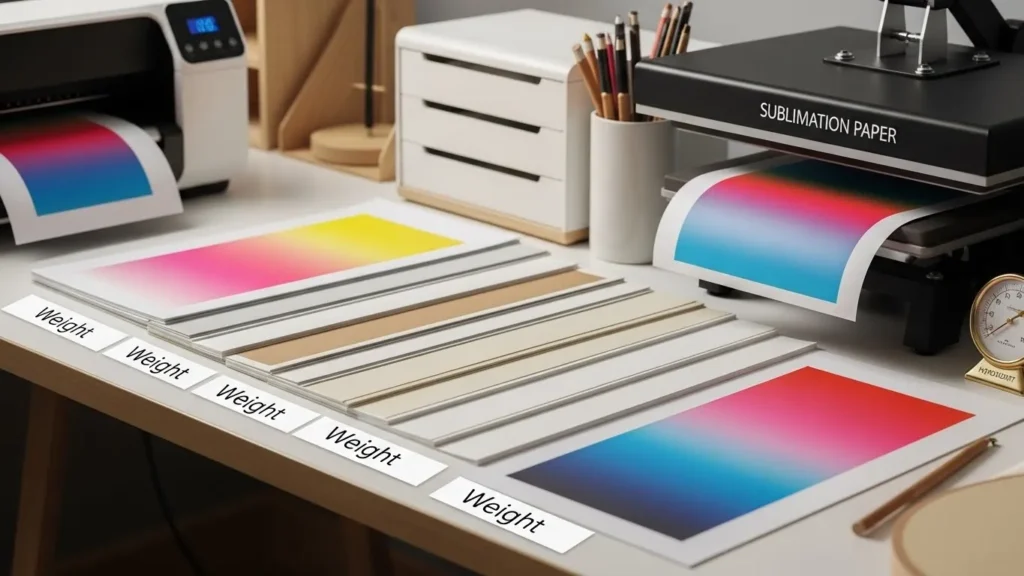
Fast Buying Tips
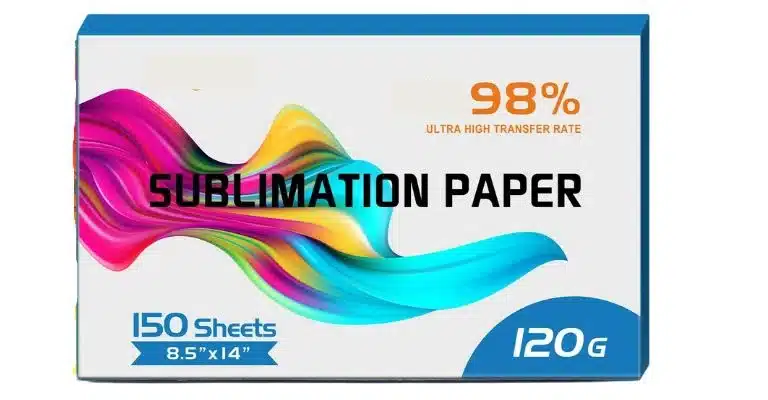
- Choose 80gsm for light ink and fast bulk printing in dry environments.
- Choose 100–110gsm for balanced everyday projects.
- Choose 120gsm for bold colors, large designs, or humid workspaces.
If you’re unsure, start with 100–110gsm and adjust based on ink load and humidity. Check out Sublimation Paper Settings for Perfect Prints
What Is Sublimation Paper?
Sublimation paper is a coated transfer paper designed to hold dye sublimation ink on the surface and release it under heat, allowing the ink to bond permanently with polyester fibers or polymer coated materials.
It is one of the most important factors in color accuracy, durability, and overall print quality.
Sublimation paper is not just a carrier for ink. It controls color strength, transfer consistency, and how long your design lasts. Choosing the right paper is often the difference between a print that looks good for a few weeks and one that lasts for years.
Definition, How Sublimation Paper Works
Sublimation paper works by controlling how ink behaves during heat transfer.
When heat and pressure are applied, sublimation ink turns into a gas and bonds directly with polyester fabric or polymer coatings. The dye does not sit on top of the surface. It becomes part of the material itself.
This is why sublimation prints:
- Do not peel or crack
- Feel smooth with no texture
- Fade gradually instead of wearing off
A simple way to understand it is this. Regular printing places ink on the surface. Sublimation printing embeds dye into the surface.
What Sublimation Paper Is Used For
Sublimation paper is used for permanent printing on compatible materials.
Common applications include:
- Apparel such as polyester shirts, hoodies, leggings, and sportswear
- Drinkware including mugs, tumblers, and coated bottles
- Home decor like pillows, coasters, panels, and wall art
- Promotional products such as phone cases, keychains, ornaments, and puzzles
- Creative projects including glow effects, novelty items, and experimental designs
It is widely used in both hobby crafting and commercial production because it delivers photo quality color without adding weight or texture.
Why Sublimation Paper Is Different from Regular Paper
Sublimation paper is not interchangeable with standard inkjet paper.
There are two critical differences.
Ink compatibility
Sublimation uses dye based ink that changes into gas under heat. Regular inkjet ink cannot do this and will smear, burn, or wash out.
Controlled release coating
Sublimation paper has a specialized coating that keeps ink on the surface until heat activates it. This allows even dye release and clean transfer.
Regular paper absorbs ink too deeply. When heated, there is nothing left to transfer properly.
Sublimation Paper vs Heat Transfer Paper
Although they are often confused, these papers serve different printing methods.
| Feature | Sublimation Paper | Heat Transfer Paper |
|---|---|---|
| Compatible materials | Polyester and polymer coated surfaces | Cotton, polyester, and blends |
| Print feel | Smooth, part of the material | Slightly raised layer |
| Durability | Long lasting and fade resistant | Can crack or peel |
| Ink behavior | Dye becomes part of surface | Ink remains on top |
Sublimation paper is best for permanent, professional results on polyester and coated products. Heat transfer paper is better for cotton fabrics or temporary designs.
How to Choose the Perfect Sublimation Paper for Stunning Prints
The best sublimation paper is the one that matches your ink load, printer setup, speed, and environment. When paper weight and conditions align, prints come out sharper, colors transfer evenly, and production becomes predictable instead of frustrating.
Ink Load and Design Density
Ink coverage is one of the biggest factors in paper performance.
Heavy ink designs place more moisture on the paper. If the paper cannot handle it, curling and distortion follow.
- High ink coverage
Bold logos, solid colors, and photo prints work best with 110gsm or higher paper. Thinner paper absorbs moisture too fast and loses shape. - Mixed ink designs
Designs with gradients or detailed shading need stability during pressing. 110gsm to 120gsm paper keeps edges sharp and prevents shifting.
For detailed branding on small items like coasters or logos, 120gsm paper delivers the most consistent edges.
Printing Setup, Roll or Sheet
Your printing workflow determines how paper feeds and behaves.
- Roll to roll systems
Lightweight 80gsm paper feeds faster and smoother, making it ideal for speed focused production. When ink coverage increases, thicker paper prevents warping. - Roll to sheet printing
Smaller projects benefit from 100gsm to 120gsm paper, which stays flat and easy to align during transfer.
For bulk signage or banners, 110gsm roll paper balances speed with control.
Print Speed and Paper Weight
Print speed directly affects ink saturation and paper stability.
- Fast printing
Best paired with 80gsm paper for low ink designs and high volume output. - Slower printing
Works better with 110gsm or heavier paper, allowing ink to settle evenly before drying.
If you are new to sublimation, slower print speeds combined with 100gsm paper provide the most forgiving results.
Workspace Humidity and Paper Behavior
Humidity changes how paper reacts before and during pressing.
- Low humidity environments below 45 percent
Lightweight 80gsm paper reduces upward curling that can interfere with print heads. - High humidity environments above 70 percent
Stiffer 110gsm to 120gsm paper resists softening and feeds more consistently.
Storing paper in sealed packaging or a dry room helps maintain coating performance year round.
Matching Paper to Project Type
Different products place different demands on sublimation paper.
- Apparel
Polyester shirts, sportswear, and uniforms benefit from stable paper that prevents shifting during pressing. - Home decor
Cushions, curtains, and patio textiles require paper that holds color evenly across larger surfaces. - Advertising and signage
Flags, banners, and display graphics need heavier paper to handle size and ink density. - Hard surfaces
Mugs, tiles, and aluminum panels require paper with consistent dye release to avoid fading and residue.
For outdoor projects, pairing 110gsm paper with UV resistant polyester improves longevity.
Common Sublimation Paper Problems and Fixes
Choosing the wrong paper often causes predictable issues.
- Curling or warping
Increase paper weight when ink coverage is high. - Paper shifting during pressing
Use thicker or adhesive backed sublimation paper. - Print head contact in dry air
Switch to lighter paper to reduce upward curl. - Inconsistent color in humid spaces
Use heavier paper that maintains stiffness.
Testing paper weight before large production runs prevents wasted ink and blanks.
Test a small batch of sublimation paper with your printer and heat press settings before committing to a large patio project.
Quick Reference: Choosing Your Sublimation Paper
| Factor | Lightweight (80gsm) | Heavyweight (110-120gsm) |
| Ink Load | Low to medium ink; simple designs | High ink; complex, vibrant designs |
| Humidity | Best for <45% (dry climates) | Best for >70% (humid climates) |
| Print Speed | Fast printing; bulk production | Slow printing; high-quality prints |
| Applications | T-shirts, coasters, basic banners | Patio banners, mugs, detailed apparel |
| Best For | Beginners, small projects | Professional, large-scale, or outdoor items |
Best Sublimation Paper Brands Compared
No single brand is best for everyone. Budget papers work well for learning, mid range papers handle daily production, and premium papers shine in high volume or precision work. Choosing based on your printer, ink load, and project type delivers better results than choosing by brand name alone.
Top Sublimation Paper Brands
| Brand | Best For | Strengths | Limitations |
|---|---|---|---|
| TexPrint R | High volume and professional production | Strong color vibrancy, minimal residue, excellent for tumblers | Higher cost, less beginner friendly |
| A-Sub | Beginners and budget focused users | Affordable, widely available, easy to work with | Slightly softer colors, light residue on dark items |
| Hiipoo | Everyday use and small businesses | Balanced quality and price, works with most printers | Fewer size options, less ideal for very high heat |
Specialty Sublimation Paper Options
Some projects need more than standard paper.
- Glow in the dark paper
Best for novelty designs, kids apparel, and seasonal items like Halloween projects. - Vinyl sticker sublimation paper
Designed for durable, weather resistant stickers on laptops, bottles, and outdoor items.
Budget vs Premium Sublimation Paper
| Category | Examples | Best Use |
|---|---|---|
| Budget | BS Tees, Blanks Galore | Learning, testing ideas, small runs |
| Mid range | Hiipoo, Koala | Daily use for hobbyists and small shops |
| Premium | TexPrint R, Sawgrass TruePix | High volume, detailed, and professional work |
Sawgrass TruePix for Epson Printers
Sawgrass TruePix pairs especially well with Epson models like the F170 and F570. It feeds smoothly, reduces smudging, and delivers consistent color when used with Sawgrass ink.
Best Sublimation Paper for Cricut Users
Koala and Hippo papers are popular with Cricut users because they cut cleanly, hold shape on mats, and produce sharp edges for detailed designs. Check out Cricut Sublimation Transfer Paper
Printer and Machine Compatibility
Sublimation success depends on matching paper, printer settings, and machine type. Most issues blamed on paper are actually caused by feeding, profiles, or pressure mismatches. Dialing in your setup once saves time, ink, and wasted blanks on every project.
Epson Sublimation Printers
Epson models like the F170, F570, and converted EcoTank printers are widely used for sublimation because they handle dye ink consistently.
Recommended paper
- TexPrint R for professional and high ink projects
- Sawgrass TruePix for consistent feeding and clean transfer
Recommended printer settings
- Paper type, Premium Presentation Paper Matte or Sublimation Paper
- Print quality, High or Best
- Color mode, CMYK with the correct ICC profile
Paper loading tips
- Load sublimation paper print side up
- Adjust guides snugly to prevent skewing
- Use rear feed for thicker paper when available
Always run a test print on plain paper first to confirm alignment and color balance.
Standard Inkjet Printers Converted for Sublimation
Many inkjet printers can work well once converted and dedicated to sublimation ink.
Recommended paper
- A-Sub
- Hiipoo
Recommended printer settings
- Paper type, Heavyweight Matte or Sublimation Paper
- Print quality, High
- Color profile, ICC profile from your ink manufacturer
Paper loading tips
- Feed one sheet at a time if jams occur
- Confirm print side orientation in your printer manual
Converted printers must never be switched back to regular ink.
Laser Printers and Sublimation
Standard laser printers are not compatible with true sublimation ink.
- Laser toner does not sublimate
- Heat can scorch paper or damage coatings
- Results are inconsistent and not permanent
Laser based transfers require specialty toner systems and are not recommended for standard sublimation workflows.
Preventing Paper Residue on Tumblers
Sticky residue usually comes from poor paper quality or incorrect press settings.
How to avoid residue
- Use reliable paper such as TexPrint R or A-Sub
- Press at 380°F to 400°F for 45 to 60 seconds
- Apply medium to firm pressure, not excessive
- Place a Teflon or protective sheet between paper and tumbler
Some papers require hot peel while others perform better with a cold peel. Always follow brand guidance.
Cricut Compatibility and Clean Cuts
Sublimation paper can be cut cleanly with a Cricut when the right materials and settings are used.
Best paper for Cricut
- Koala
- Hippo
Recommended Cricut settings
- Material, Lightweight Paper or Cardstock for intricate designs
- Pressure, Medium
- Blade, Fine point blade
Cutting tips
- Use a strong grip mat
- Cut one sheet at a time
- Reduce speed if edges appear jagged
Clean cuts reduce alignment issues during pressing and improve final print quality.
Sublimation Paper Sizes and Formats
The best paper size matches your product, printer, and workflow. Sheets offer control for smaller jobs, while rolls excel at wraps and bulk production. Choosing the right format saves paper, time, and reprints.
Sublimation Paper Size Guide
| Size | Best For | Why It Works |
|---|---|---|
| 13 × 19 inches | Full shirt prints, large tumblers, posters | Ideal for Epson wide format printers and oversized designs |
| 8.5 × 47.2 inches | Tumblers, bottles, wrap designs | Roll format allows seamless, custom length prints |
| A4 (8.3 × 11.7 in) | Keychains, stickers, phone cases | Affordable, easy to source, great for testing |
| 11 × 17 inches | Tote bags, pillow covers, mid size items | Balances coverage and material cost |
Tumbler tip: For 20 oz tumblers, 8.5 × 47.2 inch rolls allow continuous wraps without seams or overlaps.
Sheet vs Roll Sublimation Paper
- Sheets work best for small to medium projects and precise alignment
- Rolls are better for tumblers, banners, and repeat length printing
If you print wraps or signage often, rolls reduce cutting time and waste.
Buying Sublimation Paper in Bulk
Bulk buying saves money only when paper is used consistently.
Best places to buy in bulk
- Wholesale suppliers
Blanks Galore, Conde Systems, and Joto offer large packs and better pricing for frequent production. - Retail stores
Hobby Lobby and Michaels are useful for moderate quantities and local pickup. - Online retailers
Amazon and Walmart provide budget bundles and fast delivery for popular brands like A-Sub.
Storage Tips
Improper storage can ruin sublimation paper before it is used.
- Store paper in a cool, dry environment
- Keep it sealed when not in use
- Avoid humidity and heat exposure
Check out 75GSM Jumbo Rolls Sublimation Paper
A4 Sublimation Paper: Small but Mighty
Don’t underestimate the humble A4 sheet. It’s perfect for:
- Prototyping: Test designs before committing to larger sheets.
- Micro-businesses: Create stickers, greeting cards, or jewelry without overspending.
- International Users: A4 is the standard in Europe and Asia, making it easy to source locally.
Fixing Sublimation Paper Problems
Sublimation projects can run into trouble even with the best of intentions. Sticky residue, smudged ink, or wondering if you can just use parchment paper instead? Doesn’t sound familiar? Don’t sweat it.
1. Why Is My Sublimation Paper Leaving Residue?
Residue is the ultimate buzzkill. Here’s how to tackle it:
- Cause: Low-quality paper or incorrect heat settings.
- Fix:
- Use trusted brands like TexPrint or A-Sub.
- Adjust your heat press: 380°F–400°F (193°C–204°C) for 45–60 seconds.
- Add a Teflon sheet between the paper and your item to prevent sticking.
Pro tip: If residue still appears, try peeling the paper while it’s hot or cold (check your paper’s instructions).
2. Ink Smudging: How to Avoid a Mess
Smudged ink can ruin hours of work. Here’s how to keep your designs crisp:
- Cause: Overloading the printer or improper drying.
- Fix:
- Let the ink dry for 5–10 minutes before pressing.
- Avoid stacking prints—lay them flat in a dust-free area.
- Use high-quality sublimation ink and ensure your printer settings match the paper type.
3. How Long to Let Sublimation Paper Dry?
Drying times can make or break your transfer. Here’s the scoop:
- Standard Drying Time: 5–10 minutes at room temperature.
- Humid Environments: Extend drying to 15–20 minutes or use a fan to speed things up.
- Pro Tip: If you’re in a rush, a heat gun on low can help—just don’t overdo it!
4. Can You Use Parchment Paper Instead?
In a pinch, parchment paper might seem like a good substitute, but it’s not ideal. Here’s why:
| Substitute | Pros | Cons |
|---|---|---|
| Parchment Paper | – Cheap and readily available | – Doesn’t hold ink well, leading to smudges |
| – Works as a protective layer during pressing | – Not designed for high heat or pressure | |
| DTF Paper | – Great for cotton fabrics | – Requires special DTF powder and printer |
| – Produces vibrant, durable designs | – More expensive than sublimation paper |
Verdict: Stick to sublimation paper for best results, but keep parchment on hand as a protective layer during pressing.
Niche Uses and Creative Sublimation Projects
Unusual materials can work well with sublimation when heat, pressure, and paper choice are adjusted. Testing and gentle settings are the difference between fun results and wasted supplies.
Sublimation on Toilet Paper
Yes, it works, and it is mostly used for novelty gifts and seasonal humor.
Quick steps
- Design simple patterns, jokes, or themed graphics
- Print using sublimation paper and ink
- Press at 350°F (177°C) for 30 seconds
- Peel carefully
Tip
Use only clean, unused rolls and light pressure. Paper tears easily.
Glow in the Dark Sublimation
Great for kids apparel, party items, and Halloween designs.
Quick steps
- Use glow compatible sublimation paper
- Create high contrast designs
- Press at 380°F for about 45 seconds
- Expose to light to activate glow
Test in a dark space before final production.
Sublimating Paper Bags and Napkins
Ideal for party favors, events, and branded packaging.
Quick steps
- Use polymer coated bags or napkins
- Keep designs small and simple
- Press at 350°F for 20 to 30 seconds
- Peel gently
Avoid overheating, paper scorches quickly.
Other Creative Ideas
- Custom napkins for events
- Paper coasters for gifts or decor
- Personalized gift tags
Safety Tips for Non Traditional Materials
- Always test one item first
- Use lower heat when possible
- Work in a well ventilated area
How Long Sublimation Prints Really Last
A well made sublimation print is designed to last for years, not months. When the right paper, ink, and settings are used, the print often outlives the product itself.
Apparel Lifespan
On polyester shirts, hoodies, and activewear, sublimation prints typically last as long as the garment itself.
- No peeling or cracking after repeated washes
- Colors fade gradually with fabric wear, not suddenly
- Proper washing, cold water and mild detergent, extends life
In real use, many sublimated shirts still look good after 50 to 100 wash cycles, assuming correct pressing and care.
Mugs, Tumblers, and Hard Goods
For polymer coated hard surfaces, durability is extremely high.
- Dishwasher safe when pressed correctly
- Resistant to scratches and everyday handling
- Colors remain stable for years indoors
Poor paper choice or uneven pressure can reduce lifespan by causing incomplete dye transfer, which shows up later as fading.
Outdoor and UV Exposure
Sublimation holds up well outdoors but it is not completely immune to sunlight.
- Short term outdoor use, banners, flags, signage, performs well
- Long term direct UV exposure will slowly fade colors
- Using UV resistant polyester improves longevity
For patio decor and outdoor branding, sublimation still outperforms most surface level printing methods.
What Affects Sublimation Longevity
Several factors determine how long a sublimation print stays vibrant:
- Quality of sublimation paper and coating
- Correct temperature, pressure, and time
- Ink load and drying time before pressing
- Material type and polymer quality
- Washing and cleaning habits
Low quality paper often causes uneven transfer, which leads to early fading even if everything else is done correctly.
Sublimation vs Heat Transfer Durability
Compared to heat transfer paper, sublimation is significantly more durable.
- Sublimation becomes part of the material
- Heat transfer sits on top like a layer
- Heat transfer can crack or peel with wear
- Sublimation fades gradually and naturally
If long term durability matters, sublimation is usually the better choice for polyester and coated products.
Common Sublimation Paper Mistakes That Ruin Results
Many sublimation problems are blamed on ink or printers, but the real issue is often paper choice or handling. These are the mistakes that quietly cause fading, residue, and wasted blanks.
Using One Paper for Every Project
Not all projects behave the same under heat.
- Lightweight paper struggles with heavy ink designs
- Thick paper can jam or misfeed in fast printers
- What works for shirts may fail on tumblers
Match paper weight to ink load, surface type, and environment instead of using a single paper for everything.
Ignoring Humidity in the Workspace
Humidity changes how paper behaves.
- Dry air can cause paper to curl upward and scrape print heads
- High humidity softens paper and leads to feeding issues
- Seasonal changes affect results even with the same setup
Paper that worked perfectly last month may fail this month if humidity shifts.
Pressing Before the Ink Is Fully Dry
Fresh prints look dry long before they actually are.
- Pressing too soon causes smudging and ghosting
- Stacked prints trap moisture and smear ink
- Heavy ink areas need longer drying time
Let prints dry flat before pressing, especially in humid rooms.
Using Cheap Paper for High Heat Projects
Low quality paper often breaks down under heat.
- Coatings can melt and stick to tumblers
- Residue transfers onto mugs and hard goods
- Incomplete dye release causes dull colors
For tumblers and ceramics, paper quality matters more than paper price.
Incorrect Peel Timing
Some papers are designed for hot peel, others for cold peel.
- Peeling too early can smear the design
- Waiting too long can cause paper to stick
- Following brand instructions prevents residue
Peel timing is a small step that makes a big difference.
Blaming Ink When the Paper Is the Problem
Dull colors and uneven transfer are often paper related.
- Paper that cannot hold ink releases dye unevenly
- Oversaturation causes bleeding and blur
- Weak coatings reduce color vibrancy
Before replacing ink or printers, test a different paper weight or brand.
Why These Mistakes Matter
Each mistake increases wasted ink, ruined blanks, and reprints. Fixing paper related issues usually improves results immediately without changing equipment.
Real World Example, Why Sublimation Paper Choice Changes Results
When sublimation results suddenly decline, the issue is often paper behavior, not equipment failure. Matching paper weight to ink load and environment can solve problems that look much bigger than they are.
The setup stayed the same. Same Epson printer. Same sublimation ink. Same heat press settings.
The only change was switching to 120gsm sublimation paper.
What Changed After Switching Paper
- Curling stopped during printing and pressing
- Paper fed smoothly without skewing
- Edge clarity improved on large designs
- Color density became more consistent
- Reprints dropped noticeably
No calibration changes were needed. The heavier paper handled moisture better and held ink more evenly during transfer.
Why This Happens
Heavier sublimation paper:
- Absorbs ink without warping
- Releases dye more evenly under heat
- Maintains stiffness in humid environments
Lighter paper works well for speed and low ink jobs, but it breaks down faster when conditions change.
Care and Washing Best Practices for Sublimation Prints
Sublimation prints do not crack or peel, but fabric wear and heat exposure affect how long they look new. Gentle washing, low heat drying, and proper storage help sublimation designs stay vibrant for years instead of months.
Washing Sublimated Apparel
Proper washing keeps colors bright and prevents premature fading.
- Wash garments inside out
- Use cold or warm water, avoid hot cycles
- Choose mild detergent without bleach
- Skip fabric softeners, they can dull colors
- Wash with similar fabrics to reduce abrasion
Heavy agitation and harsh chemicals wear fabric fibers faster, which makes prints look faded sooner even though the dye bond remains strong.
Drying Guidelines
Heat is the biggest long term enemy after pressing.
- Air drying is best for maximum lifespan
- If using a dryer, choose low heat
- Avoid overdrying, remove while slightly damp
High heat over time weakens polyester fibers, which affects how the print looks even though it won’t peel.
Caring for Mugs, Tumblers, and Hard Goods
Sublimated hard goods are low maintenance when pressed correctly.
- Dishwasher safe on top rack when polymer coated
- Hand washing extends color life even further
- Avoid abrasive sponges and steel scrubbers
- Let items cool fully before washing after pressing
If colors fade early on hard goods, it’s usually due to uneven pressure or poor paper transfer, not washing.
Outdoor and Display Care
For items exposed to sunlight or outdoor conditions:
- Limit constant direct UV exposure when possible
- Bring items indoors during extreme heat
- Use UV resistant polyester for signage
Sublimation performs well outdoors, but no dye based print is completely UV proof.
Storage Tips
How items are stored also matters.
- Avoid stacking freshly pressed items while warm
- Store garments in cool, dry spaces
- Keep printed items away from prolonged heat sources
Heat reactivation over time can slightly soften colors, especially on thin fabrics.
If you’re ready to take your sublimation projects to the next level, Subli Genius Print has the tools, tips, and premium sublimation paper to help you create stunning, professional-quality designs.
FAQs
References:
Wikipedia contributors. (2023). Dye-sublimation printing. Wikipedia. Retrieved from https://en.wikipedia.org/wiki/Dye-sublimation_printing


7 Comments